
When it comes to technology, most of us love how convenient, fast, and innovative our gadgets have become. But with those perks comes a challenge we often overlook: security. In today’s digital world, protecting your smartphone, laptop, or tablet has never been more important. That’s where artificial intelligence (AI) steps in. At Smart Electronics, we believe AI is not just shaping the future of gadgets but also redefining how we keep them safe.
Why Device Security Matters More Than Ever
Cyber threats are no longer limited to big corporations or governments; everyday users are now prime targets. Malware, phishing attacks, unauthorized access, and data breaches are becoming common. Since our devices store personal data, banking information, and sensitive files, robust security measures are essential. This is where AI-driven security provides smarter, more adaptive solutions.
How AI Enhances Device Security
AI is designed to think and learn, making it a powerful ally in defending your devices. Unlike traditional antivirus systems, AI doesn’t just rely on a database of known threats. Instead, it learns, predicts, and adapts, ensuring your device is protected against both old and new forms of cyberattacks. Here are some ways AI plays a role:
- Threat Detection in Real Time – AI systems monitor your device constantly, spotting unusual activities that may signal malicious intent.
- Behavioral Analysis – By studying user behavior, AI can detect suspicious logins or irregular actions and immediately block them.
- Automated Updates – AI can identify vulnerabilities and ensure your device receives necessary security patches on time.
- Adaptive Learning – Unlike traditional methods, AI evolves with every threat, improving security over time.
Examples of AI in Action
- Facial Recognition & Biometrics: AI powers modern facial recognition and fingerprint scanners, ensuring only authorized users access your gadgets.
- Smart Firewalls: These AI-driven firewalls don’t just block threats; they analyze traffic patterns to filter malicious activity before it reaches you.
- Fraud Detection: Many mobile payment apps now use AI to instantly flag suspicious transactions.
AI vs Traditional Security
Traditional security relies heavily on manual updates and static defenses. While it offers basic protection, it struggles with advanced, fast-evolving threats. AI security, on the other hand, is proactive. It doesn’t just react; it anticipates threats and strengthens defenses automatically. This makes AI not only more efficient but also essential in modern device security.
Benefits of AI-Powered Security for Users

- Enhanced Protection: AI guards against both common malware and sophisticated attacks.
- Time-Saving: Automated monitoring reduces the need for manual scanning.
- Peace of Mind: With AI always running in the background, you can use your devices without constantly worrying about security breaches.
- Smarter Authentication: Biometric AI ensures your device can recognize you instantly, minimizing the risk of identity theft.
Challenges of AI in Security
While AI is powerful, it’s not perfect. Hackers are also experimenting with AI to develop advanced attacks. There’s also the concern of false positives, where legitimate actions may get flagged as threats. Balancing AI’s intelligence with accuracy is a challenge the tech industry continues to refine.
The Future of AI in Device Security
 As AI continues to evolve, we can expect even smarter, faster, and more reliable protection systems. From self-healing software to predictive threat modeling, AI will reshape how security is handled on personal devices. At Smart Electronics, we’re already seeing a future where AI not only protects but also optimizes performance without compromising speed or usability.
Final Thoughts
In 2025 and beyond, AI will remain at the core of gadget security. As our devices become more connected and powerful, AI will ensure that security keeps pace with innovation. Whether you’re a student, a professional, or a casual user, investing in devices with AI-powered security is one of the smartest moves you can make.
At Smart Electronics, we believe in smarter protection for smarter gadgets. After all, in a world full of digital risks, AI might just be your device’s best friend.

If you’ve ever felt the frustration of your phone battery dying at the worst possible moment, you’re not alone. Smartphone users worldwide constantly look for longer-lasting, faster-charging, and more efficient batteries. In 2025, we’re entering a new era of innovation where smartphone batteries are transforming in ways we couldn’t have imagined a decade ago. At Smart Electronics, we believe it’s important to stay informed about these advancements, especially if you’re considering your next device upgrade.
Why Smartphone Batteries Matter More Than Ever
In today’s fast-paced digital age, your smartphone is more than just a device for calls and texts. It’s your camera, GPS, entertainment hub, and even your digital wallet. With so much functionality packed into one device, battery performance has become one of the most critical aspects of smartphone technology. That’s why companies are heavily investing in research to push the boundaries of battery technology.
The Shift from Lithium-Ion to Solid-State Batteries
For years, lithium-ion batteries have been the industry standard. While reliable, they’ve reached their limits in terms of safety, efficiency, and energy density. Enter solid-state batteries—the most talked-about innovation in 2025. These batteries replace the liquid electrolyte with a solid one, reducing risks of overheating and improving energy storage capacity. That means longer battery life, smaller sizes, and much faster charging speeds.
Imagine charging your phone in just 10 minutes and having it last for two days. That’s the promise of solid-state battery technology.
Faster Charging Speeds
 Another major advancement is the development of super-fast charging technology. In 2025, many flagship smartphones support 100W to 150W fast charging. This means you can top up your device in minutes instead of hours. While this level of power might have raised safety concerns in the past, manufacturers are now implementing advanced cooling systems and AI-powered charging optimizers to ensure safety.
AI-Optimized Power Management
Battery performance is no longer just about capacity—it’s also about how efficiently your phone uses that energy. Modern smartphones now feature AI-driven power optimization that learns your daily usage patterns. This ensures that power-hungry apps don’t drain your battery unnecessarily, giving you more screen time without compromising performance.
Eco-Friendly Battery Production
Sustainability is becoming a huge priority in 2025. Many leading smartphone brands are investing in eco-friendly battery production methods, including recyclable materials and reduced reliance on rare metals. Not only does this help the environment, but it also reduces production costs in the long run, making advanced battery tech more accessible to everyday users.
Wireless and Reverse Charging
Wireless charging has become standard, but the real game-changer in 2025 is reverse wireless charging. This feature allows your smartphone to charge other devices, like earbuds or even another phone. It’s incredibly convenient for users on the go and reduces the need for multiple charging accessories.
Longer Lifespan and Durability
One of the biggest complaints about older batteries was how quickly they degraded. In 2025, manufacturers are focusing on extending battery lifespans, ensuring that your smartphone battery retains up to 80% of its health even after 1,000+ charging cycles. This means fewer battery replacements and longer device usability.
What This Means for Consumers
For consumers in Australia and around the globe, the evolution of smartphone batteries in 2025 means:
- Less charging hassle – no more carrying bulky power banks everywhere.
- Better performance – devices run smoother without worrying about battery drain.
- Sustainability – eco-conscious users can choose greener options.
- Future-ready technology – investing in a phone now means enjoying advanced features for years to come.
Final Thoughts
Smartphone batteries are no longer just a power source—they’re a key factor shaping the future of mobile technology. From solid-state batteries and fast charging speeds to AI-powered optimizations and eco-friendly production, the way we use and think about smartphone power is changing rapidly.

Smart Electronics is here to provide expert advice, trusted repairs, and guidance on all things tech. Stay connected with us for more updates on the future of smartphones and beyond.

Let’s be honest — laptops have become our go-to devices for everything from work to entertainment. But like all technology, they don’t last forever. Over time, performance drops, software becomes incompatible, and hardware can’t keep up with modern demands. At Smart Electronics, we’ve seen countless customers hold on to old laptops far longer than they should, and it usually ends up costing them more in the long run. So, how do you know when it’s time to let go of your old device and invest in a new one? Here are the top 7 signs that it’s time to upgrade your laptop in 2025.
1. Slow Performance Becomes the Norm
If your laptop takes forever to boot up, load applications, or switch between browser tabs, it’s a clear red flag. Even after upgrades like adding more RAM or switching to an SSD, your laptop might struggle if the processor is outdated. In 2025, modern applications demand more processing power, and if your laptop can’t keep up, it’s time to consider an upgrade.
2. Battery Life Is Almost Non-Existent
 Remember when your laptop could last 6–8 hours on a single charge? If now you can barely get an hour of use without plugging in, your battery health has significantly declined. While replacing the battery might work in some cases, many older laptops aren’t designed for easy replacements. Constantly relying on the charger not only limits portability but also signals that a new device is due.
3. Outdated Operating System Support
One of the clearest signs it’s time to upgrade is when your laptop no longer supports the latest operating systems. Without updates, you’re exposed to security risks and unable to use modern software. In Australia, many people still use older laptops running unsupported versions of Windows or macOS, which leaves their data vulnerable. If your device can’t upgrade, it’s time to move on.
4. Storage Is Always Full
Are you constantly deleting files, photos, or applications to make space? With apps and games becoming larger every year, old hard drives quickly fill up. While external drives or cloud storage can help, if your internal storage is too limited to handle your daily tasks, upgrading to a modern laptop with higher capacity SSD storage is the smarter option.
5. Overheating and Loud Fan Noise
Does your laptop feel like it’s preparing for take-off every time you open multiple tabs? Overheating and loud fan noise are signs that the hardware is struggling. Dust cleaning and cooling pads may help temporarily, but long-term overheating can damage internal components. A laptop that constantly overheats is a clear signal that it’s past its prime.
6. Poor Display and Graphics
Screens are evolving quickly, with sharper resolutions, higher refresh rates, and better color accuracy. If your laptop’s display looks dull compared to modern devices, or if it struggles with even basic video editing or light gaming, it’s a sign your graphics card is outdated. Students, professionals, and gamers alike can benefit greatly from investing in a device with a better display and GPU performance.
7. Repairs Cost More Than Replacement
 If your laptop requires frequent repairs — from broken keyboards to faulty motherboards — it might not be worth spending money on fixing it anymore. At Smart Electronics, we often advise customers to compare repair costs with the price of a new laptop. In most cases, upgrading turns out to be more cost-effective than repeatedly patching up an old machine.
Final Thoughts
Your laptop plays a huge role in your productivity, entertainment, and communication. Holding onto an outdated device can not only waste your time but also cost you more money in repairs and lost efficiency. By recognizing these 7 signs, you’ll know exactly when it’s time to make the switch.
At Smart Electronics, we help Australians find the best laptops that suit their budget and needs. Whether you’re a student, gamer, or business professional, upgrading in 2025 means better performance, longer life, and an overall smoother experience.
Ready to upgrade your laptop? Visit Smart Electronix today to explore the best laptops and expert repair services in Australia.

We’ve all been there—running out of space on our laptop or phone and wondering, “Where should I keep all this data?” For years, external hard drives were the go-to option, but now cloud storage has taken center stage. If you’re a student, professional, or even a casual user, deciding between the two can feel overwhelming. Don’t worry—this guide from Smart Electronics will help you understand the pros and cons of each so you can make the best choice for your needs.
Why Storage Choice Matters
Your data is valuable. From personal photos and videos to important assignments or work files, choosing the right storage option impacts not only convenience but also safety. While external hard drives offer physical control, cloud storage brings unmatched accessibility. Let’s dive deeper into both.
External Hard Drives: Pros and Cons
Pros
- One-Time Purchase – You pay once and own the device, no monthly subscription required.
- Large Storage Capacity – External drives can store terabytes of data, making them ideal for heavy users.
- Offline Access – No internet connection required to access your data.
- Fast Transfer Speeds – Especially with USB 3.0 and SSD drives, data transfer can be quick and efficient.
Cons
- Physical Vulnerability – Hard drives are prone to damage from drops, water, or wear and tear.
- Risk of Loss or Theft – If you lose the device, you lose your data unless you have a backup.
- Limited Portability – Carrying external drives isn’t always convenient for students or travelers.
Cloud Storage: Pros and Cons
Pros
- Accessibility Anywhere – Access your files from any device with an internet connection.
- Automatic Backups – Cloud platforms can sync and back up files without manual effort.
- Collaboration Made Easy – Sharing files with friends, classmates, or colleagues is seamless.
- Scalability – You can increase or decrease storage capacity as needed.
Cons
- Ongoing Cost – Monthly or yearly subscriptions add up over time.
- Internet Dependency – No internet, no access.
- Privacy Concerns – Storing sensitive data online may feel risky for some users.
Comparing Costs in 2025
 In Australia, here’s how pricing often compares:
- External Hard Drives: A 2TB HDD costs around AUD $100–$150, while a 1TB SSD may cost around AUD $200–$250.
- Cloud Storage: Google Drive and iCloud typically charge around AUD $12–$15 per month for 2TB plans. Over a few years, this can exceed the cost of a hard drive.
So, while external drives have a higher upfront cost, cloud storage spreads costs over time.
Which Is More Reliable?
- External Hard Drives can fail due to hardware issues, accidental drops, or age.
- Cloud Storage depends on internet availability and the provider’s uptime, but major services like Google, Dropbox, and OneDrive have strong reliability.
The best solution? A combination of both—local storage for quick access and cloud backups for security.
Best Uses for Each
External Hard Drives Are Best For:
- Gamers storing large files.
- Students with limited budgets who prefer a one-time investment.
- Professionals who need offline access in areas with unreliable internet.
Cloud Storage Is Best For:
- Remote workers who need access from multiple devices.
- Students collaborating on group projects.
- Anyone who values automatic backups and file sharing.
How Smart Electronics Helps You Decide
At Smart Electronics, we understand that every user has unique needs. That’s why we:
- Provide expert recommendations tailored to your usage.
- Offer both external hard drives and guidance on setting up secure cloud storage.
- Ensure you understand the trade-offs before making a decision.
Final Verdict
So, which is better: cloud storage or external hard drives? The answer depends on your lifestyle. If you want accessibility, convenience, and collaboration, cloud storage is the way to go. If you value physical control, offline access, and one-time costs, external hard drives are a solid choice.
 For most people, the best option is a hybrid approach—using cloud storage for everyday accessibility and external hard drives for long-term backups.
Smart Electronics – Helping Australians make smarter tech choices every day.

When your phone suddenly breaks, the first instinct is often to find the cheapest repair option available. After all, no one wants to spend hundreds of dollars on a repair when there are cheaper alternatives right around the corner. But here’s the thing: what looks like a money-saving decision in the short term can actually cost you more in the long run. At Smart Electronics, we’ve seen countless cases where opting for quick and cheap fixes has ended up being more expensive and damaging than people initially expected.
This guide will help you understand the hidden costs of cheap phone repairs and why making informed decisions is always better for your device and your wallet.
Why People Choose Cheap Phone Repairs
Let’s face it—phones are essential. Whether it’s for communication, online learning, work, or entertainment, being without a phone even for a day can feel impossible. That’s why people often choose the cheapest and fastest repair services they can find. Common reasons include:
- Low upfront cost: The most obvious reason—saving money immediately.
- Quick service: Many low-cost repair shops advertise same-day repairs.
- Convenience: Local shops often seem more accessible.
While these reasons are understandable, they can come with significant risks.
Hidden Costs You May Not Expect
1. Poor Quality Parts
Cheap repair shops often use non-genuine or low-grade replacement parts. For example, a replacement screen may not have the same brightness, touch sensitivity, or durability as the original. Batteries may drain faster or even swell over time, leading to further problems.
2. Shortened Device Lifespan
When poor-quality components are used, your device may not perform as well or last as long. This means you might have to repair it again—or even replace it—much sooner than expected.
3. Warranty Voids
Many manufacturers void warranties if unauthorized repair services are used. That means if your phone experiences other issues later, you won’t be able to claim warranty support, which could cost you far more in the long run.
 4. Data Privacy Risks
Cheaper repair services may not have strict privacy policies in place. There have been cases where customer data was accessed, stolen, or even sold. Always ensure your device is repaired by a trusted provider.
5. No After-Service Support
Reputable repair centers provide warranties on their services and parts. Cheap repair shops often don’t. If something goes wrong after your repair, you’ll likely be left paying again for the same issue.
6. Potential Safety Hazards
Improper repairs and low-quality parts can lead to overheating, short circuits, or even fires. This is especially true with batteries and charging components.
Signs You’re Getting a Cheap Repair
If you’re considering a phone repair service, here are some red flags to watch out for:
- The price is significantly lower than official repair centers.
- They don’t provide a warranty on repairs.
- No proper invoicing or documentation.
- They use generic parts instead of original manufacturer parts.
- Poor customer reviews or lack of transparency about repair processes.
Why Quality Repairs Save Money
It might seem counterintuitive, but spending more upfront on high-quality repairs can actually save you money over time. Here’s why:
- Durability: Genuine parts last longer, reducing repeat repairs.
- Warranty protection: Authorized repairs keep your manufacturer warranty valid.
- Device performance: Quality repairs ensure your phone continues to perform at its best.
- Safety: Genuine components reduce risks of overheating or damage.
How to Choose the Right Repair Service in Australia
When searching for reliable phone repairs, especially in Australia, keep these tips in mind:
- Check for Certification: Look for repair centers that are certified by manufacturers.
- Ask About Parts: Always confirm whether genuine or OEM parts will be used.
- Read Reviews: Customer reviews can reveal a lot about reliability and service quality.
- Look for Warranties: Ensure the repair service offers warranties on both parts and labor.
- Compare Value, Not Just Price: Don’t base your decision on cost alone—consider the overall value.
How Smart Electronics Helps
At Smart Electronics, we take pride in offering trusted, high-quality phone repair services across Australia.
 Here’s why students, professionals, and everyday users trust us:
- We use genuine parts for all repairs.
- Our services come with warranty coverage.
- Your data privacy is our priority.
- Experienced technicians ensure safe and effective repairs.
- Transparent pricing with no hidden surprises.
Final Thoughts
Cheap phone repairs may look like a bargain at first glance, but they come with risks that can affect your wallet, your device, and even your safety. By understanding the hidden costs, you can make smarter decisions when it comes to fixing your device.
If you want peace of mind, longer-lasting devices, and reliable support, choose trusted professionals like Smart Electronics. Sometimes, paying a little more today can save you a lot tomorrow.
Smart Electronics – Your Trusted Phone Repair Partner in Australia.

When you’re a student who loves gaming, finding the perfect balance between affordability and performance can feel tricky. With so many options on the market, it’s easy to get lost in flashy advertisements and technical jargon. Don’t worry, though—this guide will break things down simply and help you make the right choice without burning a hole in your wallet. At Smart Electronics, we know how important it is for students to get reliable tech that fits both academic and entertainment needs.
Why Students Need Budget-Friendly Gaming Laptops
Students are constantly balancing expenses—from tuition fees and books to daily living costs. That makes investing in a laptop a big decision. For many, it’s not just about gaming but also about:
- Productivity: Taking notes, writing assignments, and creating presentations.
- Entertainment: Streaming videos, online classes, and, of course, gaming.
- Portability: Lightweight laptops that fit perfectly into backpacks are ideal for students on the move.
Budget gaming laptops allow students to have the best of both worlds: solid performance and reasonable prices.
Key Features to Look for in 2025
Before jumping into the best options, let’s quickly highlight the must-have features that make a laptop great for both studies and gaming:

- Processor Power: Look for at least Intel i5 13th-gen or AMD Ryzen 5 series for smooth multitasking.
- Graphics Card: A dedicated GPU like NVIDIA GTX 1650 or RTX 3050 is ideal for decent gaming performance.
- RAM: Minimum 8GB RAM, with an option to upgrade to 16GB.
- Storage: SSD storage (at least 512GB) ensures fast boot times and enough space for both study files and games.
- Battery Life: At least 6–8 hours to last through classes and gaming breaks.
- Display: A 15.6-inch Full HD display with at least 120Hz refresh rate for smoother visuals.
Top Budget-Friendly Gaming Laptops for Students in 2025
Here are our top picks for affordable gaming laptops that don’t compromise on quality.
1. Acer Nitro 5 (2025 Edition)
- CPU: Intel Core i5 13th Gen
- GPU: NVIDIA GeForce RTX 3050
- RAM: 8GB (upgradeable to 16GB)
- Storage: 512GB SSD
- Why It’s Great: The Nitro 5 remains a favorite for students with its sturdy build, great thermal management, and affordable price. Perfect for mid-level gaming and everyday tasks.
2. Lenovo IdeaPad Gaming 3
- CPU: AMD Ryzen 5 7735HS
- GPU: NVIDIA GeForce GTX 1650
- RAM: 8GB
- Storage: 512GB SSD
- Why It’s Great: Known for its balance of cost and performance, the IdeaPad Gaming 3 is reliable for both schoolwork and casual gaming sessions.
3. ASUS TUF Gaming A15
- CPU: AMD Ryzen 7 7735HS
- GPU: NVIDIA GeForce RTX 3050 Ti
- RAM: 16GB
- Storage: 1TB SSD
- Why It’s Great: Durable design with military-grade build quality, powerful internals, and long-lasting battery life. Ideal for students who need a laptop that can take a beating.
4. HP Pavilion Gaming 15
- CPU: Intel Core i5 13th Gen
- GPU: NVIDIA GeForce GTX 1650
- RAM: 8GB
- Storage: 512GB SSD
- Why It’s Great: A stylish yet budget-friendly laptop that covers all essential gaming needs while being compact enough for daily campus life.
5. Dell G15 (2025 Edition)
- CPU: Intel Core i5 13th Gen
- GPU: NVIDIA GeForce RTX 3050
- RAM: 16GB
- Storage: 512GB SSD
- Why It’s Great: Known for its solid build and consistent performance, the Dell G15 is a reliable choice for both gamers and students who need stability.
Tips for Students Buying Gaming Laptops
Buying a laptop isn’t just about specs; it’s about making smart choices. Here are some tips:
- Set a Budget: Know your limit before exploring options. In 2025, budget gaming laptops range between AUD $1,000–$1,500.
- Check Upgrade Options: Laptops that allow RAM or storage upgrades are always a better investment.
- Focus on Battery Life: Avoid laptops that only perform well when plugged in.
- Warranty and Service: Choose brands with reliable customer support in Australia.
How Smart Electronics Helps Students
At Smart Electronics, we understand that students need affordable yet powerful laptops. That’s why we provide:
- Expert recommendations based on your study and gaming needs.
- Affordable deals and seasonal discounts.
- Guidance on maintenance and upgrades for long-term use.
We don’t just sell laptops—we help you choose the right partner for your academic and gaming journey.
Final Thoughts
Balancing studies with gaming doesn’t have to break the bank.
 With budget-friendly gaming laptops like the Acer Nitro 5, Lenovo IdeaPad Gaming 3, or Dell G15, students in 2025 can enjoy smooth performance and reliable productivity. By focusing on the right features and making informed choices, you can find the perfect laptop that suits your lifestyle.
At the end of the day, your laptop should make studying easier and gaming more fun. And with Smart Electronics, you’re never alone in your tech journey.
Smart Electronics – Your Trusted Tech Partner in Australia.

When you first buy a laptop, it feels fast, efficient, and ready to take on anything you throw at it. But after a few months or years, it may slow down, heat up more quickly, or even start showing signs of wear. The good news is that with the right maintenance, you can extend your laptop’s lifespan significantly and keep it performing like new. In this guide, Smart Electronics shares simple yet powerful laptop maintenance tips that can save you money, prevent hardware issues, and maximize performance.
Why Laptop Maintenance Matters
A laptop is more than just a device; it’s often your work partner, entertainment hub, or study tool. Proper maintenance not only ensures smoother performance but also helps avoid costly repairs or replacements. In Australia, where high-performance devices can be pricey, extending your laptop’s life is both practical and cost-effective.
1. Keep Your Laptop Clean
Dust and dirt are silent killers of laptop hardware. Over time, they can clog fans, block ventilation, and cause overheating.
Tips:
- Use compressed air to gently blow dust out of the vents.
- Wipe the keyboard and screen regularly with microfiber cloths.
- Avoid eating or drinking near your device to prevent spills.
2. Manage Battery Health
Laptop batteries naturally degrade over time, but good habits can slow down this process.
Tips:
- Avoid keeping your laptop plugged in at 100% all the time.
- Don’t let the battery fully drain before recharging.
- Enable battery-saving modes when on the go.
3. Keep Software Updated
 Outdated software slows down performance and exposes your laptop to security threats.
Tips:
- Regularly update your operating system and apps.
- Install antivirus software and run scans frequently.
- Remove unused programs that take up storage and memory.
4. Optimize Storage
Running out of storage can drastically reduce laptop speed. Keeping your hard drive organized improves performance and prevents crashes.
Tips:
- Delete unnecessary files and programs.
- Use cloud storage or external drives for large files.
- Regularly clear your browser cache and temporary files.
5. Prevent Overheating
Excessive heat can damage internal components and shorten your laptop’s lifespan.
Tips:
- Place your laptop on a flat, hard surface for proper ventilation.
- Invest in a cooling pad if you use your laptop for long hours.
- Don’t block airflow by placing it on soft surfaces like beds or couches.
6. Handle With Care
Physical damage is one of the most common reasons laptops fail prematurely.
Tips:
- Always carry your laptop in a padded case.
- Avoid dropping, pressing, or mishandling the device.
- Keep liquids and heavy objects away from your laptop.
7. Run Regular System Maintenance
Just like cars need servicing, laptops benefit from routine system checks.
Tips:
- Defragment hard drives if using HDDs (not needed for SSDs).
- Run built-in system diagnostics to spot potential issues early.
- Backup important files regularly to prevent data loss.
8. Upgrade When Necessary
Sometimes, small upgrades can breathe new life into an old laptop.
 Tips:
Tips:
- Upgrade RAM for faster multitasking.
- Replace old hard drives with SSDs for better speed.
- Consider replacing an old battery if performance drops.
Final Thoughts
Taking care of your laptop doesn’t require advanced technical knowledge. By following these simple yet effective maintenance tips from Smart Electronics, you can extend the lifespan of your device, reduce repair costs, and enjoy smooth performance for years. Whether you use your laptop for work, study, or gaming, proper maintenance is the key to getting the best return on your investment.
If you ever need professional laptop repairs, battery replacements, or expert diagnostics, Smart Electronix is here to help Australians keep their devices running at peak performance.
When was the last time you picked up your phone, laptop, or tablet and worried about the battery draining too fast? If you’re like most people, it probably happens every single day. Batteries are the lifeline of our devices, and understanding how to keep them healthy can save us time, money, and frustration. At Smart Electronics, we believe that learning how to maintain battery health is the first step toward making your devices last longer and perform better.
In this ultimate guide, we’ll dive into practical tips and strategies that apply to smartphones, laptops, tablets, and even wearable devices. By following these steps, you’ll not only extend the lifespan of your batteries but also reduce the chances of sudden power drops.
Why Battery Health Matters
A healthy battery ensures your device runs efficiently and consistently. Whether you’re using your phone for work, gaming, or daily browsing, good battery practices keep performance stable. Poor battery health, on the other hand, can lead to overheating, reduced charging cycles, and eventually costly replacements. Smart Electronics recommends prioritizing battery maintenance as part of your overall device care routine.
General Battery Care Tips
1. Avoid Extreme Temperatures
Heat and cold are major enemies of battery health. Leaving your device in direct sunlight or a freezing environment can damage its internal cells. Ideally, keep your device in temperatures between 20°C and 25°C.
2. Don’t Let Your Battery Hit Zero Frequently
Regularly draining your battery to 0% puts extra stress on its cells. Instead, aim to recharge when it reaches around 20%. This practice ensures longer life and stable performance.
3. Keep It Between 20% and 80%
Charging your battery fully all the time isn’t ideal. The sweet spot for most lithium-ion batteries is between 20% and 80%. Smart Electronics suggests unplugging your device once it crosses 80% to maintain long-term health.
4. Use Original Chargers
Always use manufacturer-approved or original chargers. Cheap or unverified chargers may not regulate voltage correctly, which can harm your battery in the long run.
Smartphone Battery Health Tips

- Turn Off Background Apps: Too many apps running in the background consume unnecessary battery.
- Adjust Screen Brightness: High brightness drains your battery quickly. Use auto-brightness when possible.
- Enable Battery Saver Mode: Modern smartphones come with built-in battery saver features that optimize performance.
Laptop Battery Health Tips
- Avoid Keeping It Plugged In 24/7: Continuous charging at 100% can slowly reduce your laptop’s battery capacity.
- Perform Battery Calibration: Once every few months, let your laptop discharge completely, then recharge it fully. This keeps the system’s battery meter accurate.
- Optimize Settings: Lower screen brightness, disable unnecessary Bluetooth connections, and manage background tasks.
Tablet Battery Health Tips
- Update Software Regularly: Manufacturers release updates that optimize power usage.
- Turn Off Wi-Fi and Bluetooth When Not Needed: This prevents unnecessary battery drain.
- Avoid Overcharging: Just like phones and laptops, tablets also benefit from the 20%–80% rule.
Wearable Devices Battery Tips
Smartwatches and fitness trackers are small but power-hungry. Here’s how to care for them:
- Use Dark Mode: If your watch has an OLED screen, dark mode saves power.
- Disable Always-On Display: Turning it off conserves energy.
- Update Regularly: Software updates often improve efficiency.
Charging Habits That Save Battery Health
- Charge Slowly When Possible: Fast charging is convenient but can cause long-term wear on batteries.
- Avoid Overnight Charging: Continuous charging beyond 100% adds stress to the battery.
- Use Power Banks Wisely: Choose high-quality power banks with safety features.
Common Battery Myths Busted
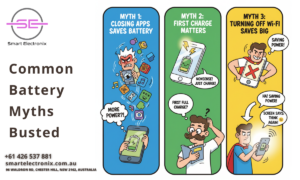
- Myth 1: Closing apps always saves battery – Not true for modern devices, as reopening apps uses more energy.
- Myth 2: You must fully charge before first use – Modern lithium-ion batteries don’t require this.
- Myth 3: Turning off Wi-Fi saves huge battery – Minimal savings; screen brightness matters more.
Final Thoughts
Maintaining battery health doesn’t require complicated steps—it’s all about consistency. With small changes in your daily charging habits and device care, you can significantly extend battery life. Whether it’s a smartphone, laptop, tablet, or wearable, applying these strategies keeps your device running efficiently.
At Smart Electronics, we not only provide high-quality devices but also ensure you know how to take care of them. Following this guide will help you save money, avoid unnecessary repairs, and enjoy longer-lasting devices.
Ready to Power Smarter?
If you’re looking for expert advice, top-notch electronics, or repair services, visit Smart Electronix and explore our range of solutions designed to keep your devices performing at their best.

Finding the perfect phone without burning a hole in your pocket can sometimes feel like hunting for treasure. With so many brands and models out there, Australians are spoiled for choice when it comes to affordable mobile phones. The good news? You don’t need to compromise on performance, design, or features to get a phone that suits your lifestyle and budget. In this blog, we’ll walk you through the best cheapest mobile phones in Australia with great features, so you can make a smart decision when upgrading your device.
Why Choose Budget-Friendly Phones?
Not everyone needs to spend $1,500+ on a flagship smartphone. Many people simply need a reliable device that handles calls, messages, apps, social media, and entertainment.
 Affordable smartphones now come with:
- High-quality cameras for clear photos.
- Strong battery life to last all day.
- Modern designs with large displays.
- Fast processors capable of handling multitasking.
- Ample storage with expandable options.
This means you get value for money without missing out on essential features.
Top 5 Cheapest Mobile Phones in Australia with Great Features
Here are some of the best options available for Australian consumers looking for affordable yet powerful smartphones.
1. Samsung Galaxy A14
One of the most popular affordable smartphones, the Galaxy A14 delivers excellent performance for its price.
- 6.6-inch FHD+ display.
- 50MP triple rear camera.
- Long-lasting 5000mAh battery.
- Reliable performance with expandable storage.
- Price in Australia: Around $250–$300.
2. Nokia G21
A solid, budget-friendly phone built for durability and efficiency.
- 6.5-inch HD+ display.
- Triple-camera system with AI enhancements.
- Up to 3-day battery life.
- Stock Android experience with updates.
- Price in Australia: Around $250.
3. Motorola Moto G32
Motorola’s budget phones are known for excellent user experience and features.
- 6.5-inch FHD+ display with 90Hz refresh rate.
- Snapdragon processor for smooth performance.
- 50MP main camera.
- 5000mAh battery with fast charging.
- Price in Australia: $280–$320.
4. OPPO A57s
OPPO brings sleek design and great specs at an affordable price point.
- 6.56-inch HD+ display.
- Dual rear cameras with AI features.
- 5000mAh battery with 33W fast charging.
- Stylish design that looks premium.
- Price in Australia: $300–$350.
5. Realme C35
A rising competitor in the affordable smartphone space.
- 6.6-inch FHD+ display.
- 50MP AI triple camera setup.
- 5000mAh battery for long use.
- Lightweight design for comfortable handling.
- Price in Australia: $250–$280.
Key Features to Look For in Cheap Phones
When buying a budget smartphone, don’t just focus on the price tag. Consider these features:
- Battery Life – Aim for 5000mAh batteries for all-day performance.
- Display Quality – Full HD+ screens enhance streaming and browsing.
- Camera Performance – Look for at least 13MP+ for decent shots.
- Storage & RAM – Minimum 64GB storage and 4GB RAM recommended.
- Software Updates – Brands like Nokia and Motorola offer frequent updates.
Are Cheap Phones Worth It?
Yes! Today’s budget phones are not like the basic models from years ago. They’re packed with useful features, sleek designs, and powerful batteries. For everyday use—social media, YouTube, online shopping, and video calls—these phones perform brilliantly without costing a fortune.
Tips for Saving Even More on Mobile Phones

- Buy during sales events like Black Friday or Boxing Day in Australia.
- Check refurbished models for high-end phones at lower prices.
- Compare retailers such as JB Hi-Fi, Harvey Norman, and online stores.
- Bundle with mobile plans for extra discounts.
Final Verdict
If you’re in Australia and want the best cheapest mobile phones with great features, there’s no shortage of options. Brands like Samsung, Nokia, Motorola, OPPO, and Realme are offering affordable models with reliable performance, strong cameras, and durable batteries.
At Smart Electronix, we believe that technology should be accessible to everyone. Whether you’re after a budget-friendly smartphone for yourself, your kids, or as a backup device, the models listed above will give you excellent value for money.
Closing Thoughts
Investing in an affordable smartphone doesn’t mean sacrificing quality. With the right research and guidance, you can easily find a mobile phone that balances performance, design, and cost. Explore your options, compare features, and enjoy the benefits of staying connected without overspending.
Smart Electronics – Helping Australians Find the Right Tech at the Right Price

If you’ve ever found yourself staring at a broken screen or a sluggish computer, you’ve probably faced the age-old dilemma: should you repair your laptop or desktop, and which option is more cost-effective? In Australia, where technology is a big part of both professional and personal life, this question is more relevant than ever. Let’s break it down in a casual, easy-to-understand way, and explore which choice might save you more money in the long run.
Why People Prefer Laptops vs. Desktops
Laptops are loved for their portability. Whether you’re working in a café, attending university lectures, or traveling for business, laptops give you freedom. Desktops, on the other hand, are known for their power, durability, and upgrade potential. Many gamers, professionals, and designers prefer desktops for the performance boost they deliver.
When repairs are needed, though, the story changes. Laptops are compact and tricky to repair, while desktops are more straightforward, but both come with unique costs.
Common Laptop Repair Issues
Laptops may require repairs more often due to their portable nature. Common issues include:

- Broken screens from accidental drops.
- Battery replacements due to short lifespan.
- Keyboard or touchpad malfunctions.
- Overheating from dust build-up.
- Hard drive or SSD failures.
In most cases, laptop repairs can be more expensive because parts are smaller, tightly integrated, and sometimes proprietary.
Common Desktop Repair Issues
Desktops are sturdier but not immune to problems. Some of the most common desktop repair issues are:
- Power supply failures.
- Motherboard replacements.
- Hard drive crashes.
- Graphics card issues.
- Dust and cooling problems.
The good news is that desktops are easier to open up, and individual components can often be swapped out without much hassle.
Repair Costs in Australia
In Australia, repair prices vary depending on the type of computer, the issue, and the brand. Let’s compare the two:
Laptop Repair Costs:
- Screen replacement: $150 – $450 depending on brand and size.
- Battery replacement: $100 – $300.
- Keyboard replacement: $120 – $250.
- Hard drive replacement: $200 – $400.
Desktop Repair Costs:
- Power supply replacement: $100 – $250.
- Motherboard replacement: $200 – $500.
- Hard drive replacement: $150 – $350.
- Graphics card replacement: $250 – $600.
Which Is More Cost-Effective?
When it comes to cost-effectiveness, desktops usually win. Here’s why:
- Parts availability – Desktop components are widely available and interchangeable, making them cheaper.
- Repair ease – Repairs are less complex, reducing labor costs.
- Upgradability – Instead of replacing the entire machine, you can just upgrade or swap parts.
For laptops, repairs are more complicated, parts are harder to source, and labor charges are often higher.
Longevity and Value for Money
A desktop can last 7–10 years with regular upgrades, while a laptop typically lasts 3–5 years before repairs become uneconomical. If you’re after long-term savings, desktops provide more value, though they lack portability.
However, if mobility is a necessity, investing in a high-quality laptop and taking preventive care (like using protective cases and cooling pads) can help reduce repair frequency.
Tips for Reducing Repair Costs
- Regular maintenance: Clean dust, update software, and use antivirus protection.
- Protective accessories: Laptop sleeves, cooling pads, and surge protectors go a long way.
- Choose reliable brands: Some brands have better repair networks in Australia.
- Consult trusted technicians: Services like Smart Electronix offer professional laptop and desktop repair in Australia at reasonable prices.
Final Verdict
So, which is more cost-effective in Australia: laptop or desktop repairs? Desktops generally cost less to repair and maintain, making them the more budget-friendly option. Laptops, however, offer the convenience of mobility but at a higher repair cost.
If you’re based in Australia and struggling with computer issues, don’t stress. Smart Electronix can help you diagnose the problem and provide cost-effective solutions tailored to your needs.
Closing Thoughts
At the end of the day, the right choice depends on your lifestyle. If you need performance and savings, go with a desktop. If you need flexibility, a laptop is worth the higher maintenance costs. Either way, with proper care and professional support, you can extend the lifespan of your device and get the most out of your investment.
Smart Electronics – Your Trusted Tech Partner in Australia
