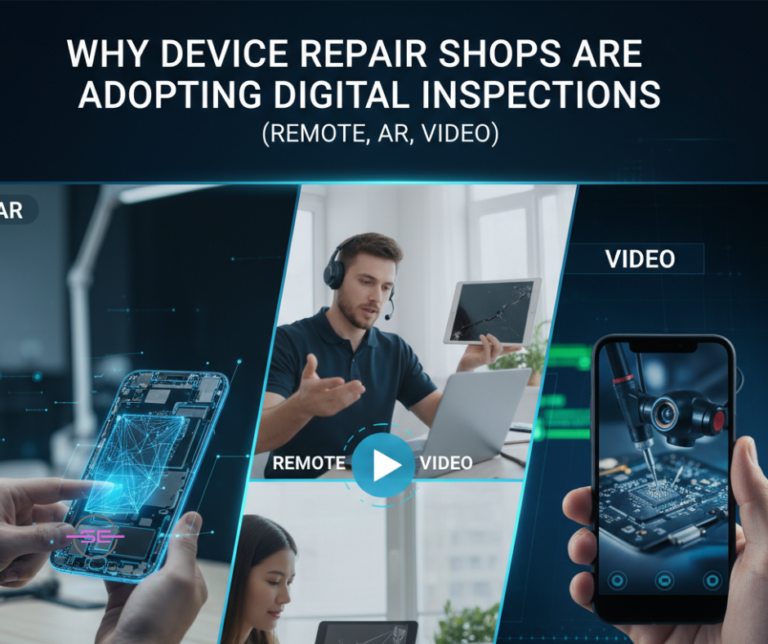
Gone are the days when tech repairs always required booking a visit, waiting in queues, and leaving your device in a shop for days. In 2025, repair specialists across Australia — including Smart Electronix — are introducing a smarter way to assist customers:
👉 Digital inspections using remote check-ups, augmented reality (AR), and video diagnostics.
These digital support tools are transforming the repair process — making it faster, more accurate, more transparent, and more convenient for customers.
Here’s why digital inspections are becoming the new normal in the repair industry.
🎥 1️⃣ Remote Inspections Offer Instant Support
When a phone won’t turn on or a laptop starts glitching, customers want answers right now — not after a long wait.
Remote inspections allow technicians to:
✅ Evaluate issues through live video ✅ Guide customers through quick troubleshooting ✅ Determine if hardware or software is to blame ✅ Provide repair estimates immediately
No travel. No delays. Just fast tech support — from wherever you are in Australia.
👓 2️⃣ AR (Augmented Reality) Helps Technicians See What You See
AR overlays digital instructions onto real life, enabling technicians to:
✔ Highlight ports, buttons, or screws on-screen ✔ Guide customers step-by-step in real time ✔ Diagnose visible hardware damage instantly
This innovation is especially helpful for:
🔋 Charging issues 🧩 Loose components 📸 Camera or speaker failures 📱 Accessory compatibility errors
It’s like having a technician right in your living room — without the call-out fees.
📊 3️⃣ Better Diagnostic Accuracy Before the Device Arrives
Digital inspections allow technicians to gather information early — so repairs start faster once the device arrives.
Repair shops can pre-order parts if needed, based on:
🚩 Boot errors or software warnings 🚩 Screen behavior, flickers, cracks 🚩 Battery swelling or overheating signs 🚩 Motherboard-related symptoms
This cuts turnaround time significantly — meaning customers get their devices back sooner.
🛡 4️⃣ Transparent Process = Trust & Comfort
Customers today want clarity:
What’s wrong with my device?
How much will it cost?
Will my data remain safe?
Remote and video inspections offer full visibility — building consumer trust and eliminating repair surprises.
At Smart Electronix, we ensure:
✅ Honest diagnosis ✅ Clear pricing before repairs begin ✅ Privacy-first support & secure data handling
You always know what’s happening with your device.
AR Helps Us Fix What You Can’t See.
🧑🔧 5️⃣ Gives Technicians a Head Start
With digital pre-checks, repair shops can:
📌 Prepare workspace 📌 Queue the correct tools 📌 Analyze logs & history beforehand 📌 Prioritize urgent repairs
This means devices spend less time waiting and more time being fixed.
Customers love efficiency — and so do technicians.
🌱 6️⃣ Reducing Unnecessary Device Drop-Offs
Not all problems require physical repair. Many are solved in minutes through smart digital guidance.
Remote inspections help:
✅ Prevent unnecessary travel ✅ Reduce e-waste from misdiagnosed failures ✅ Restore functionality using software fixes
Convenience + Sustainability = A smarter repair ecosystem.
✅ Smart Electronix Leads the Digital Repair Movement
We proudly offer:
📌 Video Call Troubleshooting 📌 AR-Assisted Support 📌 Online Diagnostics & Repair Scheduling 📌 Contactless Pickup & Delivery Options 📌 Full Transparency at Every Step
Whether you’re facing:
Sudden shutdown
Screen malfunction
Battery drainage
Boot looping
Overheating
…we diagnose smarter and fix faster.
Smart Devices Deserve Smart Inspections.
🔍 Final Takeaway
Digital inspections aren’t replacing expert technicians — they’re empowering them.
In 2025, repairing smartphones and laptops isn’t just about opening devices and checking what’s broken. Modern electronics are complex machines — packed with smart chips, encrypted firmware, digital sensors, and ultra-compact hardware.
That’s why Artificial Intelligence (AI) is now transforming how expert technicians diagnose device problems. At Smart Electronix, AI-powered diagnostics allow us to detect faults faster, fix issues with greater accuracy, and restore your device quickly — without guesswork.
Let’s dive into how AI is revolutionizing the repair industry.
🤖 What Is AI Diagnostics in Device Repair?
AI diagnostics use machine learning algorithms to:
🔍 Scan internal systems 📊 Compare performance with millions of known error patterns 🚨 Identify faults early ✅ Recommend the best repair method
Whether it’s an iPhone stuck in a boot loop or a laptop that overheats randomly, AI tools help pinpoint where the failure is happening — even inside parts that can’t be seen.
More Accuracy. Less Waiting.
⚡ Faster, Smarter, More Accurate Troubleshooting
Before AI, technicians relied heavily on manual inspection and trial-and-error testing. Now:
✅ Fault detection is faster ✅ Board-level issues are easier to locate ✅ Software + hardware problems can be separated quickly ✅ Repair time is significantly reduced
Example: If a phone doesn’t charge, AI can determine whether the issue is caused by:
🔋 Battery health 🔌 Charging port pins ⚡ PMIC chip malfunction 🔧 Firmware corruption
…instead of replacing random components.
🔧 AI Supports Chip-Level Repairs
Many modern devices fail because of tiny components on the logic board — charging ICs, Wi-Fi chips, power circuits, etc. AI tools help technicians detect:
Smart Electronix — Professional Device Repair & Diagnostics
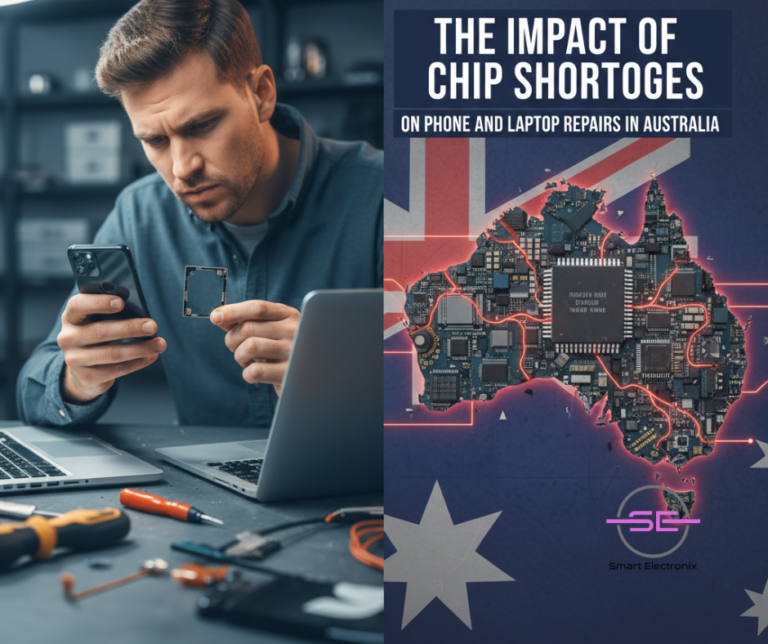
Over the last few years, Australians have experienced frustrating delays when repairing smartphones and laptops. Whether it’s a cracked iPhone screen that refuses to respond or a MacBook that won’t charge — one major issue is behind many of these challenges:
👉 The global chip shortage.
From everyday consumers to repair shops like Smart Electronix, chip scarcity has reshaped how and when devices can be fixed. Here’s what’s really happening — and what it means for your tech repairs in Australia.
🔍 Why Do Phones and Laptops Need So Many Chips?
Modern smart devices aren’t simple machines. They run on dozens of microchips responsible for:
✔ Power management (PMIC) ✔ Fast charging and USB-C ports ✔ Touch & display processing ✔ WiFi & Bluetooth connectivity ✔ Face ID & biometric security ✔ Storage and memory
Even replacing a screen or battery can require chip-level firmware pairing with the motherboard — something only specialized repair experts can handle.
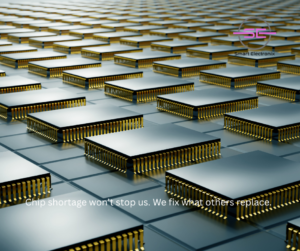
Chip shortage won’t stop us. We fix what others replace.
🌍 How the Chip Shortage Began
The global chip shortage didn’t come from one single event — it was a chain reaction:
⛔ Pandemic factory shutdowns
🚢 Shipping disruptions
📈 Massive demand for electronics
🏭 Fewer production facilities
🛡️ Stricter government trade rules
The result? Fewer chips available worldwide — and intense competition to secure the parts needed for repairs.
🇦🇺 What the Chip Shortage Means for Aussies
Because Australia depends heavily on imported repair components, the shortage has created:
Impact
What It Means for Consumers
Higher part costs
Some repairs cost more than before
Longer wait times
Spare parts may arrive weeks late
Limited aftermarket options
Cheaper parts risk failure
More complex repairs
Chip-level expertise now essential
Even big brands cannot escape delays — especially for:
✅ iPhone logic board repairs ✅ Samsung charging IC failures ✅ Laptop motherboard repairs ✅ Graphics and power chips for gaming devices
🛠 Repair Shops Are Evolving
Instead of simply swapping damaged parts, Australian repair professionals must now:
✅ Perform micro-soldering instead of full board replacement ✅ Recover chips from recycled devices ✅ Validate compatibility using software tools ✅ Prioritize data safety while repairing core components
This shift means customers get:
✔ Better-quality repairs ✔ Less waste and landfill damage ✔ More affordable alternatives to replacement devices
Repair smarter — even when parts are scarce.
♻️ A Positive Side: Better Sustainability
The chip shortage has pushed the repair industry toward:
Smart Electronix now refurbishes certain components or sources expertly remanufactured chips — reducing environmental impact without compromising performance.
💡 What You Can Do as a Consumer
To avoid delays and extra costs:
✅ Repair early — don’t wait for complete failure ✅ Book diagnostics before the problem spreads ✅ Use trusted repair specialists — not cheap shortcuts ✅ Choose high-quality tested parts
A damaged charging port today could become a motherboard replacement tomorrow.
🧩 How Smart Electronix Handles Chip Shortage Challenges
We ensure consistent service by:
✅ Maintaining trusted supplier relationships ✅ Stocking high-demand components locally ✅ Offering alternatives when imports are delayed ✅ Providing warranty-backed repairs ✅ Using expert chip-level repair techniques
Your device is repaired faster — with zero quality compromise.
✅ Final Thoughts
Chip shortages have changed how tech repairs work in Australia — but they’ve also pushed the industry toward smarter, more sustainable repair practices.
The key takeaway:
Repairs are still far cheaper and better for the environment than buying new. ✅
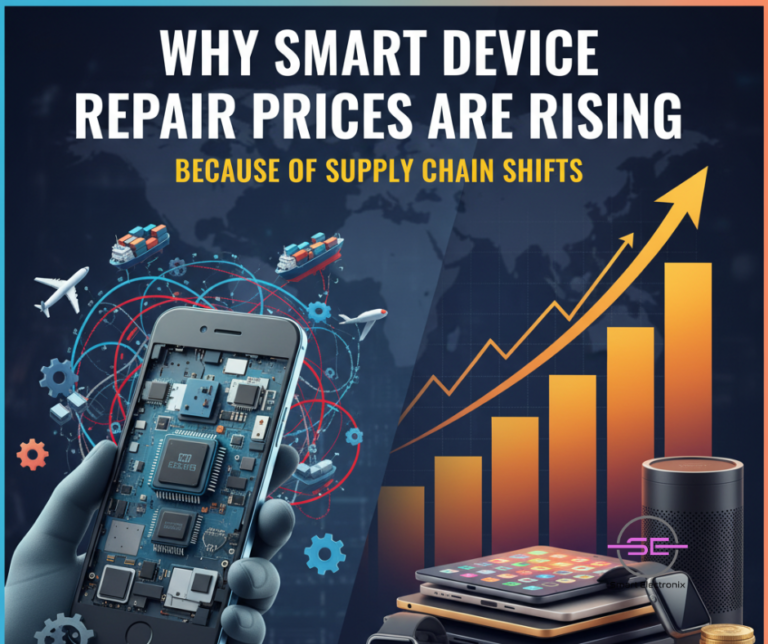
Have you noticed that repairing your smartphone, tablet, or laptop in Australia costs more today than it did a few years ago? You’re not imagining it. Repair pricing across the tech industry is rising—and there’s a major reason why:
👉 Global supply chain shifts are making spare parts more expensive and harder to source.
From international manufacturing delays to new hardware security rules, every step of the repair process has changed. In this blog, Smart Electronix breaks down what’s really driving repair costs up—and how we continue to give customers the best value for money.
🌍 What Is Causing the Supply Chain Change?
The world’s technology supply chain looks very different in 2025. Here are the biggest influences:
1️⃣ Manufacturing Consolidation
Most smartphone and laptop components are produced in only a handful of countries. When one factory slows down, the entire world feels it.
2️⃣ Rising Material & Labor Costs
Lithium, touch panels, OLED displays—even screws have seen price spikes due to global shortages and wages rising in manufacturing regions.
3️⃣ Stricter Hardware Security Regulations
Brands like Apple, Samsung, and Xiaomi increasingly pair parts like screens, batteries, and Face ID sensors with device firmware—making generic replacements incompatible.
✅ Great for anti-theft ❌ Harder (and more expensive) for repairs
4️⃣ Currency Fluctuations & Import Fees
Australia relies heavily on imported components—and the Australian dollar is constantly shifting. That cost passes through the entire supply chain.
📦 Why Spare Parts Aren’t Cheap Anymore
Historically, repair shops could source aftermarket parts to keep costs low.
But today:
Cheap parts cause firmware issues
Lower-quality components trigger device warnings
Compatibility restrictions make many parts unusable
More customers now demand premium or genuine replacements for safety and performance—especially for:
✔ iPhone batteries ✔ Samsung AMOLED displays ✔ MacBook charging IC components ✔ USB-C ports with fast-charge support
Premium parts = premium pricing.
🛠 Repair Is Getting Smarter (And More Complex)
Devices in 2025 are smarter than ever—but that means repairs require:
Technicians must invest in continuous training — and high-end equipment like:
🔹 Laser glass separation machines 🔹 Microscope-guided soldering stations 🔹 Professional data recovery systems
These improvements protect your device and your data — but also increase operational costs.
Your Device Deserves Quality, Not Shortcuts
🔋 Sustainability Is Changing the Market Too
Consumers are demanding longer-lasting electronics and eco-friendly repair options, which leads to:
Better-quality reusable components
Circular remanufacturing practices
Reduced e-waste
This shift is good for the planet — but requires more expertise and regulated parts sourcing, which impacts pricing.
🇦🇺 What It Means for Aussies
While prices may rise slightly, repairs still cost far less than replacement.
Option
Average Cost
Environmental Impact
📱 Repair
Low–Medium
✅ Low e-waste, longer device life
🆕 Replace
High
❌ More landfill & mining waste
Repairing helps you:
✔ Save money ✔ Extend device lifespan ✔ Keep your digital data safe ✔ Reduce environmental waste
It’s a long-term investment — not just a quick fix.
🤝 How Smart Electronix Keeps Repairs Affordable
We are committed to transparent and fair pricing by:
✅ Sourcing reliable, tested components ✅ Offering budget and premium repair options ✅ Using expert technicians to prevent repeat issues ✅ Providing free diagnostics before work begins ✅ Guaranteeing part quality and repair durability
Our goal: Premium repair service without premium pressure.
Repair Better Today, Save Bigger Tomorrow.
✅ Final Thoughts
Smart device repairs are evolving—more advanced hardware, stricter technology standards, and global supply complexities all play a role in cost. But one thing hasn’t changed:
Smart Electronix is here to provide trustworthy, high-quality repairs that protect your devices and your wallet.
If your smartphone, laptop, or tablet is damaged — don’t replace it. 👉 Bring it to Smart Electronix and get it repaired right the first time.
📍 Serving customers across Australia 🛠 Phone, Laptop & Tablet Repair | Battery Replacement | Data Recovery | Firmware Repair
Smart Electronix — Laptop & Smartphone Repair Specialists in Australia
When your phone, tablet, or laptop suddenly shuts down during an update and refuses to turn on again—it feels like the device has turned into a literal brick. This phenomenon is called firmware bricking, and unfortunately, it’s becoming more common in 2025 as devices rely more on complex digital firmware.
But don’t worry—most “bricked” devices can be recovered with the right tools, knowledge, and professional help.
In this blog, Smart Electronix breaks down what firmware bricking is, why it happens, and how to recover safely without risking further damage.
✅ What Is Firmware and Why Does It Matter?
Firmware is the built-in software that tells your hardware how to operate—like a brain for your device’s internal components.
📌 Firmware controls critical functions such as: ✔ Battery charging ✔ Display & touchscreen ✔ Wi-Fi & Bluetooth connectivity ✔ Booting and overall system startup
Without working firmware, even a perfectly healthy device will fail to function.
❌ What Is Firmware Bricking?
A device becomes “bricked” when firmware is corrupted, causing it to:
Not power on at all
Get stuck on manufacturer logo
Enter endless restart loops
Lose display functionality
Fail to detect USB or charger
There are two kinds of bricking:
Type
What Happens
Can It Be Recovered?
Soft Brick
Device powers on but crashes or freezes
✅ Yes, usually via software fixes
Hard Brick
No response, no screen, no boot
✅ Sometimes — with professional hardware tools
⚠️ Top Causes of Bricked Devices
Smart Electronix repair data shows the most common causes in Australia include:
✅ Failed firmware updates ✅ Using wrong ROM or rooting device ✅ Interrupted power during update ✅ Low-quality aftermarket spare parts ✅ Malware or corrupted software ✅ Manufacturing defects
🔋 Fun fact: Many firmware issues occur during battery-heavy processes like fast-charging updates. Always ensure your device is charged above 50% when updating!
🚑 What to Do Immediately If Your Device Gets Bricked
Do NOT attempt random YouTube fixes or cheap flashing tools — they often make it worse.
Instead, try this safe checklist:
✅ Charge device for at least 30 minutes ✅ Attempt Official Recovery Mode (varies per brand) ✅ Connect to PC and try manufacturer tools like:
Samsung Smart Switch
Apple Finder / iTunes Restore
Android ADB & Fastboot ✅ Check cable and port health
If none of these work → Stop there and let a technician take over.
🔧 How Smart Electronix Recovers Bricked Devices
We use advanced repair tools designed for firmware recovery and chip-level diagnostics:
✅ Official software restoration ✅ Secure bootloader repair ✅ Logic board-level reprogramming ✅ JTAG / ISP / EEPROM flashing ✅ Data preservation when possible
We specialize in Apple, Samsung, Oppo, Xiaomi, tablets, and gaming consoles—restoring devices without wiping essential data unless absolutely necessary.
Firmware bricking sounds scary—but with the right help, it’s not the end.
Smart Electronix has helped thousands of Australians recover what they thought was lost forever. Don’t throw your device away. Let us bring it back to life.
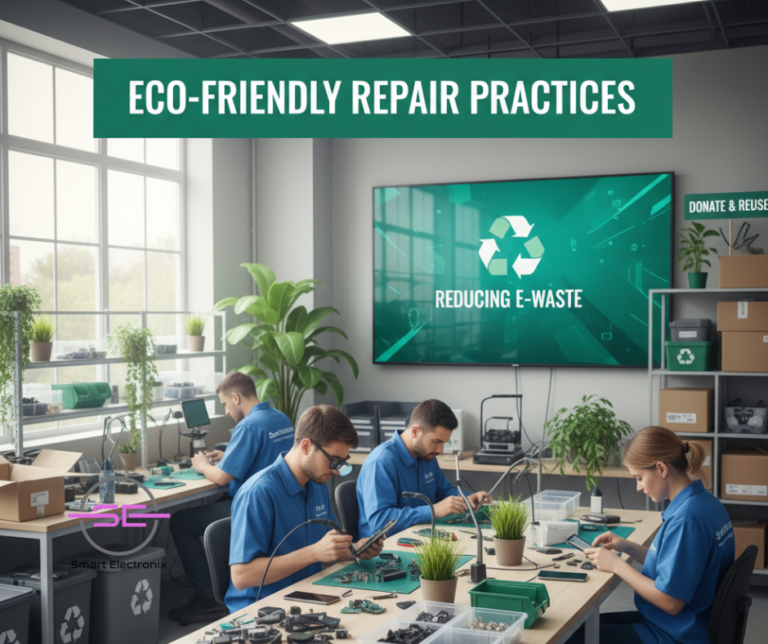
Technology evolves faster than ever — and so does waste. Every year, Australia generates over 500,000 tonnes of e-waste, and the majority ends up in landfill, leaking hazardous materials and polluting our environment.
But there is a smarter, greener alternative. At Smart Electronix, we believe every device deserves a second life — and so does our planet. That’s why we’re leading the way with eco-friendly repair practices that reduce e-waste and save Australians money.
If you care about sustainability and want your tech to last longer, this guide is for you. 🌱💡
🌏 What Exactly Is E-Waste?
Electronic waste — or e-waste — includes:
Smartphones
Laptops
Tablets
Smart home devices
Chargers, batteries & accessories
Most devices are discarded not because they’re beyond repair but because consumers think replacement is easier.
The truth? Repairing:
✅ Saves money ✅ Reduces landfill waste ✅ Keeps rare metals in circulation ✅ Lowers carbon emissions from manufacturing new devices
Repairing isn’t old-fashioned — it’s the future of sustainability.
🔧 How Smart Electronix Reduces E-Waste in Australia
We follow three core principles in our eco-friendly repair mission:
✅ 1️⃣ Repair Instead of Replace
Our technicians assess each device carefully. Even when brands push for replacement, we work to:
Restore original performance
Replace faulty parts instead of full systems
Extend device lifespan by years
For every phone we save from landfill, precious minerals like cobalt, gold, and lithium are spared from waste.
✅ 2️⃣ Quality Spare Parts & Remanufacturing
Cheap parts = short lifespan. Smart Electronix uses high-grade components that:
Perform like original parts
Reduce failure rates
Prevent repeat repairs
We also support remanufactured parts — refurbished to as-new condition — helping reduce the demand for newly mined materials.
Connected Convenience Comes with Repair Challenges
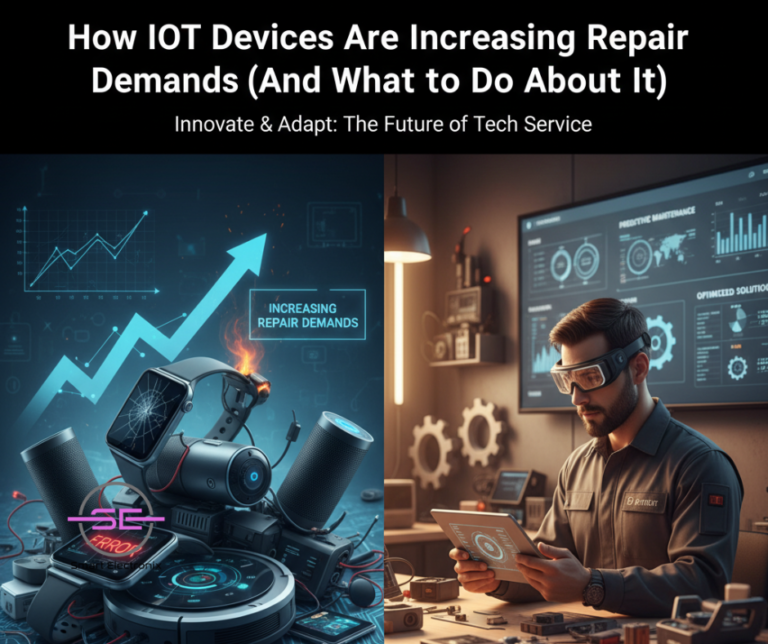
Smart homes are no longer futuristic — they’re everyday reality in Australia. From Wi-Fi security cameras and smart TVs to connected appliances and wearable devices, we are surrounded by IoT (Internet of Things) technology designed to make life simpler.
But as our devices get smarter, repair needs are rising faster than ever.
At Smart Electronix, we’ve seen increasing repair requests for IoT devices — not because they are low-quality, but because connectivity introduces new points of failure that simply didn’t exist in traditional electronics.
Let’s uncover why IoT devices are driving repair demand, and most importantly, what Australian consumers can do to stay ahead of the problem.
What Makes IoT Devices Different?
IoT devices rely on three elements to function properly:
Hardware
Software
Network Connectivity
If even one of these fails — the entire device stops working.
Traditional electronics might only require hardware servicing, but a smart home gadget might need:
Firmware updates
Network troubleshooting
App reconfiguration
Sensor recalibration
Hardware replacement
These layers of complexity increase both the frequency and difficulty of repairs.
Don’t Replace — Reconnect.
Top 5 Reasons IoT Repairs Are Increasing
Here’s what’s driving the surge in IoT repair needs:
✅ 1️⃣ Software Glitches & Firmware Failures
IoT devices rely heavily on internal software.
A failed update can brick a device.
Unsupported apps can cause lag and battery drain.
In these cases, most consumers assume the hardware is faulty, but the real fix is technical debugging — something Smart Electronix specializes in.
✅ 2️⃣ Connectivity & Compatibility Issues
Smart devices need smooth Wi-Fi, Bluetooth, and sometimes cloud access to operate.
Common issues we see:
Devices dropping from the network
Router compatibility problems
Smart home hub pairing failures
These problems don’t require replacements — just professional diagnosis.
✅ 3️⃣ Wear & Tear from Always-On Usage
IoT devices are active 24/7, even when “sleeping”.
This leads to:
Faster battery degradation
Component overheating
Sensors wearing out sooner
A smart doorbell sees more extreme outdoor stresses than a normal device — so it needs repairs more often.
✅ 4️⃣ Limited Repairability by Design
Some IoT brands lock down:
Parts
Batteries
Firmware access
This creates Right-to-Repair challenges in Australia — meaning customers rely more on repair specialists like Smart Electronix who can source replacements and restore functionality safely.
✅ 5️⃣ Security Risks & Data Corruption
IoT devices are top targets for cyber attacks because:
They store personal and household data
Many lack advanced encryption
A compromised device may need:
✅ Firmware reset ✅ Secure reconfiguration ✅ Vulnerability patching
Repair is now about protecting privacy, not just fixing hardware.
Your Device, Our Vision — Repaired Smarter with AR.
The Real Cost of Not Maintaining IoT Devices
A neglected IoT device can lead to:
Higher power bills
Shorter product lifespan
Data leaks and privacy risks
Damage to connected devices
Example: A failing smart thermostat can overload a home HVAC system — expensive consequences from what seems like a tiny issue.
How Smart Electronix Helps Australians Stay in Control
We provide comprehensive IoT repair and maintenance support, including:
Our approach ensures your devices work together efficiently, not against each other.
Pro Tips to Reduce IoT Device Failures
Here’s what every Aussie household should do:
✅ Update firmware regularly ✅ Keep devices on surge-protected power sources ✅ Avoid overcrowding Wi-Fi networks ✅ Use strong passwords & network segmentation ✅ Schedule preventative maintenance
Small steps → long-term savings.
The Future: More IoT. More Repairs. More Solutions.
By 2027, the average Australian home will have over 40 smart devices connected at once. That means repair needs will continue to grow — but so will the solutions.
Smart Electronix is already leading with:
Remote diagnostics
Predictive maintenance tools
AR-assisted repair support
Secure configuration practices
We don’t just fix devices. We help them live longer, perform smarter, and protect your home.
✅ Final Thoughts
Smart devices are becoming essential to modern living — but their advanced technology requires advanced care.
The increase in IoT repair demand isn’t a downside — it’s a sign that we are entering a more connected and capable era of technology.
And with the right experts by your side, repairs will always be:
✔ Faster ✔ More affordable ✔ More sustainable
Smart Electronix is here to keep your smart home running smarter — every day.
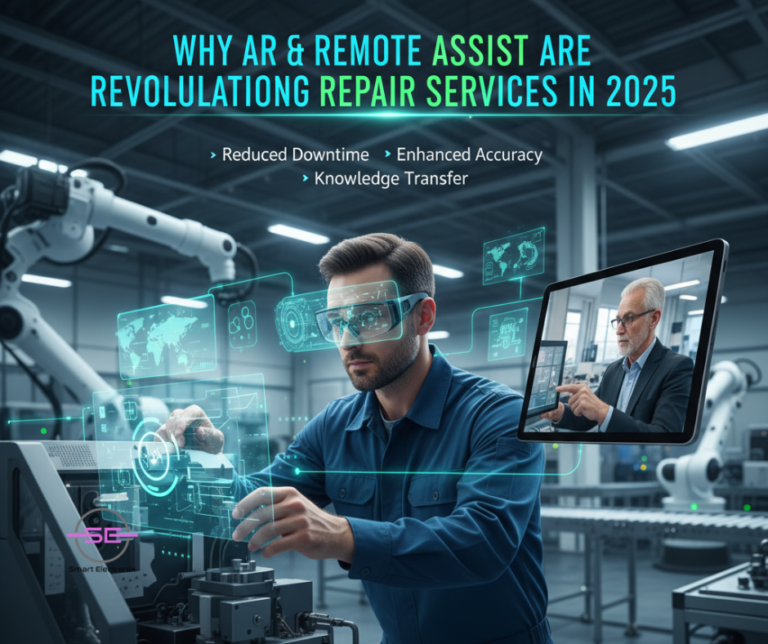
In 2025, the way we repair our devices is changing faster than ever. Gone are the days of waiting weeks for diagnostics or struggling to explain a problem over the phone. Thanks to Augmented Reality (AR) and Remote Assist technologies, the repair industry is entering a new era of speed, transparency, and precision.
At Smart Electronix, we’ve witnessed this transformation firsthand. What was once considered “futuristic” is now part of the everyday service experience — helping Australians fix their devices smarter, faster, and more conveniently than ever before.
Let’s explore how AR and remote assist are revolutionizing repair services and what it means for customers in 2025.
What Is Augmented Reality in Repairs?
Augmented Reality (AR) overlays digital visuals and information onto the real world using a smartphone, tablet, or smart glasses. In repair services, this technology allows technicians — or even customers — to see live 3D instructions, visual diagnostics, and repair guides directly on the device being fixed.
Imagine pointing your phone’s camera at your laptop, and seeing highlighted parts showing where to remove screws or reconnect cables. That’s the power of AR — real-time visual assistance without guesswork.
How Remote Assist Works
Remote Assist takes virtual support one step further. It allows technicians to connect with customers through a live video session, guiding them step-by-step to troubleshoot or fix an issue instantly.
For example, if your smartphone won’t charge, you can start a remote session where a Smart Electronix expert can view your device setup and walk you through quick diagnostics or settings checks — all without you leaving your home.
Together, AR and Remote Assist are reshaping how the repair industry operates — combining visual learning, expert knowledge, and real-time support.
Why AR & Remote Assist Matter in 2025
The year 2025 has become a turning point for digital-first services. Consumers demand faster solutions and eco-friendly alternatives to traditional service models. Here’s why these technologies have become essential:
1. Faster Diagnostics
With AR, technicians can instantly visualize hardware layouts, component conditions, and even system alerts in 3D. This shortens diagnostic time by over 50% compared to manual inspection.
For customers, that means less waiting and quicker solutions — whether it’s a cracked screen, motherboard issue, or battery failure.
Your Device, Our Vision — Repaired Smarter with AR.
2. Fewer Physical Visits
Not every issue requires a workshop visit. Through Remote Assist, many software-related or minor hardware issues can be resolved virtually. This reduces travel, costs, and environmental impact — aligning with Australia’s growing sustainability goals.
At Smart Electronix, we use this approach to minimize unnecessary device shipments and encourage eco-friendly repair practices.
3. Improved Accuracy & Training
AR tools allow technicians to visualize internal components and repair instructions directly on their screen, minimizing errors. They can even record sessions for training new technicians.
This ensures that repairs are not only faster but also more accurate and consistent, maintaining Smart Electronix’s commitment to quality service.
4. Enhanced Customer Experience
One of the biggest frustrations in tech repair is the lack of transparency — customers rarely know what’s happening during the process. AR-enabled video sessions change that. Customers can see exactly what’s being fixed, understand the issue, and even learn preventive care tips along the way.
Transparency builds trust — and that’s exactly what Smart Electronix stands for.
5. Remote Collaboration Between Experts
Sometimes, complex device issues require specialized input. With AR and Remote Assist, multiple experts from different locations can collaborate in real time. They can share digital annotations, diagrams, and part references directly on the device image.
This global collaboration leads to faster, smarter, and more reliable fixes, even for rare or high-end devices.
Real-World Example: AR in Laptop Repairs
At Smart Electronix, we’ve integrated AR to assist in laptop repairs — from motherboard diagnostics to screen replacements. Here’s how it works:
The technician opens an AR overlay showing the exact screw and connector locations.
Step-by-step instructions guide the process in real-time.
Any errors or incorrect part placements trigger instant visual alerts.
This not only reduces repair time but also ensures component safety and high-quality results — something every Australian customer deserves.
The Sustainability Angle
Every time a device is fixed remotely or guided through AR, it prevents unnecessary logistics — packaging, shipping, and e-waste.
AR-based troubleshooting can help determine whether a repair is genuinely needed, saving hundreds of devices from landfill every year.
As Australia moves toward a circular economy, these technologies align perfectly with eco-conscious repair and reuse initiatives that Smart Electronix proudly supports.
Challenges and Future Outlook
While AR and Remote Assist have made huge progress, the journey isn’t over yet. Some challenges include:
Device Compatibility: Not all older devices support AR-enabled repair visualization.
Internet Dependence: Stable connections are necessary for real-time collaboration.
Training Needs: Technicians must learn to use AR interfaces efficiently.
However, with 5G expansion and more AR-ready tools being developed, these challenges are quickly being overcome.
By 2026, experts predict that over 60% of repair and maintenance companies will integrate AR-based systems into daily operations — making remote repair assistance the new norm.
Your Device, Our Vision — Repaired Smarter with AR.
What This Means for Smart Electronix Customers
At Smart Electronix, innovation isn’t just about keeping up — it’s about staying ahead. Here’s how we’re embracing AR and Remote Assist in 2025:
Virtual Consultations: Get live diagnostic help before sending in your device.
Visual Repair Tracking: Watch progress and receive real-time updates.
Smart Training Tools: Our technicians continuously improve with AR-guided learning.
Eco-Friendly Approach: Fewer shipments, less waste, greener solutions.
We’re committed to making device repair smarter, faster, and more transparent — because we believe technology should work for you, not against you.
Final Thoughts
The combination of Augmented Reality and Remote Assist isn’t just transforming repair services — it’s redefining customer expectations. In 2025, the repair industry is no longer limited by geography or guesswork. Instead, it’s powered by innovation, efficiency, and connection.
At Smart Electronix, we see AR and Remote Assist as more than tools — they’re the foundation for the next generation of smart repair solutions that put power, knowledge, and confidence back in the hands of consumers.
🔧 Key Takeaways
AR & Remote Assist make repairs faster, accurate, and more convenient.
Customers enjoy real-time transparency and eco-friendly services.
Smart Electronix leads the way in AI-driven and AR-powered repair innovation.
As technology evolves, so do the threats that challenge it. In 2025, cybersecurity experts are sounding the alarm on one of the most profound shifts in digital safety — the rise of quantum computing. This revolutionary technology promises to solve complex problems at lightning speed but also threatens to break the encryption methods that protect our phones, laptops, and connected devices. This is where Post-Quantum Cryptography (PQC) comes in — the new armor designed to protect the digital world against quantum-powered cyberattacks.
At Smart Electronix, we’re not just about repairing and upgrading your devices; we care about the technology that keeps your data and privacy safe. So, let’s explore how PQC is reshaping consumer device security and what it means for everyday Australians.
Understanding the Quantum Threat
Traditional encryption — like RSA and ECC — is what keeps our online transactions, passwords, and communications secure. These systems rely on mathematical problems that would take classical computers centuries to solve. However, with quantum computing’s immense processing power, these same problems could be cracked in minutes. This means that everything from your smartphone data to your home Wi-Fi could be vulnerable once large-scale quantum computers become widely available.
Experts call this potential danger the “Quantum Apocalypse” — not because it’s science fiction, but because it could render current encryption methods useless overnight.
What Is Post-Quantum Cryptography?
Post-Quantum Cryptography (PQC) refers to a set of encryption algorithms designed to resist attacks from quantum computers. These algorithms aim to future-proof digital security by making encryption stronger and more complex, even for quantum-level decryption attempts.
The goal is simple: ensure that no matter how advanced computing becomes, your private data stays private.
In 2022, the U.S. National Institute of Standards and Technology (NIST) began standardizing PQC algorithms, and by 2025, companies around the world are integrating them into devices, networks, and cloud infrastructures.
Future-Proof Your Devices — Stay Safe in the Quantum Era.
How PQC Impacts Consumer Devices
1. Enhanced Smartphone Security
Smartphones today are mini-computers, holding personal data, payment information, and sensitive files. With PQC, manufacturers can build encryption directly into device firmware, ensuring even quantum-resistant protection for your communications and biometric data.
In simple terms: your Face ID, banking apps, and encrypted chats could soon be protected by post-quantum encryption.
2. Safer Smart Home Devices
From smart TVs to Wi-Fi cameras, Internet of Things (IoT) devices are convenient but often vulnerable. PQC can help secure communication between smart devices and your network, preventing hackers — quantum or not — from intercepting or altering data.
For Australian households that rely on smart home automation, PQC will be a game-changer for digital safety.
3. Stronger Data Protection in Laptops & PCs
Businesses and individuals store massive amounts of data on laptops, often connected to the cloud. Integrating PQC ensures that this data remains encrypted even if future technologies become powerful enough to break traditional security systems.
In essence, your files, photos, and credentials stay safe not only today — but for decades to come.
4. Future-Proof Firmware Updates
Many modern devices receive over-the-air (OTA) firmware updates. With PQC, these updates can be signed using quantum-safe certificates, guaranteeing that your device is talking to a legitimate source and not a hacker mimicking a manufacturer.
Challenges in Adopting Post-Quantum Cryptography
While PQC promises next-generation security, the road to adoption isn’t without hurdles.
Performance Overhead: Post-quantum algorithms can require more computational power, potentially impacting device speed or battery life.
Compatibility: Not all current devices support PQC yet, meaning older tech might need hardware upgrades.
Implementation Complexity: Ensuring seamless migration to PQC standards without disrupting existing services is a challenge for developers and manufacturers alike.
Still, the benefits outweigh the risks. As more companies like Apple, Samsung, and Google explore quantum-safe encryption models, the consumer landscape will shift toward devices built for long-term resilience.
When AI Knows Your Device Better Than You Do.
The Role of Smart Electronix
At Smart Electronix, we’re committed to staying ahead of technology trends — not just repairing what’s broken but preparing you for the future of smart security. Whether it’s upgrading device firmware, replacing sensitive components, or ensuring compatibility with next-gen encryption standards, we aim to keep your devices secure in a rapidly evolving digital environment.
We believe that every Australian consumer deserves peace of mind, knowing their tech investments are protected — not just today, but tomorrow too.
The Future of Consumer Security in a Quantum World
As quantum computing continues to evolve, Post-Quantum Cryptography is no longer optional — it’s essential. Over the next few years, expect to see major software updates, security patches, and even hardware upgrades incorporating PQC by default.
For everyday users, this means:
Stronger digital privacy
Reduced data breach risks
Longer-lasting device security
Peace of mind in a post-quantum era
In short, PQC represents a new security foundation — one that ensures your connected life stays private and protected.
Final Thoughts
The world of cybersecurity is changing fast, and quantum computing could redefine what “secure” really means. But thanks to Post-Quantum Cryptography, the digital future doesn’t have to be uncertain.
By embracing PQC, manufacturers and repair experts like Smart Electronix are helping Australian consumers navigate the next generation of digital safety — where technology predicts, protects, and prevails.
🔐 Key Takeaways
Quantum computing poses a major threat to traditional encryption.
Post-Quantum Cryptography (PQC) is designed to defend against these quantum attacks.
PQC will impact smartphones, laptops, IoT devices, and cloud systems.
Smart Electronix is dedicated to keeping Australian consumers secure in the quantum era.
In the fast-paced digital world, our laptops, smartphones, and other smart electronics have become indispensable. Whether it’s for work, entertainment, or business, we depend on our devices every single day. But what if your laptop could predict when it’s about to fail—and fix itself before the problem even happens?
Welcome to the future of predictive device maintenance, powered by Artificial Intelligence (AI). This emerging technology is revolutionizing the world of electronics repair and maintenance, and Smart Electronix is at the forefront of this transformation in Australia.
What Is Predictive Device Maintenance?
Predictive maintenance is a smart system that uses AI algorithms, sensors, and data analytics to monitor device performance in real time. Instead of waiting for something to go wrong, the system can anticipate failures—from battery degradation to overheating motherboards—and take preventive action.
In other words, your device learns from its own usage data. It tracks temperature spikes, performance drops, unusual current draws, and other metrics to detect early warning signs. When potential issues are identified, the system can alert users or even automatically adjust operations to avoid damage.
This isn’t just futuristic thinking—it’s already happening. In 2025, tech innovators and service centers like Smart Electronix are using AI insights to repair devices smarter, faster, and more sustainably.
Why Predictive Maintenance Matters
1. Fewer Unexpected Breakdowns
One of the biggest frustrations for laptop or phone owners is a sudden malfunction. Whether it’s a dead battery, a cracked screen, or an overheating issue, breakdowns usually come without warning.
With predictive maintenance, devices can detect early signs of stress and inform users before a failure occurs. For example, your laptop might notify you that its cooling system is underperforming and needs cleaning or fan replacement—before it overheats and causes permanent damage.
This means fewer emergency repairs and a longer device lifespan.
2. Cost-Effective Repairs
Traditional repair often means reacting to damage after it happens—sometimes when it’s too late to save expensive parts. Predictive systems help prevent costly damage by identifying problems early.
For instance, replacing a battery when it first shows signs of wear is far cheaper than fixing the entire power circuit after a short-circuit failure. At Smart Electronix, this proactive approach allows our technicians to perform timely repairs that save both money and hassle for customers.
3. Enhanced Device Performance
When laptops or smartphones operate under stress for too long, performance dips—apps lag, systems crash, and components wear faster. Predictive AI continuously analyses usage data and keeps the system optimized.
It can even schedule maintenance tasks such as battery calibration, thermal management, or software updates at the ideal times. The result? Faster, more reliable, and longer-lasting devices.
AI-Powered Precision — Because Prevention Beats Repair.
4. Sustainability and Environmental Impact
Predictive maintenance isn’t just good for users—it’s great for the planet. By reducing device failures and extending product lifecycles, AI-driven maintenance significantly cuts electronic waste (e-waste).
In a country like Australia, where millions of electronic devices are discarded each year, this technology supports the move toward sustainable repair practices. Fewer replacements mean less raw material extraction, lower carbon emissions, and reduced landfill waste.
At Smart Electronix, sustainability is part of our DNA. Our focus on long-term device care—using genuine parts, expert diagnostics, and eco-conscious repair—aligns perfectly with the predictive maintenance revolution.
How AI Predictive Maintenance Actually Works
Predictive maintenance relies on a combination of data analytics, sensors, and cloud-based AI learning models. Here’s a simple breakdown of how it functions in a device like a laptop:
Data Collection – Sensors monitor temperature, voltage, battery charge cycles, fan speeds, and more.
Real-Time Analysis – AI algorithms process this data continuously to identify abnormal patterns.
Early Warning Detection – When performance deviates from normal, the system sends alerts or notifications.
Automated Adjustments – In advanced systems, AI can adjust power usage, fan speed, or CPU performance to prevent damage.
Maintenance Scheduling – Users receive smart reminders to replace parts like batteries, SSDs, or thermal paste before failure occurs.
By integrating this approach into laptop and device repair, Smart Electronix ensures customers enjoy peak performance and reliability for longer periods.
Smarter Repairs Start Before Damage Happens.
The Smart Electronix Approach to AI-Driven Repairs
At Smart Electronix, we believe the future of repair lies in predictive intelligence. Our technicians don’t just fix problems—they anticipate them. By combining experience, diagnostic tools, and AI-based analytics, we’re redefining the meaning of proactive device care.
Here’s how we’re embracing predictive maintenance:
Advanced Diagnostics: We use smart diagnostic software to evaluate component health and predict potential issues.
Preventive Battery Replacement: We analyze battery cycles and voltage patterns to replace batteries before they degrade completely.
Cooling System Optimization: Our repair process includes fan efficiency checks and thermal analysis to prevent overheating.
Data-Driven Service Scheduling: Based on usage history, we recommend when to clean, recalibrate, or service your laptop for optimal performance.
Genuine Parts Assurance: All replacements are made with genuine, high-quality parts to ensure long-term reliability and safety.
This AI-supported workflow allows us to deliver faster, smarter, and more transparent repairs for Australian customers who depend on their devices every day.
The Broader Impact on the Repair Industry
AI-powered predictive maintenance is changing the way the entire repair industry operates. Instead of being reactive, service centers are now becoming partners in device lifecycle management.
Imagine this: you bring your laptop in for a check-up, and instead of waiting for a part to fail, the technician tells you, “Your hard drive has a 10% chance of failure within the next 90 days. Let’s back up your data and replace it now.”
This level of precision and foresight doesn’t just improve customer satisfaction—it builds trust. Repair shops that embrace predictive technology, like Smart Electronix, are positioning themselves as the future leaders of the electronics service industry.
Challenges and the Road Ahead
While the benefits are huge, predictive maintenance also comes with challenges. It requires strong data privacy measures, access to manufacturer diagnostics, and skilled technicians who understand both hardware and software analytics.
But as AI becomes more accessible and standard across devices, these systems will only grow smarter. By 2025 and beyond, most high-end laptops, smartphones, and even home appliances will likely come equipped with built-in predictive maintenance features.
The key is to have local repair experts—like Smart Electronix—who can interpret that data and turn it into real, actionable care for your device.
Final Thoughts
Predictive device maintenance marks a turning point in how we manage our technology. Instead of waiting for our laptops to fail, we’re moving toward a world where they maintain themselves.
For Australian consumers, this means fewer breakdowns, better performance, and lower costs. For repair professionals, it’s an opportunity to offer smarter, more efficient services. And for the planet, it’s another crucial step toward sustainability.
At Smart Electronix, we’re proud to lead this evolution—combining expert repair with forward-thinking AI insights to keep your devices running at their best, long before trouble begins.