In 2025, fast and stable WiFi is no longer a luxury—it’s essential for work, study, gaming, streaming, and everyday communication. But if your laptop suddenly slows down, drops the connection, or struggles to load even simple webpages, it can be incredibly frustrating.
At Smart Electronix, we repair hundreds of laptops with WiFi issues every year. And while sometimes the cause is a simple software glitch, other times it’s a sign of deeper hardware trouble.
This guide breaks down why your laptop’s WiFi is slow, how to troubleshoot it at home, and when it’s time to seek professional repair.
⭐ 1. The Most Common Reasons Your Laptop WiFi Is Slow
Slow WiFi doesn’t always mean your internet provider is at fault. Many times, the problem lies within the laptop itself or its configuration.
Here are the top causes:
1. Too Much Distance From the Router
WiFi strength decreases with distance. Walls, metal objects, and even furniture can weaken the signal.
2. Overloaded Network
If too many devices are using the same WiFi—phones, TVs, cameras, smart appliances—your connection slows down.
3. Outdated or Corrupted WiFi Drivers
Drivers help the laptop communicate with the WiFi card. If these are outdated or broken, speeds drop instantly.
4. Faulty WiFi Adapter
Your laptop’s internal WiFi card may be:
overheating
failing
losing signal intermittently
physically damaged
This is one of the most common repairs we perform at Smart Electronix.
5. Malware or Background Programs
Hidden programs consume bandwidth silently.
6. Router Compatibility Issues
New laptops (WiFi 6/6E/7) struggle when paired with older routers.
7. DNS Problems
Slow DNS servers equal slow page loading, even if the internet is fast.
8. Interference from Other Devices
Microwaves, Bluetooth devices, cordless phones, and neighboring WiFi networks can cause signal drops.
9. Thermal Throttling
If your laptop overheats, it may reduce WiFi performance to protect internal components.
10. Aging Hardware
Older laptops simply lack the modern WiFi standards needed for today’s high-speed internet.
⭐ 2. Quick Home Troubleshooting Guide (Before Calling a Technician)
Here are Smart Electronix’s expert-approved steps to diagnose slow WiFi at home:
Step 1: Test Your Internet Speed
Use:
Fast.com
Speedtest.net
Compare results on your phone vs. laptop. If the phone is fast and laptop is slow → the issue is inside the laptop.
Step 2: Restart Your Router & Laptop
A basic reboot can fix:
IP conflicts
memory leaks
stuck processes
channel congestion
It’s simple, but effective.
Step 3: Forget & Reconnect to WiFi
This clears corrupted settings stored in the network profile.
Step 4: Update Your WiFi Driver
On Windows:
Open Device Manager
Go to Network Adapters
Select your WiFi card
Choose Update Driver
On macOS, updates come via system updates.
Step 5: Change WiFi Band (2.4 GHz vs 5 GHz vs 6 GHz)
2.4 GHz = longer range, slower speed
5 GHz = faster, shorter range
6 GHz (WiFi 6E/7) = ultra-fast, very limited range
If your laptop supports 5 GHz or 6 GHz, switch to it.
Step 6: Scan for Malware
Viruses and hidden miners can severely slow your WiFi.
⭐ 3. Hardware Problems That Require Professional Repair
Sometimes the issue is beyond DIY fixes.
At Smart Electronix, these are the problems we diagnose most often:
1. Faulty WiFi Card (Adapter Failure)
Physical WiFi components can fail due to:
voltage surges
internal heat
dust buildup
manufacturing defects
Repair: We replace the WiFi card with a high-quality, compatible module.
2. Damaged Antenna Cable
Thin internal antenna cables can get:
torn
bent
misaligned
Symptoms include weak signal even near the router.
3. Motherboard Connection Fault
This happens when:
the WiFi module connector burns
the board has power rail issues
liquid damage affects the WiFi IC
Smart Electronix uses micro-soldering tools to repair these precisely.
4. Overheating Laptop
If your laptop gets too hot:
the WiFi performance drops
network card slows down
CPU throttles
system becomes unstable
We provide:
✓ deep cleaning ✓ thermal paste replacement ✓ fan service
which often restores full WiFi speed.
5. Outdated WiFi Technology
Older laptops using WiFi 4/5 cannot handle 2025 internet speeds. We upgrade compatible models to:
WiFi 6
WiFi 6E
WiFi 7 (where supported)
This is one of the best performance upgrades for low-cost laptops.
⭐ 4. When to Bring Your Laptop to Smart Electronix
You should contact a professional repair technician if:
WiFi card keeps disconnecting
Speeds remain slow even after resets
Laptop cannot detect WiFi at all
Signal strength is extremely poor
WiFi shuts off when the laptop warms up
You recently dropped/spilled liquid on the device
Apps/games lag even on fast internet
These signs often indicate internal hardware issues.
⭐ 5. How Smart Electronix Fixes WiFi Problems
We follow a precise diagnostic process:
🔧 Step 1: Hardware & Software Analysis
We test:
driver integrity
OS configuration
power rails
antenna performance
WiFi card health
🔧 Step 2: Thermal Evaluation
We check for overheating and airflow problems.
🔧 Step 3: Internal Cleaning
Dust and debris are removed using professional tools.
🔧 Step 4: Component Repair or Replacement
If needed, we replace:
WiFi module
antenna
connectors
motherboard circuits
🔧 Step 5: Performance Testing
We check:
Mbps speed
signal stability
range performance
multi-device performance
This ensures your WiFi is fully restored.
⭐ 6. Tips to Keep Your WiFi Fast Year-Round
Follow these Smart Electronix recommendations:
Keep your router high and unobstructed
Don’t block your laptop’s vents
Clean your laptop every 6–12 months
Avoid cheap USB WiFi dongles
Update firmware regularly
Use 5Ghz or 6Ghz when possible
Avoid sitting too far from the router
Use a mesh WiFi system in large homes
These simple habits can drastically improve WiFi reliability.
⭐ Conclusion
Slow WiFi can disrupt your productivity, entertainment, and communication—but most issues are fixable. From outdated drivers and overheating to antenna damage or failing WiFi cards, your laptop may simply need a tune-up or a small hardware repair.
At Smart Electronix, we specialise in diagnosing and repairing laptop WiFi problems for users across Australia. Whether your speeds are dropping, your laptop constantly disconnects, or your network simply feels slower than it should, our technicians can restore your connection quickly and safely.
Fast WiFi starts with a healthy laptop—let Smart Electronix keep yours running at full speed.
Gaming has never been bigger in Australia. Whether it’s late-night FIFA sessions, open-world adventures, or competitive online matches, consoles are now a core part of home entertainment. But as gaming hardware becomes more advanced, packed with high-performance chips, cooling systems, SSDs, and complex firmware, repair needs have increased too.
At Smart Electronix, we see hundreds of consoles every year—PlayStation, Xbox, Nintendo Switch, handhelds, and even retro units. And one trend is clear: modern gaming consoles are more powerful, but their repair challenges are also more complex.
If you’re an Aussie gamer wanting to protect your investment, avoid costly breakdowns, and choose the right repair service, here’s everything you need to know.
1. Why Gaming Consoles Are Breaking Down More Often in 2025
Today’s consoles are essentially specialised computers—equipped with powerful CPUs, GPUs, custom motherboards, NVMe SSDs, and highly sensitive cooling systems. This complexity means more potential failure points.
Common Reasons Consoles Fail
1. Overheating (The #1 Problem in Australia)
Australia’s climate doesn’t help. Hot summers + poor ventilation = thermal stress. Dust accumulation inside PS5s, Xbox Series X units, and Switch docks is one of the biggest contributors to system crashes or shutdowns.
2. Firmware & Software Failures
Automatic updates sometimes corrupt the system, causing:
boot-looping
software crashes
account syncing errors
games refusing to launch
Smart Electronix technicians see firmware issues weekly—especially after major OS updates.
3. HDMI Port Damage
A very common issue. Heavy cables, accidental kicks, or too-tight setups can bend or break the HDMI port. PS5 and Xbox Series consoles are especially sensitive.
4. SSD or Storage Failures
Game sizes are huge. Constant writes/reads on NVMe drives can cause slow performance or even SSD failure.
5. Power Supply Problems
Sudden shutdowns, storms, and unstable home electricity can damage internal power boards.
6. Controller Drift & Connectivity Issues
Nintendo Joy-Cons, PS5 DualSense, and Xbox controllers all suffer from analog drift, stick wear, or internal sensor damage.
2. Signs Your Gaming Console Needs Repair
If you’re unsure whether your console needs servicing, look out for these symptoms:
Loud fan noises
Overheating after short play sessions
Visual glitches or black screens
Random shutdowns
No display output
Games crashing frequently
Controller inputs acting unpredictable
Reduced storage performance
Slow boot time
Error messages after updates
The earlier you address these, the cheaper the repairs usually are.
3. The Most Common Console Repairs in Australia
Here is a breakdown of the repairs Aussies request the most in 2025:
🔧 1. Deep Cleaning & Thermal Paste Replacement
Dust and aging thermal paste make consoles run hot. Replacing these can improve:
performance
fan noise
lifespan
reliability
This is crucial for PS4, PS5, and Xbox One/Series units.
🔧 2. HDMI Port Replacement
A precise micro-soldering job. Smart Electronix uses high-quality ports to prevent repeated failures.
🔧 3. SSD Replacement or Upgrade
Especially for:
PS5
Xbox Series X
PS4 (HDD → SSD upgrade)
Nintendo Switch
Faster SSD = smoother gameplay and longer console life.
🔧 4. Power Supply Repair
If your console doesn’t turn on or shuts down unexpectedly, this is likely.
🔧 5. Controller Repairs (Stick Drift Fixes)
Joy-Con drift is massive in Australia. PS5 triggers also frequently break.
🔧 6. Firmware Recovery
If your console is:
bricked
stuck in a loop
stuck on a safe mode screen
Smart Electronix can restore the OS safely.
4. Should You Repair or Replace Your Console?
Many Australians assume repairs are more expensive than new consoles—but that’s not always true.
When Repair Is Better
The issue is HDMI, fan, SSD, HDMI, or PSU-related
Your PlayStation/Xbox is no longer in warranty
The cost is under 40–50% of replacement
You have digital games tied to your account
When Replacement Makes Sense
Motherboard is completely dead
Liquid damage is severe
Multiple components failed at once
Repair cost is too high compared to a new unit
Smart Electronix always provides transparent diagnosis so you can choose wisely.
Want your console to last? Follow these essential tips:
1. Keep It in a Well-Ventilated Space
Never place your console inside closed cabinets.
2. Clean It Every 6–12 Months
Dust kills consoles slowly.
3. Use a Surge Protector
Australian storms and unstable voltage can easily fry power supplies.
4. Don’t Move the Console While It’s On
This can damage the internal disk (especially older consoles).
5. Update Carefully
Avoid interrupting firmware updates.
6. Use High-Quality HDMI Cables
Cheap cables cause port strain and display issues.
7. Avoid Third-Party Charging Docks
Especially for Nintendo Switch—many cheap docks cause motherboard damage.
7. Why Choose Smart Electronix for Console Repairs?
Smart Electronix is trusted across Australia for reliable and premium device repairs.
What Makes Us Different?
Certified console technicians
Original-grade spare parts
Expert micro-soldering
Transparent pricing
Fast turnaround
Detailed diagnostic reporting
Repairs for PS5, PS4, Xbox Series X/S, Xbox One, Switch, Steam Deck & more
Our goal is simple: keep your gaming experience smooth, safe, and long-lasting.
Final Thoughts
Gaming consoles are more advanced—and more fragile—than ever. From overheating to firmware glitches and HDMI port damage, Australian gamers face unique repair challenges in 2025. But with the right technicians and proper care, your console can easily last years longer than expected.
Smart Electronix is here to ensure your gaming never stops.
n 2025, most Australians rely on their laptops daily — for work, study, entertainment, remote meetings, and more. But as laptops age, one issue tends to creep up unnoticed: firmware bloat. Unlike software bloat (apps slowing down your system), firmware bloat happens at a much deeper level, silently affecting system performance, stability, and even boot time.
At Smart Electronix, we have seen a rising number of older laptops struggling because of unnecessary or poorly optimized firmware updates. This blog explores why firmware bloat happens, how it affects older devices, and what you can do to restore speed and performance.
⚠️ 1. What Is Firmware Bloat?
Firmware is the low-level code that lives in your laptop’s BIOS or UEFI. It controls:
Boot processes
Hardware communication
Security features
Power management
Device initialization
Firmware bloat occurs when:
Manufacturers add new features older hardware cannot fully support
BIOS updates become larger and more complex
Security patches accumulate over years
Features from newer devices are backported unnecessarily
This added weight increases the workload on older CPUs, memory controllers, and chipsets — resulting in slowdowns that many users mistake for “old hardware.”
🐢 2. Signs Your Laptop Is Suffering from Firmware Bloat
If your laptop is 4–10 years old, you might notice:
▪️ Slower boot times
Instead of starting within 10–15 seconds, it now takes 45 seconds or more.
▪️ Fans running constantly
Firmware bloat can interfere with thermal management, making your laptop run hotter.
▪️ Freezing or random restarts
Certain bloated firmware versions are incompatible with older RAM or chipsets.
▪️ Lag when waking from sleep mode
UEFI power sequences may struggle due to excess instructions.
▪️ Peripheral or port issues
Thunderbolt, USB, or internal sensors may stop working after newer firmware is installed.
These problems aren’t caused by Windows or apps — they originate before the operating system even loads.
🧠 3. Why Firmware Bloat Affects Older Hardware More
Older laptops have:
Slower processors
Limited memory bandwidth
Older chipsets
Outdated embedded controllers (EC)
Less efficient storage performance
When they’re forced to run firmware designed for newer, more powerful hardware, they struggle.
Manufacturers often release universal firmware updates, combining support for multiple device generations. While great for newer laptops, older systems become overloaded.
🔍 4. How Manufacturers Contribute to Firmware Bloat
Some causes include:
1. Security Patch Overload
Each vulnerability patch adds code. Over time, this grows significantly.
2. Universal Firmware Bundles
One update covering 5-10 hardware versions increases size and complexity.
3. Feature Additions Unnecessary for Older Models
For example, modern sleep states or virtualization enhancements may not be needed on a 2015 laptop.
4. Forced Updates via Windows Update
Many users unknowingly install BIOS updates automatically.
5. Chipset Driver Conflicts
Firmware bloat can break compatibility with older embedded controllers.
Because firmware loads first, any inefficiency trickles down to the entire system experience.
🔧 5. How to Fix Firmware Bloat on Older Laptops
The good news? You can reverse or reduce the effects with the right steps.
1️⃣ Roll Back to a Stable Firmware Version
Many laptops perform best on older, leaner firmware versions.
Smart Electronix often restores:
Pre-2020 BIOS versions
Lightweight UEFI builds
Manufacturer-recommended legacy firmware
Rolling back requires caution — we do it using professional tools to avoid bricking the device.
2️⃣ Disable Unnecessary BIOS Features
Modern firmware adds many features you may never use, such as:
TPM attestation
Virtualization extensions
Fast Boot / Secure Boot modes
Advanced power states
Thunderbolt security layers
Turning off unused features immediately reduces boot time and improves stability.
3️⃣ Reset BIOS Settings to Default
Years of updates and changes build hidden conflicts. A BIOS reset:
Clears corrupted tables
Fixes fan control bugs
Restores stable hardware initialization
Many older laptops become much faster after a clean firmware reset.
4️⃣ Reflash the Firmware Using a Clean Image
Professional reflashing removes:
Corrupted modules
Conflicting patches
Manufacturer bloat
Redundant security hooks
Smart Electronix uses industry-grade programmers to safely rewrite and verify firmware integrity.
5️⃣ Update Chipset Drivers After Firmware Rollback
Sometimes firmware bloat causes driver conflicts. Installing chipset drivers that match the firmware version ensures:
Cooler temperature
Faster performance
Reduced freezing
This pairing is essential for long-term stability.
6️⃣ Improve Thermal Management
Firmware bloat often disrupts thermal policies. Fixing it may require:
Reapplying high-quality thermal paste
Cleaning fans
Replacing aged thermal pads
Updating EC (embedded controller) profiles
These steps restore proper cooling, preventing thermal throttling.
7️⃣ Replace the SATA or NVMe Drive
Older firmware + aging storage = severe slowdowns. A clean installation on a new SSD paired with optimized firmware dramatically improves performance.
🇦🇺 6. How Smart Electronix Fixes Firmware Bloat for Aussie Users
We specialize in:
Firmware rollback & recovery
BIOS chip flashing
EC reprogramming
Port & power management fixes
Thermal profile tuning
Driver compatibility matching
Our technicians use advanced diagnostic tools to determine the exact cause of firmware-related slowdowns — ensuring your device becomes fast, stable, and reliable again.
Whether you’re a student, remote worker, or business professional, fixing firmware bloat often restores 3× faster performance on older laptops.
🧩 7. Should You Avoid Firmware Updates Altogether?
Not entirely — but you should be cautious.
Update Firmware Only If:
✔ It fixes a major security issue ✔ It addresses a problem you are already experiencing ✔ The manufacturer recommends it for your exact model
Avoid Updating If:
✘ Your laptop is older than 5 years ✘ The update adds new features irrelevant to you ✘ Your current BIOS is stable and fast
When unsure, Smart Electronix offers free firmware compatibility checks to help you decide safely.
✅ 8. Final Thoughts
Firmware bloat is one of the most overlooked reasons older laptops slow down. While the hardware may still be perfectly usable, excessive or unnecessary firmware updates can load the system with tasks it was never designed to handle.
By identifying the symptoms early and applying the right fixes — from firmware rollbacks to BIOS optimization — you can breathe new life into your laptop.
At Smart Electronix, we’re committed to helping Australians maintain, optimize, and repair their devices with expert care. If your laptop feels slower after updates, freezes randomly, or takes too long to boot, firmware bloat might be the silent culprit — and we’re here to help.
Smartphones are essential in 2025. From work to entertainment, social networking, and personal management, we rely on these devices constantly. But even the most advanced devices are not immune to accidental drops, battery wear, screen scratches, and minor hardware issues.
While major repairs should be handled by professionals like Smart Electronix, having a DIY home repair kit can help you manage small, non-critical issues safely. With the right tools, preparation, and knowledge, you can fix minor problems without voiding warranties or causing damage.
This guide will walk you through what you need, how to set it up, and safety tips to create a smartphone repair toolkit that every Aussie tech enthusiast should have.
🔧 1️⃣ Why a DIY Smartphone Repair Kit Matters
A well-prepared kit helps you:
Fix minor issues quickly — like a loose charging port, cracked screen protector, or battery replacement.
Save money — by handling small repairs at home instead of paying for every minor service.
Prevent damage — using proper tools reduces the risk of scratches or component breakage.
Stay prepared — sudden problems like stuck SIM trays or jammed buttons can be handled immediately.
In 2025, with foldable devices, USB-C ports, and advanced batteries, having the right tools is more important than ever.
🧰 2️⃣ Essential Tools for Your DIY Smartphone Repair Kit
Here are the basic and advanced tools you’ll need:
Basic Tools
Precision Screwdriver Set
Includes Phillips, Pentalobe, Torx, and flathead bits.
Essential for opening screws on iPhones, Androids, and laptops.
Plastic Pry Tools / Spudgers
Prevent scratches on screens and frames.
Useful for separating glued screens safely.
Tweezers
Fine-tip, anti-static tweezers for handling small components like screws and connectors.
SIM Card Ejector Tool
Essential for removing SIM or microSD cards safely.
Suction Cup
Helps lift glass screens or back panels without cracking them.
Microfiber Cloth
For cleaning screens, lenses, and components without leaving scratches.
Intermediate Tools
Anti-Static Mat & Wrist Strap
Protects sensitive circuits from electrostatic discharge (ESD).
Essential for opening your smartphone safely.
Plastic Opening Picks
Used for separating tightly sealed screens.
Reduces the risk of damaging thin OLED or foldable panels.
Precision Knife / Razor Blade
Helps remove stubborn adhesive or protectors carefully.
Advanced Tools
Heat Gun / iOpener
Softens adhesive on screens and batteries.
Prevents cracking or warping while opening devices.
Magnetic Mat / Screw Organizer
Keeps tiny screws in place and prevents loss.
Battery Tester / Multimeter
Measures voltage, continuity, and battery health.
Spare Replacement Parts
Screens, charging ports, buttons, adhesive strips, and batteries.
Only purchase OEM or verified third-party parts.
⚠️ 3️⃣ Safety Tips for Home Repairs
Even small DIY repairs can cause damage or safety risks. Follow these guidelines:
Turn off your phone completely before opening.
Remove the battery if possible, or disconnect it safely.
Work in a clean, dust-free area with good lighting.
Avoid metal tools near exposed circuits to prevent short-circuits.
Use anti-static wrist straps to protect chips and boards.
Handle screens and glass parts carefully to prevent cuts.
Do not attempt advanced repairs like motherboard replacement or liquid damage restoration at home — leave these to professionals.
🛠️ 4️⃣ How to Organize Your DIY Repair Kit
Organization is key for efficiency:
Use a small toolbox or drawer organizer with compartments.
Label tools and spare parts to avoid confusion.
Keep delicate tools separate to prevent damage.
Regularly check that your kit has no missing or worn-out tools.
At Smart Electronix, we recommend having one kit per device type — especially if you own multiple smartphones or tablets.
🔍 5️⃣ Common DIY Smartphone Repairs You Can Safely Do at Home
Here are some examples of repairs you can attempt safely:
Screen Protector or Glass Replacement
Replace cracked glass or tempered protector using suction cups, pry tools, and adhesive strips.
Battery Replacement
Swap out old batteries with OEM replacements using heat tools and spudgers.
Charging Port Cleaning or Replacement
Remove lint or debris from USB-C or Lightning ports using soft brushes.
SIM Tray Replacement or Adjustment
Easy to do with an ejector tool and tweezers.
Button or Housing Cleaning
Remove dirt from volume, power, or home buttons to restore proper functionality.
Pro Tip: Always test functionality before sealing the device fully.
💡 6️⃣ When to Seek Professional Help
Some repairs should never be DIY:
Motherboard issues or short circuits
Water damage beyond minor exposure
Foldable phone internal repairs
Camera or lens module replacement in high-end devices
Firmware bricking or update-related failures
At Smart Electronix, our certified technicians can handle these safely, ensuring your device is restored without further damage.
🌟 7️⃣ Smart Electronix Tips for Maintaining Your DIY Kit
Update your toolkit every 12 months with fresh adhesive, thermal pads, and tools.
Invest in high-quality parts — cheap tools or knock-off replacements can cause permanent damage.
Keep a reference guide or tutorial bookmarks for model-specific instructions.
Use anti-static storage bags for delicate components like motherboards or screens.
✅ 8️⃣ Final Thoughts
A DIY smartphone repair kit can save you time and money — but only if used wisely. Small fixes, maintenance tasks, and cleaning are perfect DIY projects. But when it comes to complex repairs, folded devices, water damage, or firmware issues, professional services are the safest choice.
Smart Electronix helps Australians balance DIY convenience with professional support. From repair tips to certified services, we ensure your smartphones stay functional, safe, and long-lasting.
Start with the right tools, follow safety protocols, and make your DIY repair kit a reliable extension of your tech care routine.
In 2025, choosing a new laptop isn’t just about processor speed, RAM, or storage. Connectivity has become equally crucial — especially when deciding between USB-C and Thunderbolt ports. Both standards promise fast data transfer, high-quality video output, and versatile charging. But which one is best for your workflow, gaming setup, or professional projects?
At Smart Electronix, we often get questions from Australian laptop buyers about USB-C vs Thunderbolt. This guide breaks down the differences, benefits, and practical considerations for 2025, helping you make an informed choice.
⚡ 1️⃣ Understanding the Basics: USB-C vs Thunderbolt
USB-C
A universal port standard introduced in 2014
Supports data transfer, video output, and charging
Commonly found on mid-range and budget laptops
Speeds vary based on USB version:
USB 3.2 Gen 1: 5 Gbps
USB 3.2 Gen 2: 10 Gbps
USB4: Up to 40 Gbps
USB-C is versatile, widely compatible, and becoming standard on nearly all laptops in 2025.
Thunderbolt
Developed by Intel (Thunderbolt 4 latest version)
Uses a USB-C physical connector but adds higher speed and features
Thunderbolt is ideal for professionals, content creators, and gamers who need maximum speed and performance.
🔍 2️⃣ Key Differences Between USB-C and Thunderbolt in 2025
Feature
USB-C
Thunderbolt 4
Data Speed
Up to 40 Gbps (USB4)
Up to 40 Gbps
Video Output
Single 4K
Dual 4K or 8K
External GPU Support
Limited
Full PCIe support
Daisy Chaining
Rare
Yes, up to 6 devices
Charging Power
Up to 100W
Up to 100W
Compatibility
Very high
Moderate, depends on device
While both use the same USB-C port, Thunderbolt adds extra power, versatility, and high-end features that most standard USB-C devices don’t support.
💻 3️⃣ Why USB-C Still Makes Sense
Even in 2025, USB-C remains a strong choice for everyday laptop users:
Budget-Friendly: Laptops with standard USB-C ports cost less than Thunderbolt-enabled models.
Universal Compatibility: Works with chargers, hubs, docks, and accessories without extra adapters.
Adequate Performance: USB 3.2 Gen 2 or USB4 provides fast file transfers for documents, media, and most gaming needs.
Power Delivery: Supports fast charging up to 100W, enough for most laptops.
If you primarily browse, stream, work in office apps, or do light content creation, USB-C is sufficient.
⚡ 4️⃣ Why Thunderbolt Is Worth the Investment
Thunderbolt 4 or Thunderbolt 3 shines for power users:
Content Creators & Editors: Transfer large 4K/8K videos or RAW photo files in seconds.
Gamers: Connect external GPUs to enhance gaming performance.
Multi-Monitor Setups: Daisy-chain multiple high-res monitors for productivity.
Professional Storage Solutions: Thunderbolt allows ultra-fast access to SSD arrays.
While Thunderbolt laptops may cost more, the speed, power, and expandability justify the price for high-demand users.
🔧 5️⃣ Practical Considerations for Aussies Buying Laptops in 2025
Check Your Accessories
USB-C hubs are widely available and cheaper.
Thunderbolt docks cost more but support more devices.
Consider Laptop Port Count
A single Thunderbolt port can replace multiple USB-C ports and HDMI connections.
Think Long-Term
Thunderbolt adds future-proofing for new monitors, external GPUs, and fast storage.
Repair & Compatibility
Both USB-C and Thunderbolt are robust, but damaged Thunderbolt ports are more expensive to repair due to their complexity.
At Smart Electronix, we handle USB-C and Thunderbolt repair cases efficiently, including port replacement and board-level fixes.
📈 6️⃣ USB-C + Thunderbolt Hybrid: The Best of Both Worlds
Many 2025 laptops now support both USB-C and Thunderbolt 4, giving users:
Standard USB-C for everyday devices and charging
Thunderbolt for high-speed storage, displays, and GPUs
This hybrid approach maximizes flexibility while reducing repair risk — since Thunderbolt ports are sometimes more sensitive and costly to replace.
🔍 7️⃣ Troubleshooting USB-C & Thunderbolt Issues
Common problems we see in Australia include:
Loose or damaged ports
Inconsistent charging
Devices not detected by docks
Thunderbolt firmware incompatibility
High-speed data drops
At Smart Electronix, our certified technicians use:
Professional diagnostic tools for Thunderbolt and USB-C ports
Board-level inspection
Port replacement services
Firmware updates for Thunderbolt controllers
We ensure your connectivity works reliably while protecting expensive laptops from further damage.
✅ 8️⃣ Conclusion: Which One Should You Choose in 2025?
USB-C: Perfect for everyday users who need flexible charging, video output, and general data transfer. Affordable and widely compatible.
Thunderbolt 4: Ideal for power users, creative professionals, and gamers. Offers high-speed transfers, multi-display support, and external GPU compatibility.
Hybrid laptops: Provide maximum flexibility with both USB-C and Thunderbolt, future-proofing your device and minimizing repair risks.
At Smart Electronix, we help Australians choose, maintain, and repair laptops with USB-C and Thunderbolt ports. Whether it’s port damage, connectivity issues, or firmware updates, our expert technicians ensure your device performs at peak efficiency.
📍 Smart Electronix — Your Australian Expert for Laptop Connectivity & Repairs
🛠 USB-C & Thunderbolt Diagnostics | Port Repairs | Data Transfer Solutions | Laptop & Peripheral Support | Australia-Wide
Foldable smartphones have quickly moved from futuristic concepts to mainstream devices in Australia. Brands like Samsung, Huawei, Oppo, and Motorola have pushed foldable technology forward with sleek hinges, flexible OLED displays, and multi-angle folding frames. But as exciting as foldables are, they also bring an entirely new set of repair challenges — and often, higher costs.
At Smart Electronix, we’ve seen a fast rise in foldable phone repair cases across 2024–2025. Whether it’s hinge wear, screen creasing, broken inner displays, or software glitches linked to foldable functionality, these devices require more expertise and care than traditional smartphones.
This blog breaks down why foldables are harder to repair, common damage types, and how Aussie consumers can get cost-effective fixes without risking more damage.
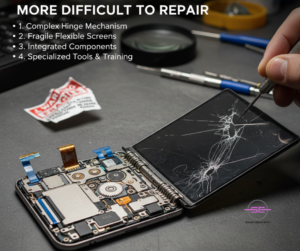
🔧 Why Foldable Phones Are More Difficult to Repair
Foldable phones are built with advanced engineering that differs entirely from flat smartphones. Three key components make repairs tricky:
1. Flexible OLED Displays Are Extremely Sensitive
Foldable screens are ultra-thin and layered with flexible OLED panels, polymer substrates, sensors, and protective films.
Because of this:
They crease easier
They crack without visible external marks
Pressure damage is common
Replacing them costs significantly more
A standard smartphone screen might cost between $200–$350, but a foldable display replacement can range from $600 to over $1,200 depending on the model.
2. The Hinge Mechanism Is Complex
The hinge is the “heart” of a foldable phone — and also one of the first parts to suffer damage.
Common hinge issues include:
Grinding or stiffness
Misalignment
Dust or lint inside the hinge
Broken multi-gear hinge components
Repairing a hinge requires micron-level precision and often complete device disassembly. Cheap repair attempts can make the problem worse.
3. Dual-Battery Setup Means Double Risk
Most foldables use two or three battery cells balanced by software. If one fails:
The phone may not open fully
It may power off randomly
Overheating risks increase
Battery issues in foldables require specialised handling to avoid damaging the flexible display during disassembly.
📉 Most Common Foldable Phone Repair Cases in Australia (2025 Trends)
Here are the top problems reported by Aussie foldable users this year:
1. Inner Screen Damage
The soft internal layer is easily affected by:
Accidental pressure
Fingernail scratches
Screen protectors not meant for foldables
Small debris getting trapped in the fold
Once damaged, the display often spreads cracks or dead pixels quickly.
2. Hinge Wear & Tear
Especially common on Samsung Galaxy Z Fold and Flip models used daily over 12–24 months.
Symptoms include:
Clicking noises
Screen bubbling near the fold
Difficulty opening the device
Half-open locking issues
3. Outer Display Cracks
Flexible outer screens are still more fragile than traditional glass. A minor corner impact can damage the entire unit.
4. Software Glitches Linked to Fold Modes
These include:
Multi-window issues
Lag when switching from folded to tablet mode
Camera app freezing while opening
Display orientation bugs
Software is deeply linked to the folding hardware — so glitches often require a hardware check too.
5. Battery Imbalance
If battery health differs between the two cells, the phone may:
Drop charge suddenly
Shut down mid-use
Overheat around the hinge section
Regular battery diagnostics are essential for foldable owners.
💸 Why Foldable Phone Repairs Are More Expensive in Australia
Several factors contribute to higher repair prices:
Specialised parts (hinges, flex screens, multi-layer panels)
Limited availability of components in Australia
Advanced skills required for safe disassembly
Manufacturer restrictions on third-party repairs
High import costs for replacement parts
This is why choosing an expert repair shop matters — one mistake during hinge opening or screen lifting can brick the entire device.
🛠️ Cost-Effective Fixes for Foldable Phones in Australia
At Smart Electronix, we focus on helping customers save money without compromising reliability. Here’s what you can do to reduce repair costs in 2025:
🌱 1. Consider Refurbished OEM Parts
For many foldables, refurbished original screens and hinges can be:
30–40% cheaper
Just as reliable as brand-new
Fully compatible with your model
This is a safe option when sourced from trusted providers.
🔍 2. Get a Diagnostic Check Before Approving Repairs
Many foldable issues are misdiagnosed, causing unnecessary part replacements.
A full diagnostic can help identify:
Whether the hinge or screen is truly the problem
Whether a firmware update is causing display glitches
If a battery imbalance is fixable without replacement
Smart Electronix always runs a detail-oriented inspection before repair.
🛡️ 3. Install Only Approved Foldable-Safe Screen Protectors
Many third-party protectors damage foldable screens by:
Adding pressure
Creating bubbles at the fold
Causing adhesive incompatibility
Using certified protectors extends screen life and reduces repair frequency.
🔧 4. Maintain Your Hinge Properly
Good practices include:
Avoiding pocket lint
Keeping the device away from sand/dust
Opening and closing using both hands
Not snapping the fold too quickly
Proper care dramatically extends hinge lifespan.
💰 5. Compare Repair Prices and Ask for OEM Quality Assurance
Not all repair shops are equal. Ask:
Are the parts genuine or OEM-grade?
Is there a warranty?
Do technicians specialise in foldable repairs?
Smart Electronix uses high-quality components to ensure long-term performance.
Foldable smartphones represent a revolution in mobile design — but also in repair complexity. Whether you’re dealing with a damaged inner screen, hinge issues, battery problems, or display glitches, Smart Electronix provides:
Expert foldable diagnostics
OEM and high-grade replacement parts
Transparent pricing
Quick repair turnaround
Warranty-backed service
We help Australians get the most out of their premium devices without paying excessive repair fees.
✔️ Final Thoughts
Foldable phones are the future — but they need future-ready repair specialists. As these devices continue evolving through 2025, understanding their challenges helps you protect your investment and avoid unnecessary repair costs.
If your foldable is showing signs of wear, don’t wait until the damage spreads. Smart Electronix is here to help you keep your device performing like new.
Laptops in 2025 are more powerful, more compact, and more intelligent than ever — but they also generate more heat. With high-performance processors, AI-accelerated tasks, advanced GPUs, and ultra-thin designs, thermal management has become one of the most critical aspects of a laptop’s health.
At Smart Electronix, we’ve seen a growing number of repair cases related to overheating, thermal throttling, and heat-induced component failure. Most of these issues could have been prevented with a proper thermal management audit — a step-by-step check to ensure your laptop is cooling properly.
Whether you’re a student, gamer, content creator, or business professional, keeping your laptop running cool is essential for performance, longevity, and safety.
This guide walks you through how to audit your laptop’s thermal management in 2025, what issues to look for, and when to seek professional help.
🧊 1️⃣ Why Thermal Management Matters More in 2025
Today’s laptops pack powerful components that can reach high temperatures fast:
AI-accelerated CPUs and NPUs
Next-gen GPUs
High-speed SSDs
Ultra-dense motherboards
Compact chassis with limited ventilation
When a laptop overheats, it triggers thermal throttling — a safety mechanism where performance is reduced to avoid damage.
But unresolved overheating can lead to:
CPU or GPU degradation
Rapid battery wear
SSD lifespan reduction
Motherboard damage
Sudden shutdowns
Increased repair costs
A thermal audit helps you catch issues before they become expensive repair cases.
🖥️ 2️⃣ Step-by-Step Guide to Auditing Your Laptop’s Thermal Health
Here’s how you can perform a complete thermal audit in 2025.
🔍 Step 1: Monitor Real-Time Temperatures
Install a reliable temperature-monitoring tool such as:
Your laptop’s environment affects thermal performance:
❗ Don’t use your laptop on:
Beds
Sofas
Pillows
Rugs
These block airflow and trap heat.
Ideal conditions:
Hard, flat surface
Room temperature 18°C–25°C
Ambient dust control
Adequate spacing around vents
🛠️ Step 8: Check for Software or Firmware Errors
Sometimes overheating is caused by:
Driver conflicts
Firmware bugs
BIOS misconfiguration
Malware overloading the CPU
Background processes stuck at 100%
Perform:
BIOS/UEFI inspection
Fan curve checks
Driver updates
Malware scans
Power plan optimization
If firmware is misconfigured, Smart Electronix can reflash or recalibrate your thermal controls.
⚠️ 3️⃣ Warning Signs Your Laptop Needs Immediate Professional Service
Bring your laptop in if you notice:
Random shutdowns
USB ports or keyboard getting hot
Burning smell
Fan running at full speed all the time
Battery swelling or overheating
Complete thermal throttling during normal use
These symptoms mean your device is at risk of permanent damage.
🛠️ 4️⃣ How Smart Electronix Helps You Fix Thermal Issues Safely
Our technicians use advanced diagnostic tools to:
Perform full thermal audits
Replace dried thermal paste
Clean internal dust blockages
Repair or replace faulty fans
Recalibrate thermal firmware controls
Fix heat pipe or vapor chamber failures
We ensure:
Lower temperatures
Better performance
Longer device lifespan
Safe, stable heat management
Every service is backed by our customer guarantee.
💬 Final Thoughts
Your laptop’s thermal health directly impacts its lifespan, speed, and overall performance. In 2025, with more powerful components and slimmer designs, overheating is more common than ever — but also more preventable.
A proper thermal audit can save you from:
Costly repairs
Sudden shutdowns
Component failures
Data loss
Reduced device lifespan
At Smart Electronix, we help Australians stay ahead of thermal issues with expert audits, repairs, and long-term cooling solutions.
📍 Smart Electronix — Keeping Laptops Cool, Fast & Future-Ready.
🛠 Laptop Repairs | Thermal Paste Replacement | Deep Cleaning | Cooling System Repair | Australia-Wide
Firmware updates are supposed to improve your device — not break it. Yet in recent years, more Australians have been walking into repair shops with phones, laptops, tablets, and smart devices that suddenly stopped working after a routine update.
At Smart Electronix, we’ve seen a significant rise in repair cases directly linked to faulty updates, incomplete installations, and corrupted firmware. While updates are crucial for security and performance, they can also introduce serious issues if something goes wrong in the process.
This blog breaks down why firmware updates are causing more repair cases, what consumers should watch out for, and how our technicians safely restore devices when updates fail.
⚙️ 1️⃣ What Exactly Is Firmware — and Why Does It Matter?
Firmware is the low-level code that controls your device’s hardware. Unlike apps or operating systems, firmware tells your device’s components how to work:
How your battery charges
How your touchscreen responds
How your camera focuses
How your wireless antennas connect
How your processor manages performance
When firmware gets corrupted, outdated, or improperly installed, your device may not function properly — or may not power on at all.
Updates should improve stability, but one small glitch can cause major damage.
🧨 2️⃣ Why Firmware Updates Are Causing More Repair Cases in 2025
📌 Reason 1: Devices Are Becoming More Complex
Modern phones and laptops rely on multiple interconnected firmware layers:
Battery management firmware
Display firmware
Camera module firmware
Motherboard firmware
Security firmware
5G/WiFi/Bluetooth module firmware
If one layer fails during an update, the whole device can malfunction.
Firmware Problems? Smart Electronix Has the Fix
📌 Reason 2: Updates Are Bigger and More Frequent
Manufacturers push out constant patches for:
Security vulnerabilities
AI model improvements
Battery optimization
Compatibility with new apps
Hardware calibration
Larger updates = Higher risk of failure.
📌 Reason 3: Bad Battery Health During Update
If a device shuts off mid-update due to:
Low battery
Sudden power loss
Faulty charging port
The firmware installation can get interrupted — leading to boot loops, bricking, or system corruption.
📌 Reason 4: Global Chip and Model Fragmentation
Different device batches use slightly different:
Chipsets
Modems
Power circuits
Display drivers
A firmware update optimized for one batch may conflict with another.
At Smart Electronix, we’ve seen phones that worked perfectly until the latest patch pushed firmware not suitable for their exact hardware revision.
📌 Reason 5: Wireless Updates Are Less Stable
Most updates happen via WiFi or mobile data. If the connection drops or packets corrupt during installation, the device may fail to boot.
This is one of the most common causes of smartphone repair cases today.
🔥 3️⃣ Common Firmware-Related Problems We See at Smart Electronix
🛑 Boot Loops
Device turns on → logo appears → shuts off → restarts. This cycle continues endlessly due to firmware corruption.
📴 Complete Bricking
The device:
won’t turn on
won’t charge
won’t enter recovery mode
This is the most severe result of a failed update.
📲 Touchscreen Malfunction
Firmware updates affecting display drivers can cause:
ghost touches
dead zones
inaccurate taps
📶 Signal Loss / Network Failure
Updated modem firmware may conflict with:
4G/5G bands
carrier settings
WiFi encryption
Bluetooth drivers
These issues usually surface immediately after an update.
🔋 Battery Drain or Overheating
Faulty power-management firmware can make your device:
drain battery faster
overheat during normal use
shut down unexpectedly
🎥 Camera Failure
Images may appear:
blurry
dark
frozen
stuck on a black screen
This often happens when camera calibration firmware fails.
🧰 4️⃣ How Smart Electronix Repairs Firmware-Related Problems
Firmware repairs require precision, expertise, and the right tools — not simple resets. Here’s how we handle them:
🔧 Step 1: Deep Diagnostic Scan
We use professional-grade tools to:
read firmware status
detect corruption
identify module conflicts
inspect power cycles
analyze boot logs
Safe, Fast, and Reliable Firmware Recovery.
🔧 Step 2: Safe Firmware Reinstallation
We re-flash:
system firmware
modem firmware
bootloader
display driver firmware
battery management firmware
Using secure, risk-free methods.
🔧 Step 3: Chip-Level Evaluation (if needed)
If the update damaged memory chips or controllers, we repair:
eMMC / UFS chips
power ICs
PMIC controllers
charging circuits
Our technicians are trained in micro-soldering and chip-level restoration — something most repair shops don’t offer.
🔧 Step 4: Data Protection & Recovery
Whenever possible, we protect:
photos
videos
contacts
conversations
documents
We understand how valuable your data is.
🔧 Step 5: Update Prevention & Stability Checks
After repair, we ensure:
the device is fully stable
all modules work
the latest SAFE firmware is installed
We also advise customers on how to avoid future firmware issues.
⚠️ 5️⃣ What Users Should Watch Out For Before Updating
Avoid firmware headaches by following these simple precautions:
💡 1. Charge your device above 50% (preferably 80%)
Low battery is one of the top causes of update failure.
💡 2. Use a stable WiFi connection
Avoid updating on mobile data.
💡 3. Don’t interrupt the update
Don’t press buttons, restart, or remove the battery.
💡 4. Avoid early updates
Wait 2–3 days and check online reviews — early updates often carry bugs.
💡 5. Free up storage
Firmware updates need space to install safely.
💡 6. Check compatibility
Older devices may struggle with heavy updates.
💡 7. Disable auto-updates
This prevents updates installing at inconvenient times.
🌟 6️⃣ Why Smart Electronix Is the Best Place for Firmware Repairs
We specialize in:
Firmware corruption recovery
Boot loop fixes
Complete device unbricking
Secure flashing and updating
Chip-level repair
Data protection during repair
Multi-brand firmware diagnostics
With advanced tools and expert technicians, Smart Electronix handles what most repair shops can’t.
🧩 Final Thoughts
Firmware updates are essential — but they’re also becoming one of the leading causes of repair cases worldwide. With increasing device complexity, larger updates, and more firmware layers than ever, even a small glitch can cause major failures.
The good news? Smart Electronix is equipped to fix them all.
Whether your device is stuck in a boot loop, bricked, overheating, or malfunctioning after an update, our team can restore it safely, quickly, and professionally.
The repair industry is entering a new era — one where sustainability and innovation go hand in hand. In Australia and around the world, more consumers are asking the same question:
“Can my device be fixed sustainably without losing performance or quality?”
The answer, thankfully, is yes — thanks to the rise of upcycled spare parts.
At Smart Electronix, we believe in extending the life of devices and protecting the planet. Our approach to sustainable spares ensures that every upcycled part meets strict quality standards — so you get a reliable, long-lasting repair that’s also environmentally responsible.
Let’s explore how upcycled components are reshaping the future of device repair, and why they’re a win for both your wallet and the world.
♻️ 1️⃣ What Are Upcycled Spare Parts?
Upcycled parts aren’t just “used” or “secondhand.” They’re professionally recovered components from non-functional or outdated devices that still have valuable, working elements — such as screens, chips, batteries, or casings.
These parts undergo a strict inspection, testing, and reconditioning process before being reused in repairs.
At Smart Electronix, our certified technicians:
Extract usable parts from devices that can’t be fully restored
Test them under high-performance benchmarks
Sanitize and repackage them for safe reuse
Match them precisely to compatible models
The result? A component that works like new — but costs less and leaves a smaller carbon footprint.
🔋 2️⃣ The Environmental Impact of E-Waste
E-waste is one of the fastest-growing waste streams in the world. Every year, millions of phones, tablets, and laptops end up in landfills — often because of minor issues like cracked screens, damaged ports, or power faults.
By reusing functional components, upcycling:
Reduces landfill waste
Lowers demand for new manufacturing
Cuts down toxic emissions from component production
Preserves rare materials like gold, cobalt, and lithium
In short, each upcycled spare part keeps valuable materials circulating in the economy — a concept known as the circular economy.
At Smart Electronix, we proudly support this model through eco-friendly repair services that prioritize sustainability without sacrificing excellence.
⚙️ 3️⃣ The Smart Electronix Quality Promise
Many consumers worry that using upcycled parts could mean lower quality or reduced device performance. That’s where professional verification makes all the difference.
Our process includes:
✅ Multi-point functionality testing — ensuring the part performs at factory-level efficiency. ✅ Compatibility checks — matching components with precise model versions. ✅ Longevity assurance — only parts that pass extended runtime tests are approved. ✅ Warranty coverage — every upcycled part we install comes with a guarantee.
We never compromise on reliability or safety. If an upcycled part doesn’t meet our internal quality threshold, it doesn’t make it to your device — simple as that.
Your Tech Runs Fast — We Repair Faster.
💡 4️⃣ Why Sustainable Spares Are Gaining Popularity
In 2025, consumers are more eco-conscious than ever — and brands like Smart Electronix are helping lead this cultural shift.
Here’s why upcycled parts are becoming the new normal:
Affordability — Repairs are cheaper without cutting corners.
Availability — In times of global chip shortages, upcycled parts keep repairs moving.
Eco-Responsibility — Customers want sustainable choices that align with their values.
Trust — Certified testing ensures these parts perform as reliably as new ones.
In Australia, this movement also supports local recycling industries and reduces dependency on imported components.
🧩 5️⃣ Common Components That Can Be Upcycled Safely
Not every part is ideal for reuse — but many can be reconditioned with full reliability.
At Smart Electronix, we commonly upcycle and reinstall:
✅ Smartphone & laptop screens (after testing for pixel and touch consistency)
✅ Batteries that meet health benchmarks
✅ Charging ports and connectors
✅ Cameras, speakers, and buttons
✅ Laptop keyboards, RAM, and storage modules
Each upcycled component is paired only with compatible models, ensuring stability and optimal performance.
🧠 6️⃣ Addressing the Myths Around Upcycled Parts
Let’s clear up some common misconceptions:
Myth 1: Upcycled means second-rate. 👉 Reality: Upcycled means tested, verified, and performance-approved.
Myth 2: They don’t last as long. 👉 Reality: With proper installation and care, they perform as well as brand-new components.
Myth 3: It voids warranty. 👉 Reality: Smart Electronix provides its own service warranty, ensuring full protection for customers.
Myth 4: They look old or worn out. 👉 Reality: Every upcycled part is cleaned, refurbished, and visually inspected for quality assurance.
We’re redefining what “used” means — because responsible reuse is the smarter way forward.
🌏 7️⃣ The Bigger Picture: Repairing for a Sustainable Future
The adoption of sustainable spares aligns with global efforts to create a greener tech ecosystem. By promoting repair instead of replacement, we collectively reduce:
Greenhouse gas emissions
Resource depletion from mining
Toxic e-waste dumping
Every repair matters — and every part reused is a step toward a more circular economy.
At Smart Electronix, we’ve made sustainability a core part of our business philosophy. Whether you’re repairing a smartphone, laptop, or tablet, you can rest assured your choice helps both your device and the planet.
🔧 8️⃣ Smart Electronix: The Leader in Sustainable Repairs
Here’s what sets us apart in the eco-repair space:
🌱 Eco-Friendly Sourcing: We prioritize verified upcycled components from trusted suppliers. 🔋 Responsible Recycling: Non-repairable parts are safely recycled through approved facilities. 🧰 Expert Diagnostics: Advanced tools help us identify the best path to restore your device. 🛠 Certified Technicians: Our team undergoes continuous training to master modern, sustainable techniques.
We believe that technology should serve people — not pollute the planet.
From Edge to Engine — We Keep Devices Alive.
💬 Final Thoughts
The future of tech repair lies in sustainability, transparency, and trust. By adopting upcycled parts, we’re not just fixing devices — we’re rebuilding the industry on smarter, greener foundations.
At Smart Electronix, we’re proud to lead this transformation in Australia. Our sustainable spare part solutions give your devices new life while protecting the environment and keeping repair costs fair.
Because fixing the planet starts with fixing the things we already have.
Technology keeps getting faster — and so do the challenges that come with it. With the global rollout of 5G networks and the rise of edge computing, our smartphones, laptops, and IoT devices are operating at lightning speeds. But with this speed comes a new wave of repair complexities that traditional diagnostic tools can’t always keep up with.
For repair professionals across Australia — including the team at Smart Electronix — this shift means more advanced tools, smarter technicians, and evolving repair strategies.
Let’s explore how 5G and edge computing are reshaping the world of modern device repair — and what that means for everyday users.
📶 1️⃣ The 5G Revolution: Faster Speeds, Finer Problems
5G technology offers ultra-fast connectivity, lower latency, and enhanced performance for devices. However, these benefits come with intricate hardware and software systems that are far more sensitive than their 4G predecessors.
🧩 What This Means for Repairs:
Smaller, denser chips that are harder to diagnose and replace.
Thermal management issues, as 5G modems generate more heat.
Antenna calibration challenges, especially in devices using multiple 5G bands.
Software interference, where firmware conflicts cause connection drops or signal loss.
Technicians now need specialized tools and microscopes capable of detecting micro-level defects. At Smart Electronix, our team uses chip-level diagnostics to identify minute component failures that could disrupt 5G signal flow — ensuring every repair restores both performance and connectivity.
🌐 2️⃣ Edge Computing: More Power, More Complexity
Edge computing pushes data processing closer to the device itself — reducing latency and enabling faster real-time responses. From autonomous cars to AI-powered smartphones, edge devices now handle tasks that once required large data centers.
But this shift also means that devices have become more self-contained ecosystems, with:
Embedded AI chips
Multiple processing nodes
Localized data storage
All of which can fail in different ways.
⚙️ Repair Implications:
Firmware corruption can now cause hardware-level dysfunction.
Intermittent faults are harder to replicate because of decentralized processing.
Security updates must be carefully managed to avoid disabling core features.
At Smart Electronix, our technicians are trained in firmware recovery and component-level debugging, ensuring we can restore devices that many repair centers might consider “unfixable.”
🔋 3️⃣ Power & Battery Stress: The Hidden Side of 5G
5G-enabled devices demand more energy. The constant switching between 5G and 4G towers, combined with edge-based AI tasks, puts immense stress on batteries.
Common Customer Complaints:
Rapid battery drain
Overheating during calls or video streaming
Charging circuit malfunctions
Battery “swelling” due to excessive current draw
Repair shops must now evaluate both hardware and software consumption patterns — including background AI models that might be draining energy unknowingly.
At Smart Electronix, we use advanced battery diagnostics to test voltage stability, identify circuit irregularities, and replace power cells with genuine, eco-friendly components that restore original efficiency.
Smarter Chips. Smarter Fixes. Smarter You
📡 4️⃣ Connectivity Diagnostics: A New Frontier
Unlike older devices, modern 5G and IoT systems rely on multiple antennas and modules working simultaneously — Wi-Fi 6, Bluetooth 5.3, NFC, and GPS — all interconnected.
That means a small fault in one component can trigger cascading failures across the network.
Example:
A minor solder crack near a 5G antenna coil can cause:
Weak or unstable signals
Delayed data transfers
Reboot loops during high bandwidth usage
Technicians must now perform multi-signal diagnostics, using spectrum analyzers and signal tracing equipment — something Smart Electronix has invested in to deliver accurate, fast repairs for 5G smartphones and laptops.
🔐 5️⃣ Firmware & Security: The Invisible Challenge
As devices become smarter, their security frameworks become more complex. 5G and edge computing have introduced new firmware layers, often protected by secure bootloaders and cryptographic checks.
While these systems protect users from cyber threats, they also make traditional repair techniques more difficult.
At Smart Electronix, our specialists use authorized, non-invasive tools to safely diagnose and reflash firmware — without violating security protocols or voiding warranties.
We ensure that your device’s integrity and data remain fully protected while resolving system-level failures.
When Devices Evolve, Smart Electronix Adapts
🔍 6️⃣ Training for Tomorrow’s Repairs
Modern repair work isn’t just about soldering or part replacement anymore — it’s about understanding complex systems.
Technicians need ongoing education in:
5G signal architecture
Edge data processing
Secure firmware engineering
AI diagnostic systems
Smart Electronix stays ahead by continuously upgrading our tools, training, and repair standards. We collaborate with technology educators and manufacturers to ensure that our team can handle any modern repair challenge — from simple screen replacements to deep system diagnostics.
🌱 7️⃣ Sustainability: Repairing Smarter, Not Replacing Faster
One positive aspect of these challenges is innovation in sustainable repair practices.
5G devices and edge systems often use modular components, allowing selective replacements instead of full board swaps. This reduces e-waste and carbon footprint, aligning with Smart Electronix’s eco-conscious repair philosophy.
We believe every device deserves a second life — repaired efficiently, affordably, and sustainably.
💡 Final Thoughts
As 5G and edge computing redefine how our devices perform, they also redefine how they’re repaired. The challenges are complex — but they also represent opportunities for smarter, more efficient repairs.
At Smart Electronix, we embrace these changes with innovation and precision:
Advanced diagnostic tools
Expert, continuously trained technicians
Sustainable, component-level repair methods
Transparent, customer-first service
Because when technology evolves, repair services must evolve too — and we’re proud to lead that transformation in Australia.