Over the past few years, Australia’s tech repair industry has faced one of its biggest challenges: global supply-chain disruptions. From prolonged shipping delays to unpredictable component shortages, technicians and customers alike are feeling the impact — especially when it comes to sourcing laptop spare parts.
Whether you run a repair shop or simply need your laptop fixed quickly, understanding why these disruptions happen and how they affect repair timelines can help you make better decisions. Here’s a deep dive into what’s going on behind the scenes.
1. Global Manufacturing Slowdowns: Fewer Parts in Circulation
Most laptop components — screens, motherboards, SSDs, batteries, and keyboard assemblies — are manufactured in China, Taiwan, Japan, and South Korea. When these regions face factory shutdowns, labor shortages, or material scarcity, the ripple effect hits Australia directly.
Commonly Affected Laptop Parts:
-
Laptop batteries for Dell, HP, Lenovo, and Apple
-
High-resolution displays and touch panels
-
Replacement keyboards
-
SSDs and RAM modules
-
Cooling fans and heatsinks
Because production drops, repair shops in Australia must wait longer or pay more to secure stock.

2. Increased Shipping Costs & Delays
Even when parts are available, getting them into Australia is becoming harder. Key reasons include:
✦ Fewer cargo flights
Passenger flights usually carry a large amount of cargo. When flight numbers drop, so does cargo capacity.
✦ Port congestion
Ports across Southeast Asia and Australia are experiencing longer processing times.
✦ Rising fuel costs
Higher shipping prices directly increase the retail price of laptop parts.
The result? A part that usually arrives in 3–5 days may now take 10–25 days, depending on the supplier and origin country.
3. Demand Spike From Work-From-Home & Remote Learning
During the WFH boom, Australians purchased laptops in record numbers. More devices equals more repairs — cracked screens, overheating issues, swollen batteries, faulty charging ports, etc.
Because repair requests jumped so quickly, supply chains couldn’t keep up. Even in 2025, that demand remains higher than pre-pandemic levels.
4. Counterfeit & Low-Quality Parts Flooding the Market
When genuine parts become hard to source, counterfeit components often enter the supply chain.
Risks of low-quality replacement parts:
Australian repair businesses now spend more time verifying vendors, checking part authenticity, and rejecting unreliable shipments.
5. Laptop Brands With the Most Supply Issues
Some brands rely more heavily on proprietary components, making disruptions worse.
Most affected brands in Australia:
-
Apple (due to custom chips and batteries)
-
Microsoft Surface
-
Lenovo X-series and Yoga models
-
HP Spectre & Envy series
-
Gaming laptops like MSI, ROG, and Predator
These parts have always been harder to source — supply-chain disruptions only magnify the challenge.
6. Rising Repair Costs for Customers
Because part availability fluctuates, prices are unstable. If a battery used to cost $60 wholesale, it might now cost $85–$120. Shops must adjust repair pricing to cover:
This is why customers may notice a 10–40% increase in laptop repair costs compared to previous years.
7. How Australian Repair Shops Are Adapting
Despite the disruptions, many Australian repair specialists are becoming smarter and more proactive.
✔ Building relationships with multiple suppliers
Instead of relying on one distributor, shops now partner with suppliers across the UAE, China, Europe, and local wholesalers.
✔ Stocking high-demand parts in advance
Batteries, screens, SSDs, and keyboards are kept in inventory to reduce wait times.
✔ Offering refurbished OEM parts
Refurbished parts maintain quality while reducing dependence on new-part supply chains.
✔ Repair-first approach
More technicians now focus on micro-soldering and component-level repairs to avoid replacing entire motherboards.

8. What Customers Can Do to Avoid Delays
If your laptop needs a repair soon, here are ways to minimise downtime:
✓ Book diagnosis early
Don’t wait until the device completely fails.
✓ Ask about alternative options
Refurbished or compatible OEM parts may be available.
✓ Be open to temporary solutions
For example, using an external keyboard or SSD while waiting for internal parts.
✓ Choose reputable repairers
They can source genuine parts faster and avoid counterfeits.
Final Thoughts
Australia’s laptop repair landscape is evolving rapidly as global supply-chain challenges continue. While delays and increased costs are unavoidable, both repair shops and customers can navigate the situation more effectively through planning, transparency, and flexible repair options.
With smarter sourcing strategies, better inventory management, and rising awareness among consumers, the future of laptop repairs in Australia remains promising — even in the face of global disruptions.

As we move deeper into 2025, our everyday tech is becoming more connected than ever. Smartphones, smartwatches, earbuds, home assistants, trackers, and even household appliances are now part of one seamless ecosystem. This hybrid use is convenient—but when something goes wrong, repairs become far more complicated.
For technicians and consumers alike, understanding how these interconnected systems affect device repair is now essential. Here’s a breakdown of the real challenges behind repairing hybrid smartphone–IoT setups, and what shops like Smart Electronix are doing to address them.
1. The Rise of the Multi-Device Ecosystem
Smartphones today act as the “brain” for many IoT devices—smartwatches for health tracking, earbuds for audio, doorbells, sensors, lights, and countless smart home gadgets.
When one device fails, it often affects the whole chain.
Common symptoms of ecosystem-based failures:
-
Smartwatch not syncing due to smartphone Bluetooth issues
-
IoT devices dropping connections because of firmware conflicts
-
Notifications failing across all devices
-
Cloud backup or account pairing errors
A simple fault in one device can create a ripple effect across the entire ecosystem—making diagnosis more complex.
2. Firmware Fragmentation Complicates Repairs
Every device has its own firmware version, update schedule, and vendor restrictions.
But when you mix Apple, Samsung, Xiaomi, Garmin, Google Pixel, and dozens of IoT brands, compatibility becomes a nightmare.
Repair Challenges Include:
-
Firmware updates permanently breaking device-pairing compatibility
-
Region-locked firmwares limiting repairs in Australia
-
Vendor-locked parts requiring proprietary tools
-
Cloud-based restrictions (Find My Device / activation locks)
For technicians, it’s no longer just “fixing a device”—it’s ensuring everything in the ecosystem works together again.
3. Connectivity Issues Are Now Multi-Layered
Hybrid setups rely on:
-
Bluetooth
-
Wi-Fi
-
NFC
-
UWB (Ultra-Wideband)
-
Cloud Sync
-
Companion Apps
When a repair comes in, technicians must now troubleshoot multiple layers of communication.
Example Repair Scenarios
-
A smartwatch isn’t pairing—not because it’s faulty, but because the phone’s Bluetooth antenna is damaged.
-
IoT lights not responding because the router’s firmware is outdated.
-
Smart earbuds cutting out due to a corrupted companion app.
Repairs often involve both hardware fixes and software reconfiguration.
4. Miniaturisation Makes Physical Repairs Harder
Smartwatches and IoT sensors are incredibly compact.
Replacing components like:
-
Sensors
-
Micro batteries
-
Vibrator motors
-
Antennas
-
Tiny ribbon cables
…requires microscope-level precision.
Technicians must be trained in micro-soldering and have specialised equipment—something many general repair shops still lack.
5. Data & Privacy Constraints Affect Repairs
IoT and wearables collect sensitive personal data:
-
health metrics
-
sleep patterns
-
location information
-
video/audio feeds
-
smart home logs
This creates legal and ethical considerations during repairs.
Shops must follow strict protocols to avoid accessing sensitive data or violating privacy requirements. Customers increasingly demand transparency in how their data is handled.
6. Cloud Dependence Increases Diagnosis Time
Many IoT devices depend heavily on cloud services to function.
If a device can’t connect to the cloud, technicians can’t:
-
Activate it
-
Run diagnostics
-
Re-pair it
-
Test features
This is common with:
Sometimes, the device is fine—the cloud service is the problem.
7. How Smart Electronix Handles Hybrid Device Repairs in 2025
At Smart Electronix, repairing smartphone–IoT ecosystems requires a modern, structured approach.
Our Process Includes:
-
Full Ecosystem Diagnosis
Not just the broken device, but all connected hardware and apps.
-
Firmware Compatibility Checks
Ensuring updates, versions, and vendor locks don’t cause new issues.
-
Connectivity Testing
Bluetooth, Wi-Fi, UWB, and NFC analysis.
-
Micro-Component Repairs
Using specialised precision tools for tiny IoT devices.
-
Secure Handling of User Data
We follow strict no-access data privacy protocols.
-
Cross-Brand Troubleshooting
Apple, Samsung, Fitbit, Xiaomi, Huawei, Pixel, and multi-brand IoT devices.
Hybrid repair is complicated, but we ensure the entire ecosystem works seamlessly again.
Final Thoughts
As smartphones, smartwatches, and IoT devices become more integrated, the repair industry must evolve. Technicians now troubleshoot not only hardware, but entire ecosystems of connected technology.
Hybrid device repair is the future—and shops like Smart Electronix are leading the change with advanced diagnostics, precision tools, and expertise in multi-device ecosystems.

Foldable smartphones and tablets are no longer niche gadgets — they’re quickly becoming mainstream in Australia. Samsung, OPPO, Motorola, and Google have pushed foldable technology into the hands of everyday consumers. As adoption grows, so does the demand for expert foldable device repairs, something many technicians are still adapting to.
Repairing foldables in 2025 is drastically different from repairing traditional flat-screen phones. These devices include ultra-thin glass, flexible OLED panels, complex hinge assemblies, and layered component stacks that require advanced techniques and specialised tools.
In this detailed guide, Smart Electronix breaks down everything technicians need to know when working with foldable devices in 2025 — the challenges, the tools, the skills, and the safety considerations.
1. Foldable Devices Have Completely New Internal Architecture
Unlike standard phones, foldables use a multi-layered, flexible display system that bends along a central axis. This changes everything about the repair process.
Common layers found in foldable displays include:
Technicians must understand these layers to avoid accidental damage during screen removal or frame separation. A single wrong step can permanently crease, crack, or disable the display.
2. Hinge Repair Is the Most Complex Task
The hinge mechanism is the heart of every foldable device. In 2025, most foldables use:
These hinges are engineered with tiny springs, rollers, and bearings that allow smooth folding motions.
Common hinge-related repair issues include:
-
Dust or debris blocking movement
-
Stiff or noisy hinges
-
Misalignment causing display tension
-
Broken hinge gears
-
Flex cable damage around the hinge area
Repairing these components requires patience and precision. Unlike typical hinges, foldable hinges cannot simply be lubricated — they often need replacement using model-specific parts.
3. Flex Cable Management Is Critical
Foldables rely heavily on flex cables that bend thousands of times daily. These cables run through or around the hinge area and are prone to wear.
Technicians must watch for:
When a foldable starts experiencing:
-
Display flickering
-
Half-screen visibility
-
Touch failure
-
Random restarts
…the flex cable is often the culprit.
Repairing these cables can require complete disassembly and hinge removal — not something inexperienced technicians should attempt.
4. Adhesive Removal Requires Temperature Control
Foldable devices use stronger but more sensitive adhesives to secure the display and frame.
The challenge?
Too much heat damages the flexible OLED. Too little heat prevents proper separation.
Safe temperature ranges (varies by brand):
-
55°C to 70°C for UTG panels
-
60°C to 80°C for outer protective film removal
-
100°C and above may permanently damage display layers
Technicians must use:
Precision is everything.
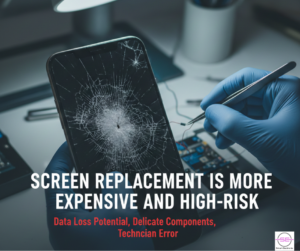
5. Screen Replacement Is More Expensive and High-Risk
Foldable display replacements are not like standard screen swaps. They require:
-
Zero dust environments
-
Multi-layer film alignment
-
Laser separation machines for UTG
-
High-tension display presses
-
OEM-curved adhesive strips
Even a tiny dust particle can cause:
-
Bubbles
-
Pressure points
-
Dead pixels
-
Screen warping
This is why Smart Electronix invests in clean-room style repair environments for foldables.
6. Outer Displays and Back Panels Still Need Specialized Handling
Most foldables have two screens:
The cover display is easier to replace but often integrated with:
-
Camera modules
-
Metal frames
-
High-strength adhesive
This means the entire midframe may need removal.
Back panels, often made with composite materials or reinforced glass, require careful heating to avoid bending, splitting, or cracking.
7. Water Resistance Adds More Difficulty
Many foldables now include IPX8 water resistance, but this complicates repairs:
-
Liquid seals must be removed and rebuilt
-
Adhesive gaskets must be replaced
-
Moisture barriers need testing
Failing to replace seals correctly can ruin the device months later, leading to internal corrosion.
8. Software Calibration After Repairs is Mandatory
Modern foldables require software alignment after hardware work. This includes:
Post-repair recalibration tasks:
Tools like Samsung’s proprietary calibration suite or Google’s repair software are required, depending on the model.
Without proper calibration, the device may:
-
Fail to detect folding
-
Misbehave in split-screen mode
-
Misalign dual-app display
-
Freeze during orientation changes
9. Special Tools Every Technician Must Use in 2025
To repair foldables properly, technicians need:
✔ Anti-dust repair chambers
To prevent contamination under repair layers.
✔ Laser display separation machines
For UTG and flexible OLED layers.
✔ Hinge alignment jigs
To ensure perfect structural balance.
✔ Precision micro-spudgers
To avoid tearing flex cables.
✔ Pressure-controlled display clamps
For bonding new screens.
✔ OEM-approved adhesives and gaskets
To restore water resistance.
Without these, foldable repairs become extremely risky.
10. Why Smart Electronix Leads the Way in Foldable Repairs
Smart Electronix is among Australia’s few repair specialists equipped to handle foldable devices safely and professionally.
Our strengths include:
-
Certified technicians trained in flexible OLED repair
-
High-grade repair tools for UTG and hinge alignment
-
Dust-free repair environments
-
OEM-approved parts and adhesives
-
Advanced diagnostic software
-
Safe hinge and flex cable replacement expertise
-
Quality assurance and post-repair calibration
We ensure each foldable device is restored to factory-level performance — safely, reliably, and affordably.

Final Thoughts
Foldable technology is the future of smartphones, but repairing them requires an entirely new skill set. In 2025, technicians must understand the unique materials, sensitive components, and precision methods required to handle foldable devices properly.
From hinge mechanics to flexible OLED layers, every part must be treated with expert-level care.
Smart Electronix is proud to lead Australia with repair solutions tailored specifically for foldables — keeping advanced technology accessible, sustainable, and long-lasting.

Smart Electronix Australia – 2025 Sustainability Insight
The global electronics industry is growing faster than ever — but so is the mountain of discarded phones, laptops, and gadgets. In Australia alone, e-waste is the fastest-growing waste stream, with millions of devices ending up in landfill every year. Most of these electronics contain reusable components, repairable boards, and recyclable metals, yet they are thrown away long before their true end of life.
At Smart Electronix, we believe repair should not just extend the life of your devices — it should help protect the planet. That’s why eco-conscious repair practices are at the core of our business model. In this blog, we explore how Smart Electronix is minimizing e-waste, promoting sustainability, and helping Australian consumers make greener tech decisions in 2025.
Why Eco-Friendly Device Repair Matters
Most people upgrade their phones or laptops because of small issues such as:
These are 100% repairable, yet many devices are discarded.
This creates:
🌍 Environmental strain
Old electronics contribute to:
🔋 Resource depletion
Precious metals like lithium, cobalt, nickel, and gold are finite. When devices are thrown away, these materials are lost forever.
💸 Higher consumer costs
Buying a new device is far more expensive than repairing a functioning one. Repair supports a circular economy that benefits both the planet and your wallet.
Smart Electronix aims to break this cycle with sustainable repair solutions.
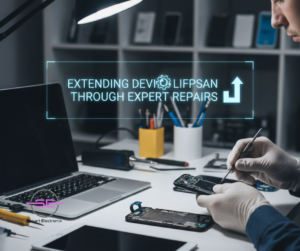
1. Extending Device Lifespan Through Expert Repairs
Every phone or laptop that gets repaired instead of replaced prevents:
At Smart Electronix, we focus on:
-
Battery replacements instead of full device upgrade
-
Repairing charging ports instead of discarding motherboards
-
Camera module fixes instead of buying a new phone
-
Laptop SSD and RAM upgrades to revive slow devices
Each repair adds 1–4 years to a device’s life, dramatically reducing e-waste.
2. Using High-Quality, Long-Life Spare Parts
Cheap, low-quality parts fail faster — which means more replacements and more discarded components.
Smart Electronix only sources:
-
Certified OEM-grade components
-
Long-life batteries
-
Durable screens
-
Reliable charging IC chips
-
High-quality camera sensors
Better parts = fewer failures = less waste.
This approach ensures your repaired device lasts longer, reducing the need for premature upgrades.
3. Upcycled & Refurbished Parts — But Only When Safe
To reduce waste, we practice controlled circular remanufacturing, including:
✔ Refurbished displays
Cracked screens with working panels are restored and reused.
✔ Repaired logic boards
Burnt ICs, charging chips, and power management units are replaced.
✔ Battery repurposing
Batteries above safe capacity levels are reused in:
-
DIY electronics
-
Low-power devices
-
Testing equipment
Every upcycled part is tested through:
-
Diagnostic scans
-
Thermal tests
-
Power cycle verification
We only reuse components that meet strict safety and performance standards.
4. Certified E-Waste Recycling for Irreparable Devices
When a device truly reaches the end of its life, Smart Electronix ensures it is recycled responsibly.
We partner with certified Australian e-waste recyclers who:
This keeps harmful electronics out of landfills and promotes a circular materials economy.
5. Minimising Single-Use Plastics in the Repair Process
Traditional repair shops use:
Smart Electronix reduces plastic waste by using:
-
Reusable anti-static containers
-
Biodegradable packing materials
-
Minimalist packaging for spare parts
-
Recycled-paper-based device return kits
Sustainable repairs start with sustainable processes.
6. Remote Diagnostics Reduce Unnecessary Travel
Every unnecessary device drop-off means:
Smart Electronix uses:
This avoids unnecessary in-store visits and cuts carbon output significantly.
7. Repair-First, Replace-Later Policy
Instead of immediately suggesting replacements like many big brands do, Smart Electronix follows a repair-first philosophy:
🔧 Try the repair
If a camera, battery, or board can be fixed — we fix it.
🔁 Refurbish and reuse
If components can be safely restored — we remanufacture them.
🔚 Replace only when necessary
If something can’t be rescued, we offer eco-friendly disposal and ethical replacement options.
This approach has saved thousands of devices from becoming e-waste.
8. Educating Consumers About Sustainable Device Care
Smart Electronix publishes blogs, guides, and tips to help Australians maintain their devices properly.
Topics include:
Better care = longer lifespan = less e-waste.

9. Supporting Australia’s Circular Economy
By prioritizing repairs, recycling, and remanufacturing, Smart Electronix contributes to a more sustainable technology ecosystem.
Our circular repair approach results in:
-
Lower landfill contribution
-
Reduced raw material mining
-
Lower manufacturing carbon emissions
-
Affordable tech repair options for customers
This aligns with Australia’s National Waste Policy and e-waste recycling initiatives.
10. Smart Electronix’s Commitment for 2025 and Beyond
We’re making sustainability a part of every repair.
Our goals for the future:
-
Expand repair services to reduce landfill contributions
-
Increase the use of upcycled components
-
Build Australia’s largest eco-friendly repair network
-
Improve recycling partnerships nationwide
-
Educate consumers on responsible tech ownership
For us, sustainability is not a marketing trend — it’s a long-term commitment.
Final Thoughts
Eco-conscious device repair is one of the most impactful ways to reduce Australia’s growing e-waste problem. At Smart Electronix, we believe every repaired device is a win for the environment, a win for customers, and a win for the future of technology.
By choosing repair over replacement, Australian consumers can:
🌿 Reduce pollution
🔋 Save valuable materials
💰 Save money
♻ Extend device lifespan
🌍 Protect our planet
And Smart Electronix is here to lead that change — one repair at a time.

The smartphone repair industry in Australia is entering a new era — one powered by remote diagnostics, augmented reality (AR), and real-time virtual assistance. As device technology becomes more complex and consumers demand faster, safer, and more convenient solutions, repair shops are evolving. Gone are the days when every repair required a physical visit. Today, thanks to advanced digital tools, many issues can be identified (and sometimes fixed) without even opening the device.
At Smart Electronix, we are at the forefront of this transformation. In this blog, we explore how remote diagnostics and AR assistance are reshaping phone repairs in Australia, why they’re becoming essential in 2025, and what benefits consumers can expect.
1. Why Remote Diagnostics Are Becoming Mainstream in 2025
Australian smartphone users rely heavily on their devices for work, travel, education, and everyday life. When something goes wrong — slow performance, fast battery drain, charging issues — waiting days for an appointment is no longer acceptable.
This is where remote diagnostics come in.
How Remote Diagnostics Work
Using secure software tools, technicians can:
-
Scan your smartphone’s internal systems
-
Check battery health
-
Analyse storage performance
-
Detect overheating trends
-
Identify firmware or system errors
-
Review crash logs
-
Monitor sensor functionality
This allows experts to understand the problem without physically touching the device.
Why it matters for Australians
-
Faster problem identification
-
Reduced in-store visits
-
Accurate quoting before repair
-
Early detection of hardware failure
-
Convenience for remote or rural areas
In 2025, when half of the population lives outside major metro cities, remote diagnostics make quality repair services more accessible than ever.

2. AR Assistance — Repair Support Like Never Before
Augmented Reality (AR) is revolutionizing the repair experience. AR overlays digital instructions onto real-world images, allowing technicians to guide you step-by-step.
Imagine pointing your smartphone camera at your device’s SIM tray or charging port. Now imagine a repair expert drawing live instructions on your screen.
That’s exactly how AR assistance works.
3. What AR Assistance Looks Like in Practice
Here are real examples of how AR is being used today in Australia:
🔧 Step-by-Step Troubleshooting
A Smart Electronix technician can:
-
Highlight buttons or settings on your screen
-
Draw arrows showing which part to press
-
Guide you through battery recalibration
-
Show you how to reset network chips safely
-
Help you reinsert cables or components
🔍 Hardware Pre-Inspection
Before booking a repair, AR allows a technician to:
-
Inspect damaged screens
-
Check for motherboard rusting
-
Examine swollen batteries
-
Identify faulty cameras or ports
This ensures you know the exact problem and cost before visiting the shop.
📦 Safe Packaging Guidance
If you need to ship your phone for repair, AR can demonstrate how to pack it securely to avoid further damage.
4. Benefits of Remote Diagnostics & AR Assistance for Aussie Users
1. Faster Turnaround Times
Most diagnoses happen within 10–15 minutes, enabling same-day or next-day repairs.
2. Lower Costs
Troubleshooting online often prevents unnecessary part replacements. You only pay for what’s genuinely required.
3. Convenience
Perfect for:
No need to drive to a repair shop unless truly necessary.
4. Enhanced Transparency
You can see exactly:
-
What the technician is checking
-
Why the device is failing
-
What needs repair
-
How much the service will cost
It builds trust — something the repair industry often lacks.
5. Reduced Device Downtime
If the issue is software-based, many problems are resolved on the spot:
-
App crashes
-
Performance drops
-
WiFi/Bluetooth bugs
-
Firmware freezes
-
Battery calibration
No drop-off. No waiting. Instant results.
5. The Technology Behind the Future
AI-Driven Diagnostics
AI now helps technicians detect:
AI-backed reports ensure high accuracy and fewer misdiagnoses.

Advanced AR Platforms
Modern AR tools use:
This makes virtual guidance precise and user-friendly.
Cloud Integration
Diagnostics results are synced to secure cloud servers, allowing technicians to track device history and performance trends.
6. Remote Diagnostics vs Traditional Repair: Which Is Better?
| Feature |
Remote Diagnostics |
In-Store Repair |
| Speed |
Fastest |
Medium |
| Accuracy |
High for software & early hardware |
Highest for hardware |
| Convenience |
Excellent |
Requires travel |
| Cost |
Low |
Medium to high |
| Best For |
Software, firmware, pre-checks |
Component failures |
Conclusion: Remote diagnostics + AR gives the best of both worlds.
You get quick answers, and only visit the shop when necessary.
7. What Can Be Diagnosed Remotely?
Remote diagnosis works for:
Software Issues
✔ Slow performance
✔ Freezing or crashing
✔ Malware or suspicious apps
✔ Network and WiFi issues
✔ Firmware glitches
✔ Overheating warnings
Hardware Pre-Checks
✔ Screen damage
✔ Camera module problems
✔ Charging port issues
✔ Battery swelling
✔ Microphone/speaker faults
✔ Water damage signs
Full repairs still require physical servicing, but remote tools speed up the process significantly.
8. The Future: Full AR Repairs at Home?
By 2030, Australia may see:
-
AR-guided battery replacement
-
Smart glasses for repair walkthroughs
-
Remote-controlled repair robots
-
Self-diagnosing phones with AI chipsets
The future of phone repair is contactless, intelligent, and user-driven.
Why Smart Electronix Leads the Way in 2025
At Smart Electronix, we use cutting-edge AR and remote diagnostic tools to deliver:
✔ Fast initial diagnosis
✔ Transparent pricing
✔ Expert virtual assistance
✔ Secure device health reports
✔ Reliable repair guidance
✔ Australia-wide support
Whether you’re in Sydney, Melbourne, Brisbane, Perth, or regional areas, we help you troubleshoot your device safely and efficiently.
Final Thoughts
Remote diagnostics and AR assistance aren’t just trends — they’re the future of phone repairs in Australia. They make repairs faster, cheaper, safer, and more accessible. As devices grow more advanced, digital repair tools will become essential for both technicians and consumers.
Smart Electronix is proud to lead this evolution, ensuring every Australian has access to expert repair support, no matter where they live.

Solid-state drives (SSDs) transformed the way laptops perform — faster boot times, quick application loading, and smooth multitasking. But by 2025, many users in Australia are discovering a frustrating truth: even SSDs slow down over time. When your once-fast laptop begins lagging, freezing, or taking longer to copy files, it’s usually not just “age.” There are real, hidden reasons behind SSD slowdowns.
At Smart Electronix, we repair hundreds of laptops every month, and SSD-related performance drops are among the most common complaints. In this blog, we’ll break down the true causes, how to diagnose the issue at home, and when you need professional intervention.
1. Your SSD Is Nearly Full — And That’s a Big Problem
Unlike HDDs, SSDs require free space to operate efficiently.
When your SSD is above 80–90% capacity, performance can drop dramatically.
Why it happens
-
SSDs need free blocks for the controller to rearrange data
-
Write amplification increases
-
Garbage collection becomes slow
-
TRIM operations struggle
Signs
Fix
2. TRIM Isn’t Working Properly
TRIM is an SSD feature that removes unused data blocks so the drive stays fast. If TRIM gets disabled (which happens after firmware updates or OS glitches), your SSD slows down.
Check TRIM (Windows 10/11)
-
Search Command Prompt
-
Run:
-
If it returns 0, TRIM is ON.
If TRIM is off
A technician may need to re-enable it or update drivers.
3. SSD Firmware Is Outdated
Just like smartphones, SSDs receive firmware updates for performance, stability, and bug fixes.
Why outdated firmware causes slowdowns
A firmware update can sometimes restore full speed.
But be careful — incorrect flashing can brick your SSD.
➡️ Smart Electronix tip:
Always back up your data before applying firmware updates.
4. Thermal Throttling — The Silent SSD Killer
SSDs get hot, especially NVMe drives used in modern ultrabooks.
When temperatures exceed 70–80°C, the drive slows down to protect its components.
Common causes
What you can do

5. Your SSD Is Using QLC Flash (Budget Drives Slow Down Quickly)
In 2025, more laptops ship with QLC SSDs — cheaper but slower under heavy load.
Why QLC slows down
If your laptop becomes slow during large downloads or file transfers, QLC limitations might be the reason.
Solution
Smart Electronix provides data migration + SSD upgrade services for all major laptop brands.
6. Background Apps Eating Your Drive Alive
Apps like:
can overload your SSD, making it feel slow.
How to fix
7. File System Corruption or Bad Sectors
Even SSDs can develop:
-
Logical errors
-
Bad blocks
-
Corrupted system files
These slow down read/write operations dramatically.
Quick fix
Run Windows built-in repair:
If the SSD has physical deterioration, replacement is necessary.
8. Your SSD’s Life Cycle Is Near Its End
All SSDs have a write limit, measured in:
Once these are close to being exhausted, the SSD slows down and becomes unstable.
Signs of an aging SSD
-
Random freezes
-
Frequent OS crashes
-
Slow boot times
-
File corruption
A technician can run SMART diagnostics to confirm SSD health.

9. Using the Wrong SATA/NVMe Mode
Incorrect BIOS settings can cripple your SSD speed.
Common issues
These problems often appear after major Windows updates or BIOS resets.
Fix
Let a repair expert check BIOS channels and lane allocation to restore full speed.
When Should You Visit Smart Electronix?
If your SSD is still slow after basic fixes, it may require professional diagnostics.
Our technicians can perform:
✔ SSD health assessment (SMART test)
✔ Firmware update with data backup
✔ Thermal analysis
✔ Cache and storage optimization
✔ SSD replacement + data migration
✔ Malware cleanup
✔ System tune-ups for maximum performance
Whether you’re using a MacBook, Dell, HP, Lenovo, or gaming laptop — we ensure your device returns to peak performance.
Final Thoughts
SSDs are fast, durable, and reliable — but they’re not immune to performance issues.
By understanding the hidden causes of slowdowns, you can maintain your laptop’s speed and extend its lifespan.
If you’re an Aussie user facing laggy performance, slow load times, or freezing apps, Smart Electronix is here to help with expert repairs, honest diagnostics, and affordable SSD upgrades.

Smartphones in 2025 are smarter, faster, more connected—and more fragile than ever. Foldables, multi-camera setups, ultra-thin frames, and compact motherboard designs make modern devices powerful but difficult to repair. But there’s a growing shift in the tech world, one that’s slowly reshaping how consumers (and repair shops like Smart Electronix) approach broken devices:
Modular phones.
While modular devices aren’t mainstream yet, their rise in 2025 signals a major step forward for sustainability, repairability, and consumer control. Modular phones are designed with swappable components—meaning users or technicians can replace parts like the battery, camera, buttons, or even the display with ease.
At Smart Electronix, we’ve seen firsthand how this shift is transforming device repair, costs, and sustainability across Australia.
This blog explores what modular phones are, why they matter, and how they’re changing repairability in 2025.
⭐ What Are Modular Phones? A Quick Breakdown
A modular smartphone is designed with independent, replaceable modules, allowing users or technicians to swap out components without extensive disassembly.
Common modules include:
Instead of using heavy adhesives or soldered connections, modular phones rely on:
-
screws
-
clips
-
plug-and-play connectors
-
easy-access frames
This reduces repair time and allows parts to be replaced without damaging surrounding components.
Brands leading the movement in 2025 include:
-
Fairphone (Europe)
-
Framework (expanding into mobile concepts)
-
Motorola’s modular Moto Mods (limited but influential)
-
Google Pixel (supporting more modular-friendly internal layouts)
-
Several emerging Asian manufacturers
While not as widespread as traditional smartphones, the trend is accelerating—driven by consumer demand, environmental regulations, and the Right to Repair movement.
⭐ Why Modular Phones Matter in 2025
The year 2025 marks a turning point. With growing environmental awareness and supply chain pressures, consumers want devices that last longer, cost less to repair, and reduce electronic waste.
Here’s why modular phones are becoming the preferred choice:
1. They Are Easier and Cheaper to Repair
Traditional smartphones often require:
Modular phones eliminate most of these difficulties.
For example:
-
A battery can be replaced in 30 seconds.
-
A damaged camera module can be swapped without removing the display.
-
A broken charging port doesn’t require motherboard repair.
This means lower labour costs and faster turnaround times.
2. They Support Long-Term Sustainability
Modular devices reduce e-waste dramatically because:
-
users replace only the broken part
-
fewer devices end up in recycling centres
-
components can be refurbished and reused
Smart Electronix already sees increased interest in sustainable repairs, especially from environmentally conscious Australian consumers.
3. They Empower Consumers With More Control
Modular phones allow users to:
-
upgrade their camera without buying a new phone
-
replace their battery annually without technician help
-
switch out a cracked screen at home
This aligns perfectly with Australia’s growing Right to Repair movement.
4. They Reduce the Need for Manufacturer-Controlled Repairs
Companies like Apple and Samsung have historically limited repairs by:
Modular phones shift power back to the user and independent shops—like Smart Electronix.
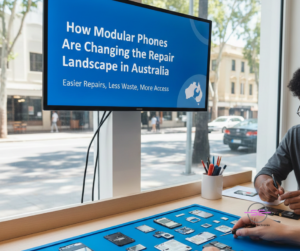
⭐ How Modular Phones Are Changing the Repair Landscape in Australia
At Smart Electronix, our technicians already see how modular designs are reshaping everyday repair workflows. Here’s what’s changing:
1. Faster Repairs & Less Downtime
Simple parts like:
-
batteries
-
speakers
-
buttons
-
cameras
Can be replaced quickly—sometimes in under 10 minutes. This means:
2. Reduced Need for High-Risk Micro-Soldering
Many modern repairs require micro-soldering due to:
-
charging IC failures
-
backlight issues
-
broken flex cables
With modular designs, these risks decrease because components are separate and replaceable.
This makes repairs less expensive and reduces the chance of accidental damage.
3. Wider Availability of Spare Parts
Modular manufacturers often sell modules directly, meaning:
-
genuine parts
-
high compatibility
-
consistent performance
This eliminates the uncertainty that often comes with third-party aftermarket components.
4. Improved Device Lifespan
A modular phone can last:
-
5 years
-
7 years
-
even 10 years
Since individual modules can be upgraded, repaired, or replaced without swapping the entire phone, users stay in control for longer.
This reduces the need for yearly phone upgrades.
5. Better Repair Diagnostics
Modular design makes troubleshooting easier:
-
Technicians can test modules one by one
-
Faulty parts can be isolated quickly
-
Complex failures become simpler to identify
Smart Electronix uses specialised diagnostic tools to evaluate module-level performance, making repairs more precise.
⭐ Why Modular Phones Haven’t Taken Over Yet
Despite the benefits, modular phones still face challenges:
1. Manufacturers Profit From Non-Modular Designs
They earn more when consumers upgrade devices frequently.
2. Thin and Foldable Phones Are Hard to Make Modular
Ultra-thin frames limit space for easily detachable components.
3. Mass Market Isn’t Fully Aware
Many users still don’t know modular options exist.
4. Higher Initial Cost
Modular phones sometimes cost more upfront due to premium materials.
However, with sustainability and repairability becoming mainstream priorities in 2025, modular phones are gaining traction faster than ever.
⭐ Smart Electronix Insight: The Future of Modular Phone Repairs
Based on current trends and market behaviour, our repair experts predict:
1. More Brands Will Adopt Semi-Modular Designs
Even if not fully modular, companies will start making:
-
easier battery replacements
-
detachable charging ports
-
independent camera modules
This middle ground improves repairability without sacrificing ultra-thin designs.
2. Modular Laptops Will Influence Smartphones
Framework’s success with modular laptops may push mobile manufacturers to follow similar designs.
3. Australia Will Strengthen Right-to-Repair Laws
Making modular devices even more appealing to consumers.
4. Repair Shops Will Upgrade Tools for Modular Systems
Smart Electronix already stocks:
These help diagnose and repair modular phones more efficiently.

⭐ Final Thoughts
Modular phones represent one of the most promising advancements in smartphone design—giving consumers more freedom, lowering repair costs, and reducing e-waste across Australia.
As the tech world evolves, Smart Electronix remains committed to supporting:
Whether you’re using a modular phone or a traditional smartphone, we ensure your device stays functional, durable, and long-lasting.

Smart Electronix Australia – Helping You Choose the Right Repair Partner
When your phone, laptop, or tablet breaks, your first instinct is usually to search for the nearest repair shop and hand over the device as quickly as possible. But not all repair shops are equal—some deliver exceptional, professional results, while others cut corners, use low-quality parts, or perform repairs that cause more damage in the long run.
Whether you’re dealing with a broken screen, dead battery, water damage, or software issues, choosing the right repair shop can save you time, money, and frustration.
To help you make a confident decision, Smart Electronix has created this expert guide outlining the 10 essential questions you should ask before booking any repair service in 2025.
⭐ 1. Are Your Technicians Certified or Trained?
This should be your number-one question.
A qualified technician ensures that:
-
your device is opened safely
-
small components are handled correctly
-
diagnostics are accurate
-
repairs follow industry standards
Shops with trained technicians typically display:
A lack of qualifications may lead to incomplete repairs or accidental internal damage.
⭐ 2. What Type of Parts Do You Use? (Original, OEM, or Aftermarket)
All parts are NOT the same. Ask clearly:
Using cheap aftermarket parts leads to:
-
display colour issues
-
touch problems
-
weaker batteries
-
overheating
-
hardware failures
A reliable shop will always explain the difference and let you choose.
⭐ 3. Do You Provide a Warranty on Repairs and Parts?
A trustworthy repair shop should offer warranties such as:
A warranty protects you from:
-
part defects
-
installation issues
-
unexpected failures
If a shop refuses to provide a warranty, it’s a red flag. They may be using poor parts or lack confidence in their repairs.
⭐ 4. How Long Will the Repair Take?
Time matters—especially when your device is essential for work or daily use.
Ask:
-
Do you offer same-day repairs?
-
Do complex issues require more time?
-
Will you call me if delays occur?
Professional shops provide realistic timelines based on:
Shops that promise “10-minute repairs” for everything should be avoided—rushed work leads to mistakes.
⭐ 5. Do You Offer Free Diagnostics Before Repairing?
Every trustworthy shop performs diagnostics before touching your device.
A good repair shop will:
-
check hardware connections
-
run software tests
-
inspect for internal damage
-
evaluate battery health
-
test camera modules, sensors, ports, and speakers
Free diagnostics help you understand the actual problem, not just assumptions.
Beware of shops that jump straight to a repair without checking anything.
⭐ 6. Do You Protect Data Privacy During Repairs?
Your phone contains:
-
photos
-
personal messages
-
banking details
-
confidential files
-
saved passwords
A reputable shop should guarantee:
Smart Electronix, for example, uses secure data protocols to ensure your information stays safe.
⭐ 7. What Are the Total Costs? Are There Any Hidden Fees?
A good repair shop will give you a clear upfront price.
Ask:
Avoid shops that give vague pricing or “starting from” quotes meant to lure customers.
Transparent pricing = professional service.
⭐ 8. Do You Use Proper Tools and Repair Equipment?
Modern devices require precision.
Ask if the shop uses:
-
anti-static tools
-
controlled heating stations
-
microscopes for micro-soldering
-
professional adhesive applicators
-
genuine calibration software
Shops using cheap screwdrivers or heat guns risk damaging:
-
internal components
-
motherboards
-
fragile connectors
High-quality equipment shows professionalism.
⭐ 9. What Repair Services Do You Specialise In?
Not every shop can handle every type of repair.
Ask:
-
Do you do micro-soldering (motherboard repairs)?
-
Do you specialise in water-damage recovery?
-
Can you repair advanced camera modules?
-
Do you handle MacBook or gaming console repairs?
Smart Electronix, for example, specialises in:
-
board-level repairs
-
charging IC replacements
-
camera module calibrations
-
battery and screen replacements
-
firmware and software corrections
Choose a shop with expertise that matches your device’s issue.
⭐ 10. Do You Have Customer Reviews or Testimonials?
Nothing speaks louder than real experiences.
Check:
-
Google Reviews
-
Facebook Reviews
-
website testimonials
A reputable shop will have:
If a shop has fake, repetitive, or no reviews at all—proceed with caution.
⭐ Bonus Tip: Ask If They Offer a No-Fix, No-Fee Policy
The best repair shops only charge when they solve the problem.
If they fail, you shouldn’t have to pay.
This policy shows confidence in their diagnostic and repair skills.
⭐ Why Smart Electronix Is a Trusted Choice in Australia
At Smart Electronix, we pride ourselves on being a transparent, skilled, and customer-focused repair service. Here’s what sets us apart:
-
Certified & highly trained technicians
-
OEM and high-grade quality parts
-
90-day to 12-month warranties
-
Free diagnostics
-
No-fix, no-fee policy
-
Fast same-day service
-
Secure data protection
-
Honest upfront pricing
-
Advanced diagnostic tools
-
Strong customer reviews
We provide professional repairs for smartphones, laptops, tablets, gaming consoles, and more—restoring your devices the right way.

⭐ Final Thoughts
Your device is valuable—and so is your trust. Before handing it over to any repair shop, make sure you ask the right questions. A few minutes of evaluation can protect you from poor-quality work, overpriced services, and unnecessary headaches.
By asking these 10 essential questions, you ensure your device is repaired safely, professionally, and with long-term reliability.
If you want dependable, honest, and high-quality repairs,
Smart Electronix is here to help.
Smart Electronix Australia – Precision Repairs for Modern Devices
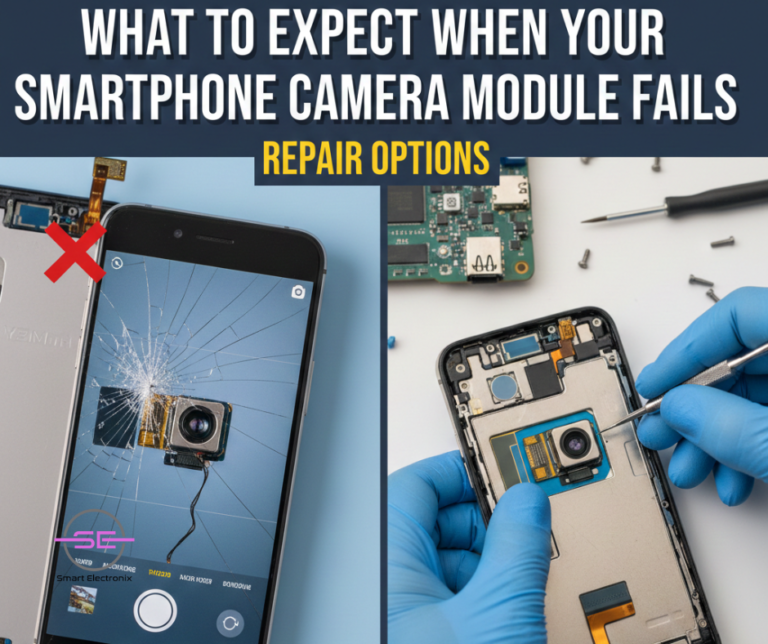
Your smartphone’s camera is no longer just a lens—it’s your memory keeper, your social tool, your scanner, your flashlight, and sometimes even your income source. That’s why when the camera module fails, it feels like half the phone has stopped working.
In 2025, smartphones come with multi-lens setups, optical sensors, AI enhancements, stabilisation systems, and advanced autofocus hardware. These make cameras impressive—but also more sensitive to damage.
At Smart Electronix, we regularly see users panicking when their camera stops working.
The good news? Most camera module issues can be fixed—and often without replacing the entire device.
This guide breaks down everything you need to know about camera module failures, symptoms, causes, repair options, and how to avoid future issues.
⭐ 1. Signs Your Smartphone Camera Module Is Failing
Your phone usually gives you early warning signs before the camera completely stops working. Look for:
1. Black screen when opening the camera app
No image, no preview—just darkness.
2. “Camera Failed” or “Unable to Connect to Camera” errors
Common across Samsung, Xiaomi, Oppo, and Pixel devices.
3. Blurry, foggy, or out-of-focus images
Even after cleaning the lens.
4. Shaking, vibrating, or buzzing sounds
This indicates OIS (Optical Image Stabilization) hardware failure.
5. Camera app freezing
Especially when switching between front and rear cameras.
6. Flash not working or constantly flickering
7. Lenses not switching
Ultra-wide or telephoto lenses stop responding.
8. Strange colours or static interference
A sign of sensor corruption.
If you see one or more of these symptoms, the issue is likely with the camera module, not just the software.
⭐ 2. What Causes Smartphone Camera Modules to Fail?
Modern camera hardware is complex. Here are the most common reasons behind failure:
1. Drops and Physical Impact
A fall can damage:
-
sensor
-
OIS mechanism
-
lens alignment
-
ribbon cable connections
Even with a protective case, camera lenses are still vulnerable.

2. Water and Moisture Exposure
Even water-resistant phones can suffer:
Moisture damage often shows up weeks after the incident.
3. Manufacturing or Firmware Issues
Some brands have recurring problems with:
Firmware-related failures often require reprogramming.
4. Dust & Debris Inside the Lens
Dust under the glass creates:
-
blurry spots
-
shadowy patches
-
inconsistent focus
This requires professional cleaning or module replacement.
5. Failed OIS Motor
Optical Image Stabilization motors tend to wear out, causing:
-
shaking images
-
buzzing noise
-
unstable focus
6. Third-Party Apps Interfering
Some apps misuse camera APIs, causing soft failures.
7. Battery Swelling
On older devices, swelling batteries push against internal components—including the camera.
⭐ 3. Your Repair Options (Explained by Smart Electronix)
When your camera fails, you have three practical options. Let’s break down the pros, cons, and costs in Australia.
Option 1: Software-Based Repair (If It’s a Software Issue)
Smart Electronix first performs diagnostics to rule out software problems.
Fixes include:
Good news:
Software fixes are usually fast and affordable.
When it works:
Cost: Low
Time: 30–60 minutes
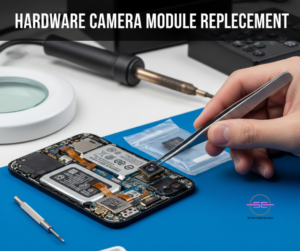
Option 2: Hardware Camera Module Replacement
If the hardware is damaged, replacing the module is the most common repair.
At Smart Electronix, we replace:
When replacement is needed:
Cost in Australia (approx.):
-
Rear camera module: $120 – $350
-
Front camera: $80 – $180
-
Premium flagships (Samsung Ultra, iPhones, Pixel Pro): $250 – $450
Why it works well:
Camera modules are self-contained, so replacing one usually restores full functionality.
Option 3: Motherboard-Level Repair (Advanced Cases)
Sometimes the camera module is fine—but the motherboard isn’t sending proper signals.
Common motherboard-level issues:
This requires:
Smart Electronix uses state-of-the-art tools to repair these faults.
Cost:
$150 – $399 depending on complexity
When this is needed:
-
camera still fails after module replacement
-
device crashes when opening camera
-
OIS power line damaged
-
no camera detection in settings
⭐ 4. Temporary Things You Can Try at Home
Before rushing to repair, try these steps:
✔ Restart your device
A temporary background process may be blocking the camera.
✔ Clear camera app cache
Especially effective for Android.
✔ Disable third-party camera apps
They may lock the sensor.
✔ Boot in Safe Mode
If the camera works in Safe Mode, the issue is from an app.
✔ Perform a factory reset
Last resort—back up first.
If none of these help, it’s likely hardware related.
⭐ 5. How to Prevent Future Camera Module Failures
Smart Electronix recommends these practices:
1. Always use a case with camera protection
Raised bezels protect against rear camera cracking.
2. Avoid exposing your phone to steam
Hot bathrooms are dangerous for camera sensors.
3. Keep your phone away from magnets
Magnets can disrupt OIS systems.
4. Clean the lens with microfiber
Avoid tissues, which scratch coatings.
5. Never use cheap chargers
Voltage spikes can damage camera circuits.
6. Protect your phone from heat
Extreme temperatures weaken adhesive and affect sensors.
7. Update carefully
Poorly optimized firmware updates occasionally break camera functionality.
⭐ 6. When to Visit Smart Electronix
You should bring your phone in immediately if:
-
the camera shows a black screen
-
it vibrates or clicks
-
the lens glass is cracked
-
moisture under the lens is visible
-
OIS appears unstable
-
photos are blurry despite cleaning
-
camera app crashes repeatedly
Delaying repair can cause:
The sooner you get diagnostics, the easier (and cheaper) the fix.
⭐ Final Thoughts
Smartphone camera failures feel frustrating—but they’re highly repairable. Whether it’s a software glitch, a damaged OIS motor, or a corrupted sensor, Smart Electronix offers reliable, professional repair solutions throughout Australia.
With expert diagnostics, genuine parts, and skilled technicians, we ensure your camera works like new—so you never miss a moment.
Want a same-day repair?
Smart Electronix is here to help.
Every year, Australians dispose of millions of electronic devices—phones, laptops, chargers, tablets, and accessories. And while upgrading to the latest technology is exciting, the environmental impact can be severe.
E-waste is the fastest-growing waste stream in Australia, and much of it ends up in landfills, leaking toxic materials and contributing to global pollution.
The good news? With the right steps, you can dispose of your old devices responsibly and even give them a second life through recycling, refurbishment, or safe material extraction.
Here’s the complete Smart Electronix guide for eco-friendly device disposal in 2025.
⭐ 1. Why Proper Electronic Disposal Matters
Most Australians don’t realise how harmful smartphones and laptops can be when tossed into the bin.
Toxic materials inside your device
Phones and laptops contain:
When dumped, these leak into soil and waterways.

Recycling recovers valuable resources
Your device contains reusable materials like:
-
Gold
-
Copper
-
Palladium
-
Aluminium
-
Rare earth metals
Recycling helps reduce the need for harmful mining operations.
Reduces carbon footprint
Manufacturing a single smartphone produces 70–90 kg of CO₂.
Extending device life through reuse or recycling significantly reduces environmental impact.
Supports the circular economy
Eco-friendly disposal ensures devices are refurbished, reused, harvested for parts, or reclaimed for raw materials—reducing waste and pollution.
⭐ 2. Before Recycling: Prepare Your Device Properly
Proper preparation protects your privacy and helps recycling technicians process your device safely.
1. Back up your data
Sync your data to:
-
Google Drive
-
iCloud
-
OneDrive
-
External hard drive
Never recycle a device containing personal information.
2. Log out of all accounts
Sign out of:
-
Google/Apple ID
-
Email accounts
-
Social media
-
Banking apps
-
Cloud accounts
3. Perform a factory reset
This permanently erases all data.
4. Remove SIM and memory cards
Eject SIM, microSD, and any attached hardware.
5. Discharge or cool the battery
Lithium batteries are sensitive.
Avoid recycling devices while the battery is extremely hot or swollen.
⭐ 3. Eco-Friendly Disposal Options in Australia
Australia has strong e-waste recycling initiatives, but many consumers are unaware of them. Smart Electronix highly recommends these sustainable solutions:
1. Manufacturer Recycling Programs
Most major brands offer free take-back recycling:
They ensure devices are dismantled responsibly.
2. Officeworks & JB Hi-Fi Tech Recycling Bins
Walk in and drop off:
-
phones
-
laptops
-
keyboards
-
chargers
-
cables
-
batteries
These programs are free and accessible nationwide.
3. Local Council E-Waste Collection
Most councils in Australia host:
Check your city’s waste management site for schedules.
4. Donate for Reuse
If your device still works, consider donating it to:
-
charities
-
community programs
-
schools
-
youth centres
-
remote communities
Many organisations refurbish used devices for those in need.
5. Sell or Trade-In Your Device
Trade-in programs from Apple, Samsung, and retailers help extend your device’s lifespan while earning you cashback or store credit.
6. Smart Electronix Upcycling Program (Coming Soon)
At Smart Electronix, we are working on offering eco-friendly:
Our goal is to help Australians reduce e-waste while supporting sustainable tech repair cycles.
⭐ 4. What Happens to Recycled Devices? (Inside the Process)
Ever wondered what happens after you drop off your device? Here’s the lifecycle:
Step 1: Safe Dismantling
Technicians break down the device into:
-
batteries
-
motherboards
-
metals
-
glass
-
plastic components
Step 2: Data Destruction
All remaining data is erased through industry-standard wiping.
Step 3: Hazardous Material Removal
Batteries, mercury lamps, and other chemicals are separated for safe handling.
Step 4: Material Recovery
Advanced machinery extracts:
-
copper wires
-
gold from circuits
-
aluminium frames
-
rare earth elements
Step 5: Reuse or Repurpose
Reusable parts may be used in:
-
refurbished phones
-
repaired laptops
-
replacement components
This supports cost-effective repairs and reduces energy consumption.
⭐ 5. Why Throwing Devices in the Bin Is Dangerous
Many Australians unknowingly dispose of electronics with household rubbish.
This is not just harmful—but in many states, illegal.
Risks include:
-
lithium batteries exploding in garbage trucks
-
fires at landfills
-
toxins contaminating soil
-
groundwater pollution
-
heavy metals entering the food chain
Proper recycling prevents these hazards entirely.
⭐ 6. Smart Electronix Tips for Greener Tech Habits
Want to reduce e-waste long-term?
Try these sustainable practices:
1. Repair before replacing
Repairing extends your device’s life significantly.
Smart Electronix specializes in:
-
battery replacements
-
screen repairs
-
motherboard-level fixes
-
charging port repairs
-
SSD upgrades
2. Avoid cheap, non-certified chargers
These damage batteries and shorten device lifespan.
3. Use phone cases & screen protectors
Reduce breakage and avoid premature replacement.
4. Store devices properly
Avoid heat, moisture, and impact.
5. Upgrade internal components
For laptops, upgrading RAM or SSD can extend usability for years.
6. Buy refurbished devices
Save money + help the planet.
⭐ 7. Why Smart Electronix Promotes Sustainable Disposal
As a repair-focused business, we understand how much value still exists in old electronics. Our mission is to:
-
reduce Australian e-waste
-
restore reusable devices
-
recycle responsibly
-
minimise landfill pollution
-
support the circular repair economy
We aim to keep devices in circulation longer and help customers make eco-friendly tech decisions.

⭐ Final Thoughts
Eco-friendly device disposal is simple, accessible, and incredibly impactful. Whether you choose recycling, refurbishment, donation, or responsible take-back programs, every action helps reduce Australia’s growing e-waste problem.
Your old phone or laptop contains materials that can be reused instead of wasted.
By taking the right steps today, we protect the planet and ensure a cleaner, greener future for generations to come.
With Smart Electronix, sustainability isn’t just a trend—it’s part of our mission.