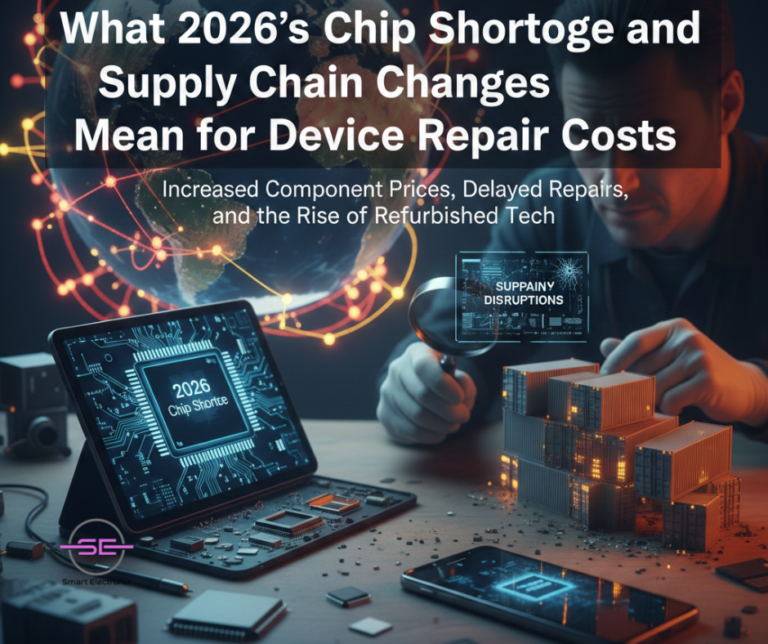
The global technology industry is entering another critical phase in 2026. While the worst of the pandemic-era disruptions may be behind us, chip shortages and supply chain shifts are still reshaping how devices are manufactured, repaired, and priced—especially in Australia.
For consumers, this often shows up as higher repair costs, longer wait times, and limited spare part availability. For repair businesses like Smart Electronix, it means adapting quickly to a constantly changing market.
In this blog, we break down what’s driving the 2026 chip shortage, how supply chain changes affect device repairs, and what Australian consumers can do to manage rising repair costs.
Understanding the 2026 Chip Shortage
Microchips are the backbone of modern electronics. From smartphones and laptops to smartwatches and IoT devices, almost every component relies on semiconductors.
Why the Chip Shortage Is Still a Problem in 2026
Despite increased investment in semiconductor manufacturing, shortages persist due to:
-
Explosive demand for AI-enabled devices
-
Electric vehicle and smart appliance competition for chips
-
Geopolitical trade restrictions
-
Limited fabrication plants (fabs) worldwide
-
Long production cycles (6–12 months per chip batch)
As manufacturers prioritise new devices, spare parts for repairs take a back seat.
How Supply Chain Changes Impact Device Repairs
Supply chains in 2026 are more complex and fragmented than ever before. Instead of relying on a few large suppliers, manufacturers now source parts from multiple regions, increasing variability in cost and availability.
Key Supply Chain Shifts Affecting Repairs
-
Increased reliance on regional suppliers
-
Higher shipping and logistics costs
-
Stricter import compliance and customs checks
-
Limited access to OEM-certified components
-
Reduced production of older model parts
For repair shops, this means sourcing the right part often takes more time and money.
Which Device Repairs Are Most Affected?
1. Smartphone Repairs
Modern smartphones use highly integrated chips for:
-
Power management
-
Camera processing
-
Face recognition
-
5G connectivity
If one chip fails, the entire logic board may need repair or replacement.
Result:
-
Higher motherboard repair costs
-
Increased demand for micro-soldering
-
Limited availability of donor boards
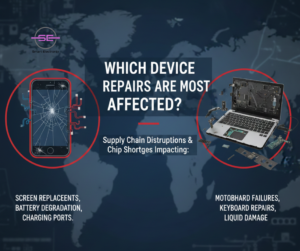
2. Laptop & MacBook Repairs
Laptops are hit particularly hard due to:
-
Custom SSD controllers
-
Unified memory chips
-
Proprietary charging ICs
Apple Silicon devices, in particular, rely on tightly integrated components that are difficult to source individually.
Result:
3. Gaming Consoles & IoT Devices
Gaming consoles and smart home devices compete directly with repair markets for chips.
Result:
Why Repair Costs Are Rising in Australia
Australian repair prices are influenced by both global and local factors.
Cost Drivers in 2026
-
Increased chip prices at the manufacturing level
-
Higher import and freight costs
-
Fluctuating exchange rates
-
Need for advanced diagnostic tools
-
Skilled labour shortages in micro-soldering
Even simple repairs can now involve complex diagnostics due to integrated chip designs.
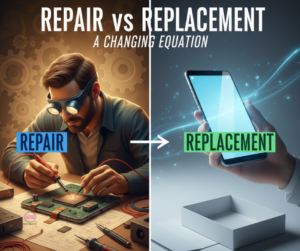
Repair vs Replacement: A Changing Equation
In the past, replacing a device often seemed cheaper than repairing it. In 2026, that equation is shifting again.
Why Repairs Still Make Sense
-
New device prices are also rising
-
Refurbished repairs cost less than full replacements
-
Data migration and setup add hidden costs
-
Repair supports sustainability and reduces e-waste
Smart Electronix focuses on repair-first strategies to keep costs manageable for customers.
How Smart Electronix Is Adapting to 2026 Challenges
At Smart Electronix, we’ve adjusted our repair strategy to handle ongoing shortages and supply chain changes.
Our Approach
-
Component-level repairs instead of full board replacements
-
Use of refurbished and reclaimed OEM chips
-
Multiple international and local suppliers
-
Advanced AI-powered diagnostics to avoid unnecessary part swaps
-
Stocking high-demand components in advance
These steps help us reduce delays and keep repair costs as fair as possible.
What Consumers Can Do to Reduce Repair Costs
While supply chain issues are largely out of your control, there are steps you can take to minimise expenses.
Practical Tips
-
Repair early before damage spreads
-
Keep devices updated but avoid rushed firmware updates
-
Use protective cases and surge protectors
-
Avoid cheap chargers that damage power ICs
-
Choose repair shops with component-level expertise
Preventive care can save hundreds of dollars in repair costs.
The Role of Right-to-Repair in 2026
Australia’s growing Right-to-Repair movement is helping balance the impact of shortages.
Benefits
-
Improved access to repair documentation
-
Wider availability of spare parts
-
More competition among suppliers
-
Lower long-term repair costs
Smart Electronix strongly supports Right-to-Repair initiatives that protect consumers and independent repairers.
Looking Ahead: What to Expect Beyond 2026
While new chip fabrication plants are being built globally, relief won’t be immediate.
Industry Outlook
-
Continued pressure on spare part availability
-
Increased use of modular and repair-friendly designs
-
Growth of refurbished and circular repair models
-
AI-assisted diagnostics becoming standard
-
Greater transparency in repair pricing
The repair industry will continue evolving—and adaptability will be key.
Final Thoughts
The 2026 chip shortage and ongoing supply chain changes are reshaping device repair costs across Australia. While prices may rise, professional repair remains the smartest and most sustainable option for extending device life.
At Smart Electronix, we’re committed to navigating these challenges with transparency, expertise, and innovative repair solutions—so Australians can keep their devices running longer, smarter, and more affordably.
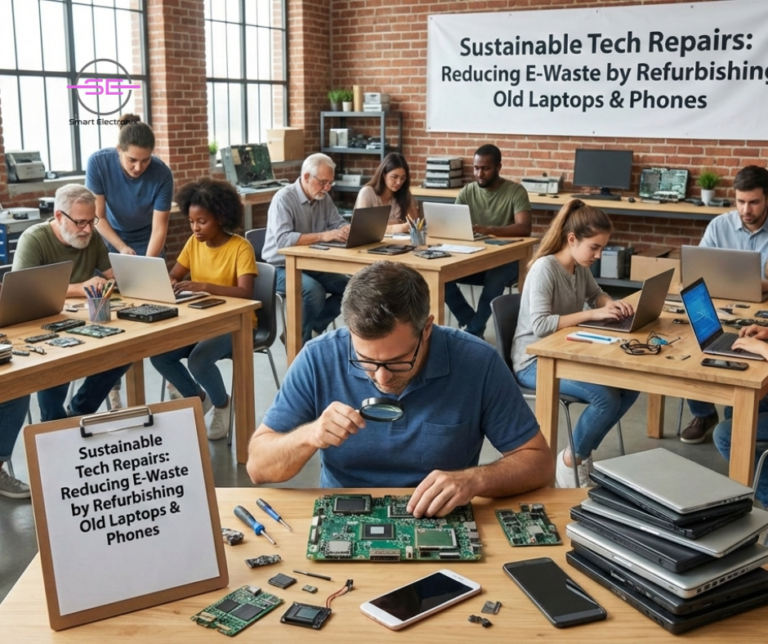
Smart Electronix Australia – Building a Greener Repair Economy
Electronic waste is one of the fastest-growing environmental challenges in Australia. Every year, millions of smartphones, laptops, tablets, and accessories are discarded—even though many of them are still repairable or refurbishable. The problem isn’t just broken devices; it’s a mindset that replacement is easier than repair.
At Smart Electronix, we believe sustainability starts with extending the life of technology. Refurbishing old laptops and phones is one of the most effective ways to reduce e-waste, lower carbon emissions, and save consumers money—without compromising performance.
This blog explores how sustainable tech repairs are transforming the repair industry and why refurbishment plays a critical role in Australia’s eco-friendly future.
The Growing E-Waste Problem in Australia
Australia generates hundreds of thousands of tonnes of e-waste annually, and much of it ends up in landfill. Devices contain hazardous materials such as:
-
lithium
-
lead
-
mercury
-
cadmium
When disposed of incorrectly, these substances pollute soil and water, posing long-term environmental risks.
What’s alarming is that:
-
over 60% of discarded devices are still repairable
-
most failures are minor (battery, screen, storage, software)
-
manufacturing a new device creates far more emissions than repairing an old one
Sustainable repair is no longer optional—it’s necessary.

What Does Device Refurbishment Really Mean?
Refurbishing a device is not the same as a basic repair. It’s a structured process that restores functionality, safety, and performance.
Refurbishment typically includes:
-
battery replacement or recalibration
-
SSD or storage upgrades
-
screen or camera replacement
-
motherboard-level repairs
-
thermal cleaning and repasting
-
operating system optimisation
-
full diagnostic testing
At Smart Electronix, refurbished devices are tested to ensure they meet performance and reliability standards, not just cosmetic fixes.
Why Refurbishing Is Better Than Replacing
1. Massive Reduction in E-Waste
Every refurbished phone or laptop:
Refurbishing one laptop can prevent up to 300 kg of CO₂ emissions compared to producing a new one.
2. Lower Environmental Footprint
Manufacturing new devices requires:
-
mining rare earth metals
-
global shipping
-
heavy energy consumption
Refurbishment uses a fraction of those resources, making it one of the most eco-friendly tech solutions available today.
3. Affordable Tech Access for Consumers
Refurbished devices:
-
cost significantly less than new models
-
perform well for daily tasks
-
are ideal for students, remote workers, and small businesses
Smart Electronix helps customers extend device life by years, not months.
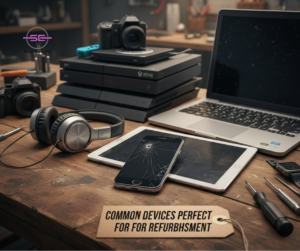
Common Devices Perfect for Refurbishment
Not all devices need replacing. Many are excellent refurbishment candidates.
Smartphones
Laptops
-
slow performance due to HDDs
-
overheating from dust buildup
-
degraded batteries
-
outdated operating systems
-
keyboard or trackpad issues
In most cases, upgrading an SSD and battery can make a 5-year-old laptop feel new again.
How Smart Electronix Reduces E-Waste Through Repairs
Repair-First Policy
We always evaluate whether a device can be:
-
repaired
-
refurbished
-
upgraded
Replacement is only recommended when repair is unsafe or uneconomical.
Component-Level Repairs
Instead of replacing entire boards, our technicians perform:
-
micro-soldering
-
IC replacements
-
power management repairs
This prevents unnecessary disposal of complex electronics.
Use of Refurbished & OEM-Grade Parts
Where safe and reliable, Smart Electronix uses:
-
refurbished OEM displays
-
tested camera modules
-
certified batteries
Each part is inspected and tested before reuse.
Responsible Recycling
When parts truly reach end-of-life, we ensure:
Nothing goes to landfill unnecessarily.
The Role of Circular Economy in Tech Repairs
A circular economy focuses on:
-
reuse
-
repair
-
refurbish
-
recycle
Smart Electronix actively supports this model by keeping devices in circulation longer. This approach:
-
reduces manufacturing demand
-
lowers costs for consumers
-
supports sustainability goals
It’s a win for both people and the planet.
Why Consumers Are Choosing Sustainable Repairs in 2025
Australian consumers are becoming more eco-conscious and cost-aware.
Key reasons include:
Refurbished tech is no longer “second-best”—it’s a smart choice.
Challenges in Sustainable Repairs (And How We Solve Them)
Challenge: Poor-Quality Refurbishments
Some refurbishers cut corners.
Our solution: strict testing, quality parts, and repair warranties.
Challenge: Software Obsolescence
Older devices can slow down due to bloated firmware.
Our solution: system optimisation, clean OS installs, firmware tuning.
Challenge: Consumer Mistrust
Some users fear refurbished devices.
Our solution: transparency, diagnostics reports, and honest recommendations.
Smart Electronix’s Sustainability Vision
Our long-term goal is to:
-
reduce e-waste across Australia
-
promote repair over replacement
-
educate consumers about sustainable tech use
-
expand refurbishment programs
-
support right-to-repair initiatives
Every device repaired is one less device discarded.
Final Thoughts
Sustainable tech repairs are not just about fixing devices—they’re about changing habits. Refurbishing old laptops and phones helps reduce e-waste, lower emissions, and make technology more accessible to everyone.
At Smart Electronix, we’re proud to lead Australia’s eco-friendly repair movement by combining advanced technical expertise with environmental responsibility.
Before you replace your device, consider repairing it—your wallet and the planet will thank you.

In today’s fast-paced digital world, customers expect device repairs to be fast, accurate, and transparent. Waiting days just to identify a problem is no longer acceptable—especially when smartphones, laptops, and smart devices are essential for work, communication, and daily life.
That’s where AI-powered device diagnostics are transforming the repair industry. At Smart Electronix, advanced diagnostic technologies are helping technicians identify issues faster, reduce human error, and deliver smarter repair solutions for Australian consumers.
Let’s explore how artificial intelligence is reshaping device diagnostics—and why it matters to you.
What Are AI-Powered Device Diagnostics?
AI-powered diagnostics use machine learning algorithms, automated testing tools, and data analysis to identify faults in electronic devices. Instead of relying solely on manual inspection, AI systems analyse thousands of device behaviours, error logs, sensor data, and historical repair patterns.
These tools can detect:
The result? Faster, more accurate diagnoses—often within minutes.
Why Traditional Diagnostics Are No Longer Enough
Traditional repair diagnostics depend heavily on technician experience and manual testing. While expertise is still crucial, modern devices are far more complex.
Challenges with Traditional Methods
-
Hidden firmware errors are hard to detect
-
Intermittent faults may not appear during manual testing
-
IoT and hybrid devices involve multiple systems
-
Human error can increase diagnosis time
-
Trial-and-error repairs raise costs
With devices becoming smarter, diagnostics also need to become smarter.
How Smart Electronix Uses AI to Speed Up Repairs
At Smart Electronix, AI doesn’t replace technicians—it empowers them.
1. Automated Health Scans
AI-based tools run full system scans on smartphones, laptops, tablets, and wearables. These scans check:
-
CPU and GPU performance
-
Storage health (SSD wear levels)
-
Battery efficiency and charge cycles
-
Sensor responsiveness
-
Network and connectivity stability
What once took hours now takes minutes.
2. Predictive Fault Detection
One of the biggest advantages of AI diagnostics is predictive analysis.
AI systems compare your device’s data with thousands of similar repair cases to identify:
-
Components likely to fail soon
-
Overheating trends
-
Battery cells nearing degradation
-
Firmware updates causing instability
This allows Smart Electronix to fix problems before they worsen, saving customers money and downtime.
3. Faster Diagnosis for Intermittent Issues
Many customers report problems like:
-
Random shutdowns
-
Battery draining overnight
-
Wi-Fi dropping intermittently
-
Touchscreens freezing occasionally
These issues are notoriously difficult to diagnose manually. AI tools log device behaviour over time, spotting patterns technicians might miss.
AI Diagnostics Across Different Devices
Smartphones
AI quickly identifies:
Laptops
AI diagnostics analyse:
Smartwatches & IoT Devices
AI helps detect:
This is critical in today’s connected device ecosystems.
Reducing Repair Time Without Cutting Corners
Speed doesn’t mean shortcuts. AI diagnostics help Smart Electronix:
-
Avoid unnecessary part replacements
-
Target the exact faulty component
-
Reduce repeat repairs
-
Improve long-term device reliability
This results in higher repair accuracy and better customer satisfaction.
Transparency Through Digital Diagnostics
Customers often worry about:
-
Unclear pricing
-
Unnecessary repairs
-
Lack of explanation
AI diagnostics generate clear diagnostic reports that technicians can explain in simple terms:
-
What’s wrong
-
Why it happened
-
What needs fixing
-
What can wait
This transparency builds trust, something increasingly important in the Australian repair market.
Supporting Sustainable & Eco-Friendly Repairs
AI-powered diagnostics align perfectly with Smart Electronix’s eco-conscious repair approach.
By accurately identifying faults:
Smarter diagnostics mean greener repairs.

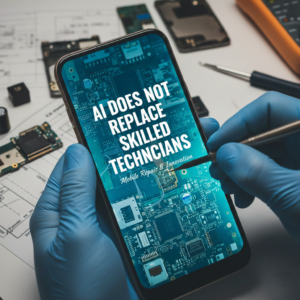
AI Does Not Replace Skilled Technicians
A common myth is that AI replaces human technicians. In reality, it does the opposite.
AI handles:
-
Data analysis
-
Pattern recognition
-
Diagnostic automation
Technicians handle:
-
Physical repairs
-
Micro-soldering
-
Component replacement
-
Quality control
-
Customer guidance
The combination of human expertise + AI intelligence delivers the best results.
What This Means for Customers
When you choose Smart Electronix, AI-powered diagnostics mean:
In many cases, devices are diagnosed on the same day, even for complex faults.
The Future of Device Repairs in Australia
As devices continue to evolve—with AI chips, foldable designs, IoT integration, and advanced firmware—repair diagnostics must keep pace.
AI-powered diagnostics are not a luxury anymore. They are becoming the standard for professional, reliable repair services in Australia.
Smart Electronix is committed to staying ahead of this curve—using technology not just to repair devices, but to repair them better, faster, and smarter.
Final Thoughts
AI-powered device diagnostics are reshaping the repair industry by removing guesswork, improving transparency, and dramatically reducing repair times. At Smart Electronix, this technology ensures every repair is backed by data, expertise, and precision.
When your device matters, smart diagnostics make all the difference.

In 2025, battery health remains one of the biggest concerns for smartphone and laptop users in Australia. Whether it’s fast-draining power, random shutdowns, overheating, or slow charging, most device troubles are tied directly to aging lithium-ion batteries. But when it comes to fixing the issue, people are often confused:
Should you replace the battery or try reconditioning it?
With so many myths circulating on social media and DIY forums, it’s important to understand the truth behind both options — and what actually benefits your device in the long run. This guide breaks down the differences and helps you make the right decision.
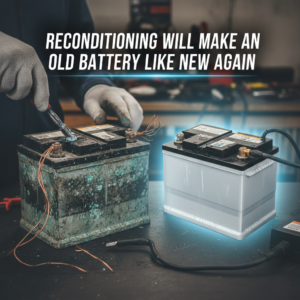
🔋 Myth #1: Reconditioning Will Make an Old Battery Like New Again
Many users believe that battery reconditioning — a process where charge cycles are reset or the battery is slowly deep-cycled — can magically restore full capacity.
The truth:
Reconditioning only helps in very specific cases, and only by a small margin.
It may restore 5–15% of lost capacity, but it cannot:
Once the battery health drops below 80%, replacement becomes the only reliable solution.
🔋 Myth #2: Replacement Batteries Are Always Risky or Fake
Because of supply-chain disruptions and counterfeit markets, customers worry about replacing their battery.
The truth:
Reputable shops — like Smart Electronix — source OEM or high-grade certified batteries that meet:
-
Australian safety standards
-
Original capacity requirements
-
Proper discharge protection
-
Safe thermal performance
A professional replacement increases safety. Counterfeit batteries are only a risk when using unverified or low-cost repairers.
🔋 Myth #3: A Reconditioned Battery Will Last Just as Long
Even after a “successful” reconditioning, the improvement is temporary.
Why?
Battery aging is chemical. Once lithium compounds break down, no software method can reverse it. Reconditioned batteries often last:
A new, high-quality replacement battery lasts:
🔋 Myth #4: Battery Replacements Damage the Device
Some believe that opening the phone or laptop causes harm.
The truth:
Damage only occurs with:
-
Untrained technicians
-
Poor-quality tools
-
Cheap batteries
-
Incorrect calibration
When done by certified repair professionals, battery replacement is safe, precise, and restores the device to near-original performance.
🆚 Battery Replacement vs. Battery Reconditioning
Here’s a clear comparison so you can decide what’s right for your device:
| Feature |
Replacement |
Reconditioning |
| Restores full capacity |
✅ Yes |
❌ No |
| Safety level |
High (OEM parts) |
Moderate |
| Useful for swollen batteries |
❌ Never |
❌ Impossible |
| Improvement duration |
1.5–3 years |
Weeks to months |
| Cost |
Higher |
Lower |
| Good for old devices |
Yes |
Limited |
| Eco-friendly |
Depends on recycling |
Yes (short-term) |
| Recommended for daily use phones |
✔✔ |
✖ |
🔋 When Reconditioning Does Make Sense
Reconditioning isn’t completely useless — it has its place.
It works best for:
-
Temporary backup devices
-
Very old laptops not worth investing in
-
People who need a short-term fix before upgrading
-
Devices where replacement parts are discontinued
In these cases, reconditioning can extend usability just a little longer.
🔋 When Battery Replacement Is the Best (and Only) Safe Option
You should replace your battery immediately if you notice:
-
Battery swelling or bulging
-
Sudden drops from 30% to 1%
-
Device shutting down during calls or gaming
-
Overheating during charging
-
Charging stuck at a certain percentage
-
Battery health below 80%
-
Extremely slow charging
These signs indicate irreversible chemical degradation, and reconditioning won’t help.
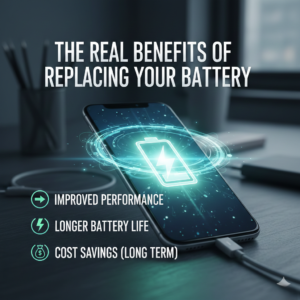
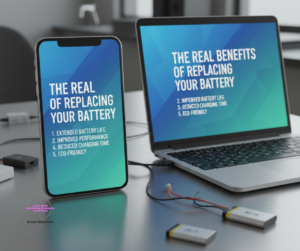
🔋 The Real Benefits of Replacing Your Battery
A high-quality battery replacement restores:
1. Full Battery Life
Your device returns to near-original performance.
2. Faster Charging
New batteries accept charge more efficiently.
3. Better Performance
Old batteries force devices to throttle performance. Replacement removes this bottleneck.
4. Improved Safety
Old lithium cells can leak, expand, or short-circuit.
5. Longer Device Lifespan
A battery replacement can add 2–3 years to your phone or laptop’s usable life.
♻️ What About the Environment?
Many people think reconditioning is always more eco-friendly, but it’s not always the case.
The eco-friendly choice is:
This keeps the device out of landfills and prevents toxic chemical leakage.
✔️ Final Verdict: Replace or Recondition?
Looking at all the evidence:
-
Reconditioning is temporary and helpful only for short-term needs.
-
Replacement is long-lasting, safer, and restores performance.
-
For daily-use smartphones and laptops, replacement is the clear winner.
-
For very old devices, reconditioning may be enough to keep them alive temporarily.
When done properly using certified, high-quality batteries, replacement gives you the best return on investment — and protects your device from future failures.
In 2025, battery health remains one of the biggest concerns for smartphone and laptop users in Australia. Whether it’s fast-draining power, random shutdowns, overheating, or slow charging, most device troubles are tied directly to aging lithium-ion batteries. But when it comes to fixing the issue, people are often confused:
Should you replace the battery or try reconditioning it?
With so many myths circulating on social media and DIY forums, it’s important to understand the truth behind both options — and what actually benefits your device in the long run. This guide breaks down the differences and helps you make the right decision.
🔋 Myth #1: Reconditioning Will Make an Old Battery Like New Again
Many users believe that battery reconditioning — a process where charge cycles are reset or the battery is slowly deep-cycled — can magically restore full capacity.
The truth:
Reconditioning only helps in very specific cases, and only by a small margin.
It may restore 5–15% of lost capacity, but it cannot:
Once the battery health drops below 80%, replacement becomes the only reliable solution.
🔋 Myth #2: Replacement Batteries Are Always Risky or Fake
Because of supply-chain disruptions and counterfeit markets, customers worry about replacing their battery.
The truth:
Reputable shops — like Smart Electronix — source OEM or high-grade certified batteries that meet:
-
Australian safety standards
-
Original capacity requirements
-
Proper discharge protection
-
Safe thermal performance
A professional replacement increases safety. Counterfeit batteries are only a risk when using unverified or low-cost repairers.
🔋 Myth #3: A Reconditioned Battery Will Last Just as Long
Even after a “successful” reconditioning, the improvement is temporary.
Why?
Battery aging is chemical. Once lithium compounds break down, no software method can reverse it. Reconditioned batteries often last:
A new, high-quality replacement battery lasts:
🔋 Myth #4: Battery Replacements Damage the Device
Some believe that opening the phone or laptop causes harm.
The truth:
Damage only occurs with:
-
Untrained technicians
-
Poor-quality tools
-
Cheap batteries
-
Incorrect calibration
When done by certified repair professionals, battery replacement is safe, precise, and restores the device to near-original performance.
🆚 Battery Replacement vs. Battery Reconditioning
Here’s a clear comparison so you can decide what’s right for your device:
| Feature |
Replacement |
Reconditioning |
| Restores full capacity |
✅ Yes |
❌ No |
| Safety level |
High (OEM parts) |
Moderate |
| Useful for swollen batteries |
❌ Never |
❌ Impossible |
| Improvement duration |
1.5–3 years |
Weeks to months |
| Cost |
Higher |
Lower |
| Good for old devices |
Yes |
Limited |
| Eco-friendly |
Depends on recycling |
Yes (short-term) |
| Recommended for daily use phones |
✔✔ |
✖ |
🔋 When Reconditioning Does Make Sense
Reconditioning isn’t completely useless — it has its place.
It works best for:
-
Temporary backup devices
-
Very old laptops not worth investing in
-
People who need a short-term fix before upgrading
-
Devices where replacement parts are discontinued
In these cases, reconditioning can extend usability just a little longer.
🔋 When Battery Replacement Is the Best (and Only) Safe Option
You should replace your battery immediately if you notice:
-
Battery swelling or bulging
-
Sudden drops from 30% to 1%
-
Device shutting down during calls or gaming
-
Overheating during charging
-
Charging stuck at a certain percentage
-
Battery health below 80%
-
Extremely slow charging
These signs indicate irreversible chemical degradation, and reconditioning won’t help.
🔋 The Real Benefits of Replacing Your Battery
A high-quality battery replacement restores:
1. Full Battery Life
Your device returns to near-original performance.
2. Faster Charging
New batteries accept charge more efficiently.
3. Better Performance
Old batteries force devices to throttle performance. Replacement removes this bottleneck.
4. Improved Safety
Old lithium cells can leak, expand, or short-circuit.
5. Longer Device Lifespan
A battery replacement can add 2–3 years to your phone or laptop’s usable life.
♻️ What About the Environment?
Many people think reconditioning is always more eco-friendly, but it’s not always the case.
The eco-friendly choice is:
This keeps the device out of landfills and prevents toxic chemical leakage.
✔️ Final Verdict: Replace or Recondition?
Looking at all the evidence:
-
Reconditioning is temporary and helpful only for short-term needs.
-
Replacement is long-lasting, safer, and restores performance.
-
For daily-use smartphones and laptops, replacement is the clear winner.
-
For very old devices, reconditioning may be enough to keep them alive temporarily.
When done properly using certified, high-quality batteries, replacement gives you the best return on investment — and protects your device from future failures.

Firmware updates are designed to make your devices better — improving performance, fixing bugs, and patching security vulnerabilities. But sometimes, these updates don’t go as planned. A sudden crash, an interrupted update, a corrupted file, or a compatibility issue can quickly turn a working device into a boot-looping, frozen, or completely unresponsive problem.
Whether it’s a smartphone, laptop, smartwatch, or gaming console, failed firmware updates are becoming increasingly common in 2025 as devices grow more complex and tightly integrated with cloud services. In this guide, we’ll explain why these failures happen, how to safely recover your device, and when to seek professional help.
1. What Is Firmware — and Why Do Updates Fail?
Firmware is the low-level software built into your device’s hardware. Unlike regular apps or OS updates, firmware controls:
-
Power management
-
Charging
-
Touchscreen functions
-
Modem & Wi-Fi
-
Storage controllers
-
Battery calibration
Because firmware interacts directly with the hardware, any disruption during an update can cause the entire device to malfunction.
Common reasons firmware updates go wrong:
-
Low battery during update
-
Interrupted Wi-Fi connection
-
Corrupted update files
-
Incompatible update versions
-
Internal storage errors
-
Third-party ROMs or rooted devices
-
Sudden shutdowns or overheating
When firmware becomes corrupted, the device often cannot boot normally — which is why users panic when their screen suddenly goes black.
2. Signs Your Firmware Update Has Failed
Firmware failures show up in different ways, depending on the device brand and model. The most common symptoms include:
✓ Stuck on company logo (Apple, Samsung, Dell, HP)
✓ Boot loop — device restarts endlessly
✓ Black screen with vibration or LED light
✓ “No Command” or recovery screen
✓ Touchscreen or keyboard stops responding
✓ Charging not detected
✓ Wi-Fi / Bluetooth no longer works
If you notice these signs immediately after a firmware update, do not keep forcing restarts — it can make recovery more difficult.
3. First Steps: Safe Actions to Try Before Repair
Before heading to a repair shop, there are several safe troubleshooting steps that often work.
✔ Charge the device for at least 30 minutes
Some devices enter firmware recovery mode when the battery is too low.
✔ Soft reset (safe restart)
Different brands have different combinations:
-
Smartphones: Power + Volume Down
-
Laptops: Long press the power button for 15 seconds
-
iPhones: Quick Volume Up → Volume Down → Hold Power
This won’t erase data.
✔ Try entering recovery mode
This allows you to:
✔ Disconnect external devices (for laptops)
Sometimes firmware conflicts with connected hardware like docking stations or USB drives.
✔ Check brand recovery software
Most brands offer official recovery tools:
These tools can reinstall the correct firmware without data loss.

4. When You Should Avoid DIY Fixes
Firmware is sensitive, and certain mistakes can permanently damage the device, especially when flashing software incorrectly.
Avoid DIY repair if:
-
The device has physical damage
-
The storage chip (EMMC/SSD) is failing
-
You smell burning or feel unusual heat
-
The device is stuck in Qualcomm QDLoader/Mask mode
-
You see “Secure Boot Error” or “FRP Lock” messages
In these cases, forcing firmware may cause additional data corruption or motherboard failure. Professional technicians use micro-soldering tools and hardware programmers to safely recover locked or bricked devices.
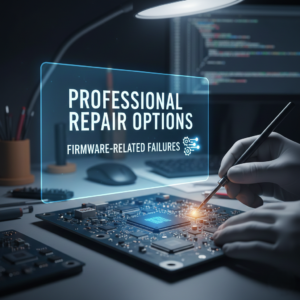
5. Professional Repair Options for Firmware-Related Failures
If you visit a certified repair shop, here’s what they typically offer:
✓ Firmware Reinstallation / Reflash
A clean version of the firmware is installed to restore the device.
✓ EMMC / UFS Chip Repair
If the internal storage is malfunctioning, technicians repair or replace the chip.
✓ Bootloader Repair
Fixes corrupted boot partitions that prevent the device from starting.
✓ BIOS/UEFI Repair (laptops)
Repairs firmware controlling keyboard, charging, and power-on functions.
✓ Data recovery (if needed)
Technicians recover photos, documents, and files even if the device cannot boot.
✓ Component-level micro-soldering
Used when firmware failed due to hardware faults such as:
This level of repair requires expertise and special equipment.
6. How to Prevent Firmware Problems in the Future
The best repair is prevention. Before applying firmware updates:
✔ Keep your battery above 50%
✔ Use stable Wi-Fi
✔ Never interrupt or force-shutdown during updates
✔ Keep storage at least 10–15% free
✔ Only install official firmware (avoid third-party ROMs)
✔ Backup your data regularly
✔ Keep device temperature cool during updates
These small habits significantly reduce the chances of corruption.
7. Final Thoughts
Firmware updates are essential for keeping modern devices secure and efficient, but when they go wrong, the effects can be stressful. Knowing how to identify early signs of firmware failure — and understanding safe recovery steps — can save you time, money, and potential data loss.
If DIY methods don’t work, don’t force the issue. Professional technicians have specialized tools that can recover even severely corrupted firmware safely and reliably.
As devices continue to become more complex and firmware-driven, being prepared is your best protection.
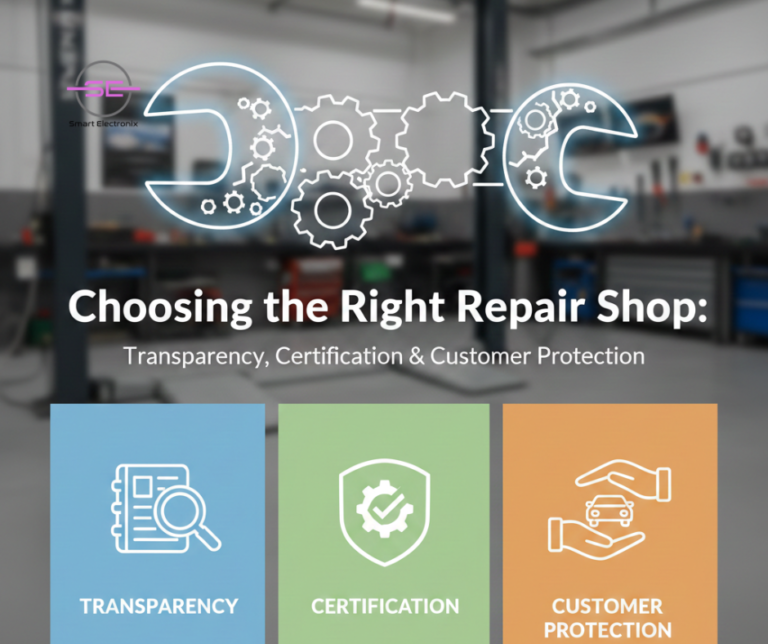
Whether it’s a cracked smartphone screen, a failing laptop battery, or a smartwatch that won’t sync, choosing the right repair shop makes all the difference. In 2025, the repair industry in Australia is booming—but not all repair shops deliver the same level of transparency, quality, or customer protection.
With increasing cases of poor-quality spare parts, misdiagnosed issues, overcharging, and untrained technicians, consumers must be more careful than ever. A reliable repair shop should provide clear communication, proper certifications, authentic parts, and genuine aftercare.
This guide will help you understand exactly what to look for before handing over your valuable smartphone, laptop, or tablet for repairs.
⭐ 1. Why Choosing the Right Repair Shop Matters More Than Ever
Modern devices are no longer simple. Today’s gadgets come with:
An inexperienced or uncertified technician can cause more damage than the original problem.
Choosing the wrong repair shop can lead to:
A trustworthy repair partner ensures your device stays safe, reliable, and long-lasting.
⭐ 2. Transparency: The First Sign of a Trustworthy Repair Shop
A good repair shop never hides information. They should clearly explain:
✔ What’s wrong with your device
A clear diagnosis—not vague statements like “your board is dead”—shows professionalism.
✔ What parts will be replaced
Shops should disclose whether they use:
You should always know what’s going inside your device.
✔ The total repair cost
No hidden charges. No surprise fees.
A transparent shop gives a written estimate before starting work.
✔ Repair time and process
You deserve to know:
✔ Warranty coverage
A reputable shop gives clear warranty terms for both parts and labor.

⭐ 3. Certification: The Mark of a Skilled Technician
One of the best indicators of a reliable repair shop is certified technicians.
Look for:
✔ Manufacturer Certifications
-
Apple Certified Technician
-
Samsung Authorized Repair Partner
-
Microsoft/Surface Device Certification
These show that technicians have been trained specifically for those brands.
✔ Industry Certifications
These qualifications ensure the technician understands safe handling, circuit repair, and diagnostic accuracy.
✔ Experience in the field
Repairs for smartphones, laptops, and tablets require different expertise. Choose technicians who specialize in your device category.
⭐ 4. Customer Protection: Keeping You and Your Data Safe
A repair shop should protect:
-
Your device
-
Your data
-
Your money
-
Your safety
Here’s how reliable shops ensure customer protection:
A. Data Privacy Policies
Technicians should promise:
-
No unauthorized data access
-
No copying, deleting, or transferring information
-
Secure handling of personal files
If a shop downplays data safety, walk away.
B. Warranty on Repairs
Industry-standard warranty:
Shops that offer no warranty are risky.
C. Use of Safe, High-Quality Parts
Poor-quality batteries and screens can:
A reputable repair shop only uses high-grade or OEM parts.
D. Clear Invoices & Proof of Service
Your invoice should include:
This protects you if something goes wrong later.
⭐ 5. Red Flags to Watch Out For
Be cautious if you see any of these signs:
🚫 Shops that offer repairs “while you wait” for major issues like board failures
🚫 No written warranty policy
🚫 No invoice or record of service
🚫 Extremely cheap pricing (usually fake or low-grade parts)
🚫 Technicians unwilling to explain the repair
🚫 Shops not allowing you to ask questions
🚫 Dirty, unorganized workspaces
🚫 No online presence or shady reviews
🚫 High-pressure sales tactics
Trust your instincts—if something feels off, it probably is.
⭐ 6. How Reputable Shops Like Smart Electronix Stand Out
In Australia, leading repair shops now prioritize:
✔ Full Transparency
Clear diagnostics, honest pricing, and upfront cost breakdowns.
✔ Certified Technicians
Professionally trained staff who follow global repair standards.
✔ Safe Repair Practices
Anti-static setups, precision tools, clean environments, and proper component handling.
✔ Customer Data Safety
Strict privacy policies and secure repair workflows.
✔ Authentic Spare Parts
Access to high-quality OEM parts for long-term durability.
✔ Modern Repair Technology
-
Microsoldering stations
-
Thermal imaging diagnostics
-
AI-powered fault detection
-
Ultrasonic cleaning systems
-
Precision alignment jigs for displays
✔ Post-Repair Support
Follow-ups, warranties, and customer guidance.
These qualities give consumers confidence that their devices are being serviced professionally.

⭐ 7. Tips for Choosing the Best Repair Shop in 2025
Before booking a repair, ask these questions:
-
Are your technicians certified?
-
Do you provide a written diagnostic or quote?
-
What quality of parts do you use?
-
Do you offer warranties on repairs?
-
How do you handle customer data privacy?
-
What is the estimated turnaround time?
-
Can I see customer reviews or testimonials?
-
Will I get a detailed invoice after the repair?
-
Do you perform board-level repairs if needed?
-
Can you guarantee my device’s safety during service?
If a repair shop confidently answers all these questions, you’re in safe hands.
⭐ Final Thoughts
Choosing the right repair shop isn’t just about fixing a broken device—it’s about protecting your data, your safety, and your investment. The best repair shops provide:
As devices evolve and repairs become more complex, consumers need a repair partner they can trust. Shops that prioritize professionalism and transparency will continue to lead the Australian market in 2025.

In 2025, consumers are using more devices than ever—smartphones, laptops, smartwatches, gaming consoles, wireless earbuds, tablets, and even IoT appliances. With this rapid growth comes a major challenge: keeping everything repaired, updated, and running at peak performance.
That’s exactly why subscription-based device maintenance plans are gaining enormous traction across Australia. Instead of random, unpredictable repair bills, consumers now prefer ongoing protection, unlimited diagnostics, and priority servicing—all bundled into a simple monthly fee.
At Smart Electronix, we’ve seen firsthand how much these plans help everyday users, businesses, and even students protect their tech investments. Let’s explore why subscription-based repair and maintenance plans are becoming the new industry standard.
⭐ 1. Devices Are Getting More Complex — and Expensive to Repair
Modern smartphones and laptops are no longer simple machines. With foldable displays, 5G antennas, ultra-thin thermal systems, and advanced chipsets, repairs have become:
-
More time-consuming
-
More expensive
-
More specialised
A single component failure—like a battery swelling or a motherboard short—can cost hundreds of dollars.
A subscription plan spreads that cost over time, making:
This is especially beneficial for premium devices like iPhones, Samsung Galaxy phones, MacBooks, gaming laptops, and flagship smartwatches.
⭐ 2. Predictable Monthly Fees Beat Surprise Repair Bills
When a device breaks, it rarely happens at a convenient time.
Suddenly you’re forced to deal with:
-
A $350 screen replacement
-
A $200 motherboard cleaning
-
A $150 battery replacement
With a subscription plan, you pay something like $10–$20/month instead of getting hit with random bills. It’s the same reason people prefer:
-
Netflix over DVD purchases
-
Apple iCloud instead of buying more storage
-
Car insurance instead of paying out-of-pocket for accidents
It spreads cost over time while giving peace of mind.
⭐ 3. Preventive Care Reduces Major Failures
Repair shops like Smart Electronix include preventive maintenance in subscription plans, such as:
-
Thermal audit & cooling system cleaning
-
Deep diagnostics
-
Battery health testing
-
Firmware update checks
-
Malware and performance scans
-
Port, speaker, and camera cleaning
This proactive service helps identify issues before they become expensive repairs.
For example:
-
A laptop with a dusty fan may overheat and damage the motherboard
-
A phone battery at 70% health may fail unexpectedly
-
A smartwatch with corrosion may become irreparable over time
Preventive care = longer device life and fewer emergencies.
⭐ 4. Priority Support & Faster Repairs
A major benefit of subscription plans is VIP treatment. Subscribers often get:
When your device stops working, speed matters. A student cannot wait days for a laptop repair before exams. A professional cannot lose their phone during work hours. Priority repair ensures minimal disruption.
⭐ 5. Multi-Device Households Need All-in-One Protection
Today, the average Australian household owns:
That’s 8–12 devices under one roof!
Subscription plans are gaining popularity because they offer:
With all devices constantly exposed to wear, drops, moisture, and battery aging, having a unified plan makes managing tech much easier.

⭐ 6. Small Businesses Benefit Even More
For businesses, downtime equals lost money. Subscription repair plans offer:
From cafes using POS tablets to e-commerce companies relying on laptops, predictable maintenance prevents sudden operational disruptions.
⭐ 7. Remote Work & Online Learning Increase Dependence on Devices
During the pandemic, Australians became more reliant on personal devices. Even today, remote and hybrid work continues to rise. This means:
Subscription maintenance ensures devices stay reliable throughout the year, not just when something breaks.
⭐ 8. Rising Repair Costs Make Subscription Plans More Attractive
Post-COVID supply chain issues caused:
This trend is still affecting Australia in 2025.
With higher repair costs, paying a small monthly fee makes far more financial sense than paying full price for major repairs.
⭐ 9. Eco-Friendly Consumers Prefer Repair Over Replace
Younger generations in particular prefer repairing devices rather than discarding them. Subscription plans:
For eco-conscious Australians, a repair subscription aligns with their values.
⭐ 10. Bonus Services Add Extra Value
Many repair subscription plans now include:
These perks make the subscription feel like a complete device-care ecosystem.
Final Thoughts — Why Subscription Plans Are the Future of Repairs
Subscription-based device maintenance plans are growing rapidly because they:
✅ Reduce repair costs
✅ Prevent major failures
✅ Provide guaranteed support
✅ Cover multiple devices
✅ Protect both consumers and businesses
✅ Extend device lifespan
✅ Offer predictable monthly expenses
✅ Support eco-friendly repair habits
With devices becoming more complex and essential to everyday life, Australians are shifting towards continuous protection instead of one-time fixes.

Accidental liquid damage is one of the most common—and costly—issues faced by device owners today. Whether it’s a smartphone dropped into water or a laptop hit by a coffee spill, moisture can seriously harm internal components. But even though both situations fall under “liquid damage,” the causes, risks, and repair strategies are very different.
In this guide, we’ll break down smartphone water damage vs. laptop liquid spills, explore their unique challenges, and share best practices to save your device safely.
1. How Smartphones Typically Get Water Damage
Smartphones face water exposure more often because we carry them everywhere — outdoors, bathrooms, kitchens, gyms, cars, beaches, swimming pools, and more.
Common Water-Damage Scenarios
-
Dropped in a sink or toilet
-
Caught in the rain
-
Sweaty pockets or gym bags
-
Spilled drinks on the table
-
Accidental dip in the pool or ocean
Key Vulnerable Components
Even with IP68 ratings, modern phones are not waterproof — just water-resistant. Damage often hits:
-
Charging ports
-
Speaker grills
-
Microphones
-
SIM/SD card tray
-
Display connectors
-
Battery terminals
Saltwater, chlorinated water, and soapy water are particularly harmful because they cause corrosion much faster than freshwater.
2. How Laptops Typically Experience Liquid Spills
Unlike smartphones, laptops don’t usually fall into water — instead, they suffer from liquid spills, often while in use.
Common Spill Scenarios
Because laptops have larger vents and openings, liquids can penetrate deep and fast.

Most Affected Laptop Parts
Sugary, sticky liquids like soda or juice are the worst — they cause corrosion, short circuits, and residue that requires deep cleaning.
3. Which Device Is More Vulnerable?
| Factor |
Smartphones |
Laptops |
| Water resistance |
Higher (IP ratings) |
Low or none |
| Exposure risk |
Higher |
Moderate |
| Liquid entry points |
Small ports |
Large vents & keyboard |
| Internal protection |
Better sealing |
Minimal sealing |
| Repair difficulty |
Medium–high |
High |
| Chance of survival |
Good (if immediate action taken) |
Lower (spills spread fast) |
Verdict:
Smartphones are more water-resistant, but are exposed more often.
Laptops are less protected, and spills usually cause more severe internal damage.
4. What Happens Inside a Device When Liquid Enters?
A. Corrosion
Moisture reacts with metal components, slowly eating away traces and connectors.
B. Short Circuits
When the device is powered on, liquid bridges connections causing instant failure.
C. Residue Build-up
Sugar, salt, and minerals create sticky layers that disrupt signals and airflow.
D. Component failure
Batteries, displays, speakers, keyboards, and charging circuits are common victims.
5. Immediate Steps: What to Do (and NOT to Do)
If a Smartphone Gets Water Damage
Do:
-
Turn it off immediately
-
Remove SIM tray
-
Dry gently with a clean cloth
-
Keep the phone in a dry, ventilated place
-
Visit a repair shop for internal cleaning
Don’t:
If a Laptop Suffers a Liquid Spill
Do:
-
Power off instantly (hold power for 5–10 seconds)
-
Disconnect charger
-
Flip the laptop upside down (tent position)
-
Remove external peripherals
-
Bring it for professional cleaning ASAP
Don’t:
-
Don’t try to power it on
-
Don’t attempt to dry it with heat
-
Don’t continue typing or pressing keys
-
Don’t delay — liquid spreads fast across the motherboard
6. How Technicians Fix Water-Damaged Devices
Smartphone Repairs
Technicians typically perform:

Laptop Repairs
Laptop spill recovery is more complex and may include:
-
Full disassembly
-
Motherboard ultrasonic wash
-
Keyboard or trackpad replacement
-
Reflow or repair of shorted circuits
-
SSD and RAM recovery
-
BIOS repair if shorting occurs
Laptop repairs often cost more due to the number of impacted components.
7. Repair Cost Comparison in Australia
| Repair Type |
Smartphone |
Laptop |
| Basic cleaning |
$60–$120 |
$120–$250 |
| Major corrosion fix |
$120–$250 |
$200–$400 |
| Port/keyboard replacement |
$50–$120 |
$150–$350 |
| Motherboard repair |
$150–$350 |
$250–$800 |
Laptops generally cost more to fix because a spill can damage multiple components at once.
8. Prevention Tips for 2025
For Smartphones
-
Use waterproof cases
-
Keep away from pools and bathrooms
-
Avoid charging in humid environments
-
Don’t expose to sweat in pockets
For Laptops
-
Keep drinks away from your workspace
-
Use a keyboard cover
-
Buy spill-resistant bags for travel
-
Never place bottles inside laptop compartments
Final Thoughts
Whether it’s a soaked smartphone or a coffee-splashed laptop, liquid damage can be devastating — but quick action and proper handling can save your device. Smartphones have better protection, but laptops suffer more severe internal failures due to the layout and number of exposed components.
How Supply-Chain Disruptions Are Affecting Spare Parts for Laptop Repairs in Australia
Over the past few years, Australia’s tech repair industry has faced one of its biggest challenges: global supply-chain disruptions. From prolonged shipping delays to unpredictable component shortages, technicians and customers alike are feeling the impact — especially when it comes to sourcing laptop spare parts.
Whether you run a repair shop or simply need your laptop fixed quickly, understanding why these disruptions happen and how they affect repair timelines can help you make better decisions. Here’s a deep dive into what’s going on behind the scenes.

1. Global Manufacturing Slowdowns: Fewer Parts in Circulation
Most laptop components — screens, motherboards, SSDs, batteries, and keyboard assemblies — are manufactured in China, Taiwan, Japan, and South Korea. When these regions face factory shutdowns, labor shortages, or material scarcity, the ripple effect hits Australia directly.
Commonly Affected Laptop Parts:
-
Laptop batteries for Dell, HP, Lenovo, and Apple
-
High-resolution displays and touch panels
-
Replacement keyboards
-
SSDs and RAM modules
-
Cooling fans and heatsinks
Because production drops, repair shops in Australia must wait longer or pay more to secure stock.
2. Increased Shipping Costs & Delays
Even when parts are available, getting them into Australia is becoming harder. Key reasons include:
✦ Fewer cargo flights
Passenger flights usually carry a large amount of cargo. When flight numbers drop, so does cargo capacity.
✦ Port congestion
Ports across Southeast Asia and Australia are experiencing longer processing times.
✦ Rising fuel costs
Higher shipping prices directly increase the retail price of laptop parts.
The result? A part that usually arrives in 3–5 days may now take 10–25 days, depending on the supplier and origin country.
3. Demand Spike From Work-From-Home & Remote Learning
During the WFH boom, Australians purchased laptops in record numbers. More devices equals more repairs — cracked screens, overheating issues, swollen batteries, faulty charging ports, etc.
Because repair requests jumped so quickly, supply chains couldn’t keep up. Even in 2025, that demand remains higher than pre-pandemic levels.
4. Counterfeit & Low-Quality Parts Flooding the Market
When genuine parts become hard to source, counterfeit components often enter the supply chain.
Risks of low-quality replacement parts:
Australian repair businesses now spend more time verifying vendors, checking part authenticity, and rejecting unreliable shipments.
5. Laptop Brands With the Most Supply Issues
Some brands rely more heavily on proprietary components, making disruptions worse.
Most affected brands in Australia:
-
Apple (due to custom chips and batteries)
-
Microsoft Surface
-
Lenovo X-series and Yoga models
-
HP Spectre & Envy series
-
Gaming laptops like MSI, ROG, and Predator
These parts have always been harder to source — supply-chain disruptions only magnify the challenge.
6. Rising Repair Costs for Customers
Because part availability fluctuates, prices are unstable. If a battery used to cost $60 wholesale, it might now cost $85–$120. Shops must adjust repair pricing to cover:
This is why customers may notice a 10–40% increase in laptop repair costs compared to previous years.
7. How Australian Repair Shops Are Adapting
Despite the disruptions, many Australian repair specialists are becoming smarter and more proactive.
✔ Building relationships with multiple suppliers
Instead of relying on one distributor, shops now partner with suppliers across the UAE, China, Europe, and local wholesalers.
✔ Stocking high-demand parts in advance
Batteries, screens, SSDs, and keyboards are kept in inventory to reduce wait times.
✔ Offering refurbished OEM parts
Refurbished parts maintain quality while reducing dependence on new-part supply chains.
✔ Repair-first approach
More technicians now focus on micro-soldering and component-level repairs to avoid replacing entire motherboards.

8. What Customers Can Do to Avoid Delays
If your laptop needs a repair soon, here are ways to minimise downtime:
✓ Book diagnosis early
Don’t wait until the device completely fails.
✓ Ask about alternative options
Refurbished or compatible OEM parts may be available.
✓ Be open to temporary solutions
For example, using an external keyboard or SSD while waiting for internal parts.
✓ Choose reputable repairers
They can source genuine parts faster and avoid counterfeits.
Final Thoughts
Australia’s laptop repair landscape is evolving rapidly as global supply-chain challenges continue. While delays and increased costs are unavoidable, both repair shops and customers can navigate the situation more effectively through planning, transparency, and flexible repair options.
With smarter sourcing strategies, better inventory management, and rising awareness among consumers, the future of laptop repairs in Australia remains promising — even in the face of global disruptions.
