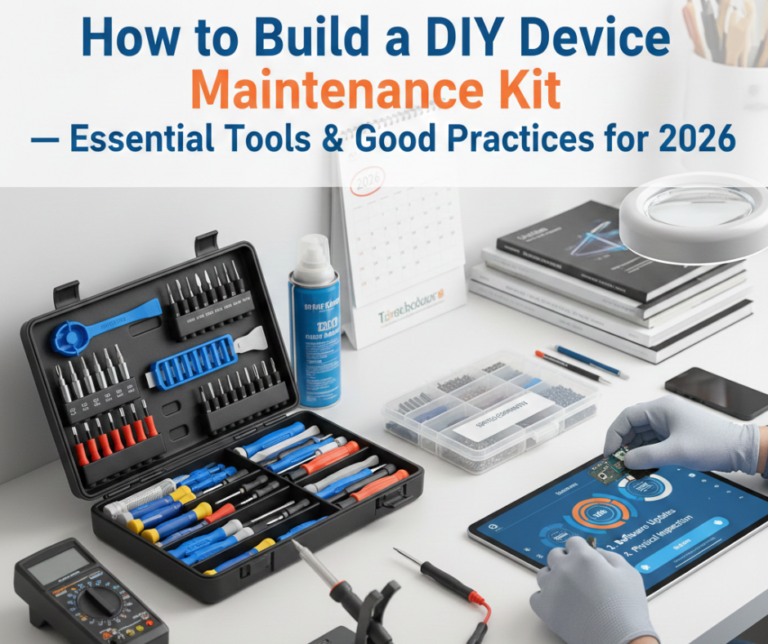
In 2026, smartphones, laptops, tablets, and smart devices are more powerful—but also more delicate—than ever before. With higher repair costs, ongoing supply-chain delays, and growing awareness around sustainability, many users are choosing basic DIY device maintenance to keep their tech running longer.
A well-built DIY device maintenance kit doesn’t turn you into a professional technician—but it does help you prevent damage, diagnose early issues, and perform safe, routine upkeep. At Smart Electronix, we encourage smart maintenance habits that reduce unnecessary repairs and extend device lifespan.
This guide walks you through what tools you need, what practices to follow, and what NOT to attempt at home in 2026.
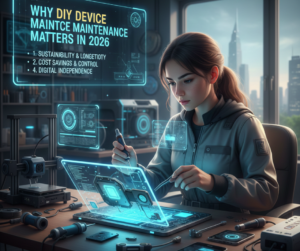
Why DIY Device Maintenance Matters in 2026
Modern devices rely on:
Minor issues like dust buildup, battery strain, or blocked vents can snowball into expensive failures if ignored. DIY maintenance helps you:
-
Prevent overheating
-
Protect charging ports
-
Extend battery life
-
Identify problems early
-
Reduce e-waste
Core Tools for a DIY Device Maintenance Kit
1. Precision Screwdriver Set
Modern devices use proprietary screws such as:
-
Pentalobe
-
Torx (T3–T6)
-
Tri-point
What to look for:
✔ Magnetised tips
✔ Hardened steel
✔ Clearly labelled sizes
Avoid cheap kits that strip screws easily.
2. Anti-Static Protection
Static electricity can damage sensitive components.
Essentials:
Even brief static discharge can damage chips silently.
3. Cleaning Tools
Dust and debris cause overheating, port failures, and fan noise.
Include:
Never use household cleaners or wet wipes.
4. Plastic Pry Tools & Spudgers
Metal tools can scratch boards or short components.
Best options:
5. Tweezers & Small Containers
Small parts are easy to lose.
✔ Fine-tip tweezers
✔ Magnetic screw mat or labelled containers
Organisation prevents reassembly mistakes.
6. Multimeter (Beginner Level)
A basic digital multimeter helps diagnose:
-
Charger issues
-
Battery voltage
-
Power continuity
You don’t need an advanced model—just one with clear readings.
7. Flashlight or Inspection Light
Helps inspect:
-
Charging ports
-
Corrosion
-
Cracks
-
Dust buildup
A headlamp is even better for hands-free work.
Optional Tools for Advanced Users
(Only if you’re confident)
If unsure—leave these to professionals.
Good Maintenance Practices to Follow
1. Regular Cleaning Schedule
✔ Clean ports every 2–3 months
✔ Dust laptop vents quarterly
✔ Wipe screens with microfiber only
Preventive cleaning reduces heat-related failures.
2. Battery Care Best Practices
In 2026, lithium batteries still degrade with poor habits.
✔ Avoid full 0–100% cycles daily
✔ Keep charge between 20–80% when possible
✔ Avoid heat while charging
✔ Use certified chargers only
Never puncture or squeeze a battery.
3. Software Maintenance Matters
DIY maintenance isn’t just physical.
✔ Keep firmware updated
✔ Remove unused apps
✔ Monitor background usage
✔ Back up data regularly
Many “hardware” issues start with software conflicts.
4. Document Everything
Before opening any device:
-
Take photos
-
Label screws
-
Track cable positions
This avoids incorrect reassembly.
5. Know Your Limits
DIY maintenance ≠ DIY repair.
Do NOT attempt:
These require specialised tools and calibration.
Common DIY Mistakes to Avoid
🚫 Using metal tools on batteries
🚫 Overusing compressed air
🚫 Mixing screw sizes
🚫 Skipping anti-static protection
🚫 Forcing connectors
Most DIY damage occurs from rushing.
When DIY Maintenance Is Enough
DIY is ideal for:
✔ Cleaning
✔ Port inspection
✔ Battery health checks
✔ Performance optimisation
✔ Early diagnostics
If a device still misbehaves after basic maintenance, professional inspection is the safest next step.

When to Call a Professional Repair Service
Contact a repair expert if you notice:
-
Battery swelling
-
Liquid damage
-
Burning smell
-
Repeated boot loops
-
No power response
Delaying can multiply repair costs.
Smart Electronix’s Advice for DIY Users
At Smart Electronix, we support responsible DIY care—but also honest guidance.
Our approach:
✔ Educate users
✔ Prevent unnecessary repairs
✔ Reduce e-waste
✔ Step in only when needed
Smart maintenance today prevents major repairs tomorrow.
Final Thoughts
Building a DIY device maintenance kit in 2026 is about prevention, not experimentation. With the right tools and habits, you can protect your devices, extend their lifespan, and save money—without risking serious damage.
When DIY reaches its limits, professional repair ensures safety, data protection, and long-term reliability.
Maintain smart. Repair responsibly. Trust Smart Electronix when it matters most.
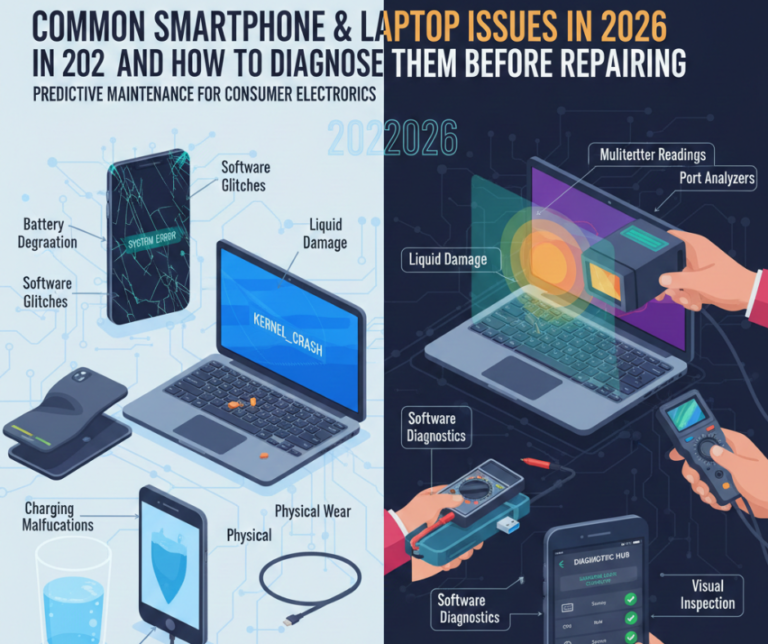
In 2026, smartphones and laptops are more advanced than ever — powered by AI-driven software, faster processors, foldable displays, and always-on connectivity. While these innovations improve performance, they also introduce new types of problems that aren’t always obvious at first glance.
Many users assume their device is “dead” or outdated when, in reality, the issue may be minor, fixable, or software-related. At Smart Electronix, we often see customers spending money unnecessarily simply because a problem wasn’t properly diagnosed first.
This guide explains the most common smartphone and laptop issues in 2026 and shows how to identify the real cause before jumping into repairs or replacements.
Why Diagnosis Comes Before Repair in 2026
Modern devices are tightly integrated systems. A single symptom—such as slow speed or overheating—can stem from:
-
Software conflicts
-
Firmware updates
-
Battery degradation
-
Thermal issues
-
Hardware wear
Replacing parts without diagnosis can:
-
Increase costs
-
Cause repeat failures
-
Risk data loss
-
Shorten device lifespan
A correct diagnosis saves both time and money.

Common Smartphone Issues in 2026
1. Fast Battery Drain & Sudden Shutdowns
What users notice:
Likely causes:
How to diagnose before repair:
-
Check battery health in system settings
-
Review background app usage
-
Test with an original charger
-
Observe drain during standby vs active use
In most cases, a battery replacement or software optimisation solves the issue.
2. Device Overheating
What users notice:
Likely causes:
-
Dust or trapped heat
-
Thermal pad degradation
-
Heavy background apps
-
Faulty firmware updates
Basic diagnosis:
Persistent overheating often requires internal thermal servicing.
3. Touchscreen & Display Problems
What users notice:
Likely causes:
-
Impact damage
-
Moisture exposure
-
Display connector wear
-
Software glitches
How to diagnose:
4. Charging & Port Issues
What users notice:
Likely causes:
-
Lint or debris in port
-
Cable damage
-
Port corrosion
Diagnosis steps:
-
Try multiple cables and adapters
-
Inspect port with a light
-
Test wireless charging if available
Many “dead” phones simply need professional port cleaning or replacement.
5. Camera, Face ID & Sensor Failures
What users notice:
-
Camera app crashes
-
Blurry or foggy photos
-
Face unlock not working
Likely causes:
-
Firmware conflicts
-
Moisture damage
-
Faulty camera module
How to diagnose:
Common Laptop Issues in 2026

1. Slow Boot & Poor Performance
What users notice:
Likely causes:
-
Failing SSD
-
Too many startup apps
-
Thermal throttling
-
Firmware bloat
Diagnosis steps:
Often fixed with SSD replacement, cleanup, or thermal service.
2. Overheating & Loud Fans
What users notice:
Likely causes:
-
Dust-blocked vents
-
Dried thermal paste
-
Faulty cooling fan
How to diagnose:
-
Monitor temperatures under load
-
Listen for grinding or rattling fan noise
-
Inspect vents for dust buildup
3. Laptop Battery Problems
What users notice:
Likely causes:
-
Battery wear
-
Firmware miscalibration
-
Power controller issues
Diagnosis steps:
4. Wi-Fi & Bluetooth Instability
What users notice:
Likely causes:
-
Driver conflicts
-
Antenna cable damage
-
Firmware updates
How to diagnose:
5. Keyboard & Trackpad Malfunctions
What users notice:
Likely causes:
-
Liquid residue
-
Worn ribbon cables
-
Firmware conflicts
Diagnosis steps:
Red Flags That Need Immediate Professional Help
Seek expert repair if you notice:
-
Battery swelling
-
Burning smell
-
Corrosion
-
Repeated boot loops
-
No power response
Delaying repair can cause permanent motherboard damage.
Why DIY Diagnosis Has Limits
While basic checks are helpful, modern devices require:
Incorrect DIY attempts often turn simple repairs into expensive ones.
How Smart Electronix Diagnoses Devices in 2026
At Smart Electronix, diagnostics are structured and transparent:
✔ Full hardware & software assessment
✔ Battery and thermal health checks
✔ Firmware and update analysis
✔ Clear repair vs replace recommendations
✔ No unnecessary part replacement
We fix the root cause, not just the symptom.
Final Thoughts
In 2026, device issues are more complex—but also more solvable than ever. Before assuming your smartphone or laptop is beyond repair, take time to diagnose the problem properly.
Early diagnosis prevents data loss, reduces costs, and extends device lifespan.
Smart Electronix is committed to helping Australians diagnose smartly, repair responsibly, and get the most value from their technology.
In 2026, smartphones and laptops are smarter, faster, and more interconnected than ever — but they’re also more complex. With advanced processors, AI features, foldable designs, and constant firmware updates, modern devices can develop issues that aren’t always easy to identify.
At Smart Electronix, one of the most common problems we see isn’t the device itself — it’s misdiagnosis. Many issues that seem like major hardware failures are actually software, battery, or thermal problems that can be resolved quickly and affordably.
This guide breaks down the most common smartphone and laptop issues in 2026 and explains how to diagnose them before committing to a repair, saving time, money, and unnecessary replacements.
Why Proper Diagnosis Matters More Than Ever
Modern devices integrate hardware and software tightly. A single symptom — like slow performance or overheating — can have multiple causes.
Accurate diagnosis:
A rushed repair often leads to repeat failures.

Common Smartphone Issues in 2026
1. Rapid Battery Drain
Symptoms:
Possible Causes:
-
Battery degradation
-
Firmware bugs
-
Background AI processes
-
Poor-quality chargers
How to Diagnose:
-
Check battery health in settings or diagnostics
-
Monitor background app usage
-
Test with an original charger
🔧 Often fixed with battery replacement or firmware optimisation.
2. Overheating During Normal Use
Symptoms:
-
Warm phone while idle
-
Thermal warnings
-
Reduced performance
Possible Causes:
How to Diagnose:
3. Touchscreen & Display Issues
Symptoms:
Possible Causes:
-
Display cable wear
-
Moisture exposure
-
Firmware issues
-
Impact damage
How to Diagnose:
-
Screenshot test (if issue doesn’t appear, hardware likely)
-
Safe mode testing
-
Visual inspection for cracks or pressure marks
4. Charging Port Problems
Symptoms:
Possible Causes:
-
Lint or debris
-
Port corrosion
-
Cable damage
How to Diagnose:
5. Camera & Sensor Failures
Symptoms:
-
Blurry photos
-
Camera app crashes
-
Face unlock fails
Possible Causes:
-
Firmware incompatibility
-
Module damage
-
Moisture ingress
How to Diagnose:

Common Laptop Issues in 2026
1. Slow Performance
Symptoms:
-
Long boot times
-
App lag
-
Freezing
Possible Causes:
-
Failing SSD
-
Overloaded startup apps
-
Thermal throttling
How to Diagnose:
-
Check SSD health
-
Monitor CPU temperatures
-
Review startup programs
2. Overheating & Fan Noise
Symptoms:
-
Loud fans
-
Hot keyboard
-
Sudden shutdowns
Possible Causes:
-
Dust-clogged vents
-
Dried thermal paste
-
Failing fan
How to Diagnose:
3. Battery Not Holding Charge
Symptoms:
-
Short battery life
-
Charging issues
-
Sudden shutdowns
Possible Causes:
-
Worn battery
-
Firmware misreporting
-
Power management faults
How to Diagnose:
4. Wi-Fi & Connectivity Problems
Symptoms:
-
Slow internet
-
Frequent disconnects
-
Bluetooth dropouts
Possible Causes:
-
Driver issues
-
Antenna damage
-
Firmware conflicts
How to Diagnose:
5. Keyboard & Trackpad Issues
Symptoms:
-
Unresponsive keys
-
Random cursor movement
Possible Causes:
-
Liquid residue
-
Ribbon cable wear
-
Firmware conflicts
How to Diagnose:
-
External keyboard test
-
BIOS input test
-
Visual inspection
Warning Signs That Require Immediate Professional Help
Seek professional diagnostics if you notice:
-
Burning smell
-
Swelling battery
-
Corrosion
-
Random power loss
-
Firmware boot loops
Ignoring these can lead to irreversible damage.
Why DIY Diagnosis Has Limits
While basic checks are helpful, modern devices require:
Incorrect DIY repairs can turn small issues into major failures.
How Smart Electronix Diagnoses Devices in 2026
At Smart Electronix, diagnostics go beyond surface symptoms:
✔ Hardware & software analysis
✔ Battery & thermal health checks
✔ Firmware integrity testing
✔ Component-level inspection
✔ Clear repair vs replace advice
Our goal is accurate diagnosis before repair, not guesswork.
Final Thoughts
In 2026, smartphone and laptop issues are more complex—but also more diagnosable than ever. Understanding symptoms before repairing helps users avoid unnecessary costs and make smarter decisions.
If your device isn’t working as expected, don’t assume the worst. With proper diagnosis and expert support, many issues can be resolved quickly and affordably.
Smart Electronix is here to diagnose, repair, and extend the life of your devices—smartly and responsibly.

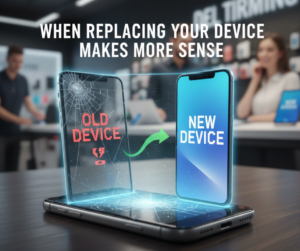
In 2026, deciding whether to repair or replace a device is no longer a simple choice. Smartphones, laptops, tablets, gaming consoles, and wearables are more powerful—and more expensive—than ever. At the same time, supply-chain shifts, sustainability concerns, and right-to-repair laws are reshaping how Australians think about technology ownership.
Replacing a device might feel like the easiest option, but in many cases, repairing is the smarter, more economical, and more sustainable choice. Still, there are times when replacement makes sense.
This guide helps tech users make confident, informed decisions about when to repair and when to replace in 2026—without overspending or compromising performance.
Why This Decision Matters More in 2026
Several trends are influencing repair vs replacement decisions:
-
Rising prices for new devices due to chip shortages
-
Longer official software support lifecycles
-
Increased repairability in modular and foldable designs
-
Environmental pressure to reduce e-waste
-
Improved diagnostics and component-level repair options
As a result, the “just buy a new one” mindset is fading. Smart decision-making now means evaluating cost, lifespan, performance, and sustainability together.
When Repairing Your Device Is the Smart Choice
1. The Device Is Less Than 4–5 Years Old
Most modern devices are designed to last longer than users think. If your device is under five years old and still receiving security updates, repair is often worthwhile.
Common fixable issues include:
These repairs typically cost far less than replacing the entire device.
2. Performance Issues Are Hardware-Related
Slowness doesn’t always mean your device is outdated.
Often, performance drops are caused by:
-
Worn batteries
-
Nearly full storage
-
Failing SSDs
-
Overheating CPUs
Replacing a battery or upgrading storage can restore performance dramatically—sometimes making a device feel brand new.
3. Repair Costs Are Under 40–50% of Replacement Cost
A good rule of thumb in 2026:
If repair costs are under half the price of a comparable new device, repair is usually the better choice.
Professional diagnostics can clarify whether a repair will meaningfully extend lifespan.
4. Data, Setup & Workflow Matter
Replacing a device isn’t just about cost—it’s also about time.
New devices require:
-
Data migration
-
App reinstallation
-
Software configuration
-
Learning new interfaces
For work or study devices, repairing preserves familiarity and avoids downtime.
5. You Want the Eco-Friendly Option
Repairing reduces:
In 2026, sustainable tech ownership isn’t just ethical—it’s practical.
When Replacing Your Device Makes More Sense
1. The Device Is No Longer Supported
If your device no longer receives:
-
Security updates
-
OS compatibility
-
App support
…it may pose security risks and compatibility issues. At this point, replacement may be safer.
2. Repeated Major Failures
Frequent breakdowns indicate deeper problems.
Warning signs include:
-
Multiple motherboard issues
-
Repeated overheating after repair
-
Unstable power delivery
-
Persistent firmware corruption
When reliability becomes unpredictable, replacement is often more cost-effective.
3. Repair Costs Exceed Device Value
If repair costs exceed 50–60% of the price of a new device—or if multiple expensive repairs are required—replacement may be the smarter investment.
4. Hardware Can’t Meet Your Needs
If your device can’t handle:
-
Required software
-
Workloads (editing, gaming, AI tasks)
-
Connectivity standards (Wi-Fi 6E, Thunderbolt, 5G)
…even after upgrades, replacement may be justified.
5. Structural Damage Is Severe
Serious issues like:
…can compromise long-term reliability, even after repair.
The Hidden Costs of Replacement
Many users overlook these factors:
Repair often avoids these hidden costs.
How Professional Diagnostics Change the Decision
Guesswork leads to poor decisions.
At Smart Electronix, diagnostics evaluate:
-
Battery health
-
Storage condition
-
Thermal performance
-
Firmware stability
-
Component lifespan
This allows customers to decide based on facts, not assumptions.
The 2026 Repair-First Mindset
With improved repair tools, OEM parts access, and consumer protections, repairing first is now the smarter default.
Many devices can gain:
…with the right repair strategy.
Smart Electronix’s Repair vs Replace Guidance
We help customers decide honestly—without pushing unnecessary repairs or replacements.
Our approach includes:
If replacement is the better choice, we’ll say so.
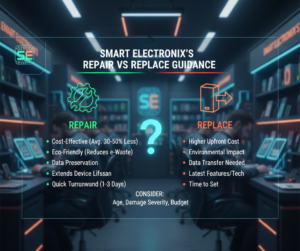
Quick Decision Checklist
Ask yourself:
-
Is the device under 5 years old?
-
Is it still receiving updates?
-
Is repair under 50% of replacement cost?
-
Does repair restore reliable performance?
-
Do I want a sustainable option?
If most answers are yes, repair is likely the right choice.
Final Thoughts
In 2026, smart tech ownership isn’t about replacing devices quickly—it’s about making informed, balanced decisions. Repairing often saves money, reduces waste, and preserves performance. Replacing makes sense when security, reliability, or capability can’t be restored.
The key is knowing the difference—and choosing a repair partner you trust.
Smart Electronix is here to help Australians make smarter repair-vs-replace decisions, backed by expertise, transparency, and sustainability.

In 2026, device repair is no longer just about replacing screens, batteries, or motherboards — it’s also about protecting personal data. Smartphones, laptops, tablets, and smart devices now store sensitive information including banking details, biometric data, health records, work credentials, and cloud access tokens.
As repairs become more advanced and devices more interconnected, data privacy and security during repairs has become a top concern for Australian consumers. Whether you’re handing over a phone for a cracked screen or a laptop for motherboard repair, knowing how your data is handled is critical.
At Smart Electronix, data protection is treated as seriously as hardware repair. In this guide, we explain the risks, best practices, and what customers should expect from a professional repair service in 2026.
Why Data Security During Repairs Matters More Than Ever
Modern devices are essentially digital identities. A single smartphone can contain:
-
Emails and passwords
-
Banking and payment apps
-
Health and fitness records
-
Work VPN access
-
Cloud storage credentials
-
Smart home controls
-
Biometric data (fingerprints, Face ID)
When devices are opened, reset, tested, or reconfigured during repairs, data exposure risks increase if proper protocols are not followed.
In Australia, consumer trust is increasingly tied to how repair shops manage data — not just how fast they fix devices.

Common Data Security Risks During Device Repairs
Before understanding best practices, it’s important to know the risks:
1. Unauthorised Data Access
Technicians may unintentionally (or maliciously) access personal files if no data protection policy exists.
2. Cloud Account Exposure
Signed-in Apple ID, Google Account, or Microsoft accounts can expose emails, photos, and documents.
3. Malware Injection
Using unsecured diagnostic tools or third-party software can introduce spyware or malicious apps.
4. Data Loss
Improper firmware flashing, OS reinstalls, or SSD replacement can wipe data permanently.
5. Device Resale Risks
Improperly wiped devices sold or recycled may still contain recoverable data.
Best Practice #1: Always Back Up Before Any Repair
In 2026, data backup is non-negotiable.
Recommended Backup Options
-
Cloud backup (Google Drive, iCloud, OneDrive)
-
External SSD or encrypted USB drive
-
Full system image (for laptops)
A professional repair shop should always ask whether a backup exists before starting work.
At Smart Electronix, customers are guided through safe backup options before any high-risk repair.
Best Practice #2: Use Temporary Guest or Repair Mode (When Available)
Many modern devices now support Repair Mode or Maintenance Mode:
These modes allow technicians to test hardware without accessing personal data.
If your repair shop doesn’t offer this option — that’s a red flag.
Best Practice #3: Log Out of Cloud Accounts (If Possible)
Before handing over a device, customers should:
-
Sign out of Apple ID / Google Account (if repair allows)
-
Disable “Find My Device” temporarily (if required)
-
Remove banking apps or secure them with biometric locks
-
Log out of work VPNs and email accounts
For certain repairs, accounts must remain logged in for testing — in those cases, strict technician protocols are essential.
Best Practice #4: Certified Repair Shops Must Follow Data Handling Policies
In 2026, professional repair shops should have:
-
Written data privacy policies
-
Technician confidentiality agreements
-
Restricted access testing procedures
-
Secure device storage systems
-
Camera-monitored repair benches
Smart Electronix follows zero-access data policies, meaning technicians do not open personal files, photos, or apps under any circumstances.
Best Practice #5: Encrypted Storage & Secure Diagnostics Tools
Modern laptops and smartphones use encrypted storage by default, but repair shops must ensure:
-
Diagnostic tools don’t bypass encryption
-
Firmware tools are OEM-approved
-
No third-party cracked software is used
-
No “test accounts” are injected into devices
Using unofficial tools increases the risk of data leaks and malware.
Best Practice #6: Clear Data Protocols for Board-Level & Firmware Repairs
Some advanced repairs — such as:
-
Motherboard replacement
-
SSD upgrade
-
Firmware reflashing
-
Bootloader recovery
…may involve unavoidable data loss.
A professional shop must:
-
Inform customers beforehand
-
Get written consent
-
Offer data recovery options where possible
-
Never proceed without approval
Transparent communication protects both the customer and the repair provider.
Best Practice #7: Proper Data Wiping for Device Recycling or Trade-In
If a device cannot be repaired and is recycled or sold:
Secure Data Destruction Includes
Simply “factory resetting” a device is no longer enough in 2026 — data remnants can still be recovered without proper wiping.
Best Practice #8: Physical Security During Repairs
Data security isn’t only digital — physical access matters too.
Professional shops should ensure:
-
Devices are tagged and tracked
-
Locked storage when not being worked on
-
No devices left unattended
-
Limited technician access per job
Smart Electronix assigns devices to specific technicians, reducing unnecessary handling.
Best Practice #9: Customer Education Is Part of Data Protection
A good repair shop doesn’t just fix devices — it educates customers.
Customers should be informed about:
-
How to protect data before repairs
-
What data might be accessed (if any)
-
What will never be accessed
-
How long data is stored (if backups are made)
-
How privacy is maintained post-repair
This transparency builds trust and long-term relationships.
How Smart Electronix Protects Customer Data in 2026
At Smart Electronix, data privacy is built into every repair process:
Our Security Commitments
✔ Repair-mode testing whenever possible
✔ No browsing of customer data
✔ OEM-certified tools only
✔ Encrypted diagnostics
✔ Secure storage & tracking
✔ Clear consent before data-affecting repairs
✔ Ethical recycling & data destruction
We treat every device as if it were our own.

Final Thoughts
In 2026, choosing a repair shop isn’t just about price or speed — it’s about trust. With devices holding more personal data than ever before, data privacy and security must be a top priority during repairs.
By following best practices and choosing transparent, professional repair services like Smart Electronix, Australian consumers can confidently repair their devices without risking their digital lives.
Your data matters — and so does how your device is repaired.

In 2026, a new trend is quietly reshaping the laptop market in Australia: home-built, refurbished, and upcycled laptops, often nicknamed “Frankenstein laptops.” These devices are assembled using parts from multiple machines—different brands, generations, or hardware configurations—to create a functional, budget-friendly system.
Driven by rising device costs, sustainability concerns, and the Right to Repair movement, Frankenstein laptops are becoming increasingly popular among students, freelancers, gamers, and environmentally conscious users. But while they can be powerful and affordable, they also come with unique risks—especially when it comes to repairs.
At Smart Electronix, we regularly diagnose and service these unconventional devices. This guide explains what Frankenstein laptops are, why they’re growing in popularity, and what you should know before buying or repairing one.
What Is a “Frankenstein” Laptop?
A Frankenstein laptop is not a specific brand—it’s a custom-assembled or heavily modified device built using:
-
A laptop chassis from one brand
-
A motherboard from another compatible model
-
Mixed RAM modules
-
Upgraded SSDs
-
Aftermarket batteries
-
Salvaged displays or keyboards
Some are assembled by hobbyists, others by refurbishers, and some by small resellers aiming to extend device lifespan and reduce e-waste.
Why Frankenstein Laptops Are Rising in 2026
1. Rising Prices of New Devices
New laptops—especially premium and AI-powered models—have become significantly more expensive due to:
-
Chip shortages
-
Supply chain disruptions
-
AI accelerators
-
Advanced displays
Upcycled laptops offer a cost-effective alternative.

2. Sustainability & E-Waste Reduction
Reusing functional components:
Many Australians now prefer refurbished or rebuilt devices for environmental reasons.
3. Custom Performance at Lower Cost
Users can build laptops optimized for:
-
Coding
-
Office work
-
Media editing
-
Light gaming
For example, combining:
…can deliver solid performance without buying new.
Common Types of Frankenstein Laptops
🔧 Mixed-Generation Builds
Same brand, different generations (e.g., Lenovo T480 body with T490 motherboard).
🔧 Hybrid Brand Builds
Different brands with compatible components (more risky).
🔧 Upgraded Refurbs
Original laptop with major upgrades (SSD, RAM, battery, display).
🔧 DIY Project Laptops
Built by hobbyists using donor parts.
The Hidden Repair Challenges
While Frankenstein laptops can be practical, they are much harder to repair than standard models.
1. Compatibility Issues
Not all parts communicate perfectly:
A device may work initially, then develop random shutdowns or overheating.
2. BIOS & Firmware Conflicts
Firmware is often locked to:
This can cause:
-
Boot loops
-
Disabled features
-
Battery misreporting
-
Fan errors
Updating firmware on Frankenstein laptops is high risk.
3. Thermal Management Problems
Cooling systems are designed for specific CPUs and GPUs.
Mismatch issues include:
Smart Electronix often sees Frankenstein laptops fail due to poor thermal alignment.
4. Power & Battery Risks
Aftermarket or mismatched batteries can:
-
Drain quickly
-
Fail to charge properly
-
Overheat
-
Damage the motherboard
Battery compatibility is one of the most common failure points.
5. Repair Documentation Is Limited
Unlike OEM laptops:
-
No official service manuals
-
No standardized part numbers
-
No guaranteed spare availability
Technicians must rely on experience, testing, and custom solutions.
What to Check Before Buying a Frankenstein Laptop
If you’re considering purchasing one, always ask:
✅ What parts are original?
✅ Has the BIOS been modified?
✅ Are replacement batteries available?
✅ Does the cooling system match the CPU?
✅ Is the seller offering any repair support?
✅ Has the device been stress-tested?
Avoid devices with unknown firmware modifications or no clear build documentation.

Can Frankenstein Laptops Be Repaired?
Yes—but only by experienced technicians.
At Smart Electronix, we use:
Repairs are possible, but they require more time and expertise than standard laptops.
When Frankenstein Laptops Make Sense
✔ Budget-conscious users
✔ Students
✔ Developers
✔ Office and productivity users
✔ Environmentally focused buyers
When They Don’t
✖ Mission-critical business systems
✖ Gaming laptops with high GPU load
✖ Users needing official warranties
✖ Users expecting easy future repairs
Smart Electronix Expert Advice
If you already own or plan to buy a Frankenstein laptop:
-
Always back up data regularly
-
Avoid unnecessary firmware updates
-
Monitor temperatures closely
-
Replace batteries with verified-compatible units
-
Use professional diagnostics before upgrades
We also recommend pre-purchase inspections for rebuilt laptops—saving you from costly surprises later.
Final Thoughts
Frankenstein laptops represent the future of sustainable, cost-effective computing, but they come with trade-offs. While they reduce e-waste and offer great value, they require informed ownership and expert repair support.
With the right care—and the right technicians—these hybrid machines can deliver years of reliable performance.
At Smart Electronix, we embrace innovation and responsibility—helping Australians repair, refurbish, and rethink how technology should last longer.
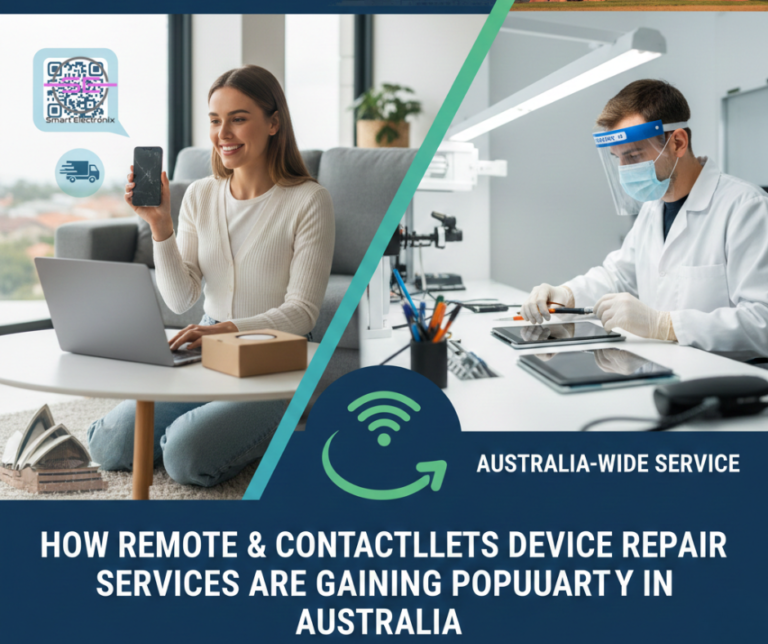
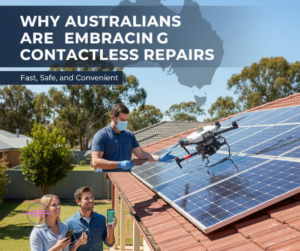
In 2026, Australians expect speed, convenience, and transparency in every service — including device repairs. With smartphones, laptops, tablets, and wearables becoming essential to daily life, the traditional “drop your device at a shop and wait” model is rapidly evolving.
Enter remote and contactless device repair services — a growing trend reshaping the Australian repair industry.
From remote diagnostics and video inspections to courier-based repairs and AR-assisted troubleshooting, contactless repair solutions are becoming the preferred choice for both consumers and repair providers like Smart Electronix.
This blog explores why remote repair services are gaining popularity, how they work, their benefits, and what Australian consumers should know in 2026.
1. What Are Remote & Contactless Device Repair Services?
Remote and contactless repairs reduce or eliminate the need for physical store visits. Instead, diagnostics, consultations, and even some fixes happen digitally.
Common contactless repair methods include:
-
Remote device diagnostics
-
Video or AR-based inspections
-
Online troubleshooting sessions
-
Mail-in or courier pickup repairs
-
Contactless drop-off and collection
-
Cloud-based repair tracking
While not all hardware issues can be fixed remotely, a significant percentage of problems can be diagnosed — and sometimes resolved — without opening the device.
2. Why Australians Are Embracing Contactless Repairs
A. Convenience Comes First
Australians lead busy lives. Remote repair services:
Whether you’re working from home, studying, or living outside metro areas, contactless repairs make professional help accessible anywhere.
B. Faster Diagnosis & Turnaround
With remote diagnostics:
-
Issues are identified before the device arrives
-
Parts are prepared in advance
-
Repairs often finish same-day
This significantly reduces downtime compared to walk-in diagnostics.
C. Rising Trust in Digital Services
Australians are now comfortable with:
-
Telehealth
-
Online banking
-
Remote IT support
Naturally, remote tech repair services feel like the next step, especially when supported by transparent communication and live visual inspections.
3. How Remote Diagnostics Work in 2026
Modern devices contain built-in diagnostic data that technicians can access securely.
Remote diagnostics can identify:
-
Battery health and degradation
-
Storage performance issues
-
Overheating and thermal throttling
-
Network and connectivity faults
-
Firmware and OS corruption
-
Sensor malfunctions
-
App-related performance drains
This allows repair technicians to determine whether the issue is:
4. The Role of Video & AR-Assisted Repairs
Augmented Reality (AR) and live video tools are revolutionising customer–technician interaction.
What AR assistance enables:
-
Visual inspection of device damage
-
Live guidance for basic fixes
-
Step-by-step troubleshooting
-
Safe packaging instructions for mail-in repairs
-
Clear explanation of repair needs
Instead of guessing, customers can see exactly what the technician sees, increasing trust and clarity.
5. Mail-In & Courier Repairs: A Growing Standard
Many Australian repair services now offer:
This is especially valuable for:
-
Regional and rural communities
-
Businesses managing multiple devices
-
Customers without nearby repair shops
With improved logistics and secure handling, mail-in repairs are now faster and safer than ever.
6. Contactless Repairs Reduce Costs
Remote services often lower overall repair costs by:
Customers only pay for what’s truly needed — not guesswork.
7. Enhanced Transparency Builds Customer Confidence
One of the biggest complaints about traditional repair services is lack of transparency.
Remote repairs improve this by offering:
Customers stay informed at every stage.
8. Security & Privacy: A Top Priority
With remote access comes responsibility.
Reputable repair providers like Smart Electronix follow strict policies:
-
No access to personal data
-
Secure diagnostic tools
-
Customer consent at every step
-
Data protection compliance
Devices are tested without browsing files, photos, or messages — protecting user privacy.

9. What Types of Issues Are Best for Remote Repair?
Ideal for remote resolution:
-
Slow performance
-
Battery calibration issues
-
App crashes
-
Firmware bugs
-
Network & Bluetooth issues
-
Storage optimisation
-
System updates gone wrong
Require physical repair:
-
Screen damage
-
Battery replacement
-
Water damage
-
Charging port faults
-
Motherboard repairs
Remote diagnostics help determine this before any device shipment.
10. Why Repair Shops Are Adopting Remote Models
Repair businesses benefit as much as customers.
Advantages for repair shops:
Remote services are no longer optional — they’re becoming a competitive necessity.
11. Smart Electronix’s Contactless Repair Approach
At Smart Electronix, we combine technology with expertise to deliver seamless remote repair solutions across Australia.
Our process includes:
-
Online booking & consultation
-
Remote diagnostics or video inspection
-
Transparent quote approval
-
Contactless pickup or drop-off
-
Professional repair & quality testing
-
Secure return with full documentation
This hybrid model ensures speed, accuracy, and peace of mind.
12. The Future of Device Repairs in Australia
By 2027, industry experts expect:
-
AI-powered self-diagnostics
-
AR-guided home repairs
-
Subscription-based remote maintenance
-
Predictive fault detection
-
Fully digital repair tracking systems
Remote and contactless services are not a temporary trend — they are the future.
Final Thoughts
Remote and contactless device repair services are transforming how Australians maintain their technology. Faster diagnostics, lower costs, greater transparency, and unmatched convenience make this model ideal for modern users.
As devices grow more complex, smart repair solutions must evolve too.
Smart Electronix is proud to lead this shift — delivering reliable, secure, and future-ready repair services across Australia.

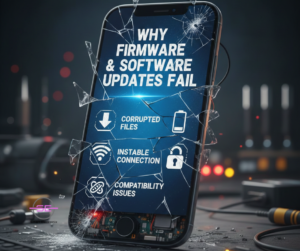
Firmware and software updates are meant to improve performance, security, and features—but in 2026, they’ve also become one of the leading causes of device failure. From smartphones stuck in boot loops to laptops that won’t power on, a failed update can instantly turn a working device into what technicians call a “bricked” device.
At Smart Electronix, we see this issue daily across phones, laptops, tablets, smartwatches, and IoT devices. The good news? Most bricked devices are recoverable—if handled correctly and quickly.
This guide explains why updates fail, how to identify the type of brick, and safe recovery methods you should follow before permanent damage occurs.
What Does “Bricked” Actually Mean?
A “bricked” device is one that no longer functions due to firmware or software corruption. It behaves like a brick—unresponsive and unusable.
Two Types of Bricks
Understanding the difference is critical:
🔹 Soft Brick
-
Device powers on but won’t boot
-
Stuck on logo or loading screen
-
Infinite restart loop
-
Recovery mode still accessible
✅ High chance of recovery
🔹 Hard Brick
⚠️ More serious but still repairable in many cases
Why Firmware & Software Updates Fail
In 2026, update failures are increasing due to device complexity and ecosystem fragmentation.
Most Common Causes
-
Battery dying mid-update
-
Interrupted internet connection
-
Corrupted update files
-
Incompatible firmware versions
-
Manufacturer bugs
-
Region-locked firmware mismatches
-
Custom ROM or unofficial software conflicts
-
Storage full during update
-
Aging hardware unable to support new firmware
Foldables, modular devices, and IoT-connected phones are especially vulnerable.
Early Warning Signs Before a Device Bricks
Act immediately if you notice:
-
Update taking unusually long
-
Device overheating during update
-
Repeated restart during installation
-
Error messages like “Update failed”
-
Storage warning mid-update
Never force power-off unless instructed.
Step-by-Step: What to Do Immediately After a Failed Update
✅ 1. Stop Rebooting the Device
Repeated restarts can overwrite recovery partitions and worsen the damage.
✅ 2. Keep the Device Powered
Low power increases corruption risk. Plug into a stable power source.
✅ 3. Try Official Recovery Mode
Most devices support recovery access:
-
Android: Power + Volume Up/Down
-
iPhone: Recovery or DFU mode
-
Windows laptops: BIOS / Advanced Startup
-
MacBooks: macOS Recovery
If recovery mode loads, do not factory reset immediately—diagnosis comes first.
Safe Recovery Methods That Actually Work
1. Official Firmware Re-Flash (Recommended)
Manufacturers provide tools to reinstall firmware safely.
Examples:
⚠️ Incorrect firmware flashing can permanently brick the device.
2. Bootloader & Partition Repair
For Android devices, corrupted boot partitions cause most soft bricks.
Technicians use:
-
ADB & Fastboot tools
-
Partition re-mapping
-
Secure boot validation
This restores boot sequences without wiping user data (when possible).
3. BIOS & UEFI Recovery for Laptops
Laptop firmware failures are increasingly common after Windows updates.
Recovery options include:
At Smart Electronix, we recover many “dead” laptops dismissed as unrepairable.
4. Firmware Downgrade (When Updates Are Incompatible)
Some devices run poorly—or fail—on newer firmware due to hardware aging.
A controlled downgrade can:
-
Restore stability
-
Fix boot loops
-
Reduce overheating
-
Improve battery life
⚠️ Downgrades must be done carefully to avoid security locks.
5. Component-Level Repair for Hard Bricks
When firmware damages power or storage controllers, software alone won’t fix it.
Advanced repair may involve:
This is not DIY-safe and requires specialist tools.
What You Should NEVER Do
❌ Flash random firmware from forums
❌ Use unofficial cracked repair tools
❌ Force factory resets repeatedly
❌ Heat the device hoping it “revives”
❌ Attempt soldering without experience
❌ Ignore backup warnings before updates
These actions turn recoverable devices into permanent losses.
Why Devices Brick More Often in 2026
Modern devices are:
Foldables, smartwatches, and IoT-paired devices rely on multiple firmware layers, increasing failure risk.

How Smart Electronix Safely Recovers Bricked Devices
We follow a structured, risk-free recovery process:
🔧 Our Recovery Workflow
-
Brick type identification
-
Firmware integrity analysis
-
Power & storage health testing
-
Secure data preservation (when possible)
-
OEM-approved flashing
-
Hardware-software calibration
-
Post-recovery stress testing
🛡️ What Makes Us Different
How to Prevent Firmware Bricking in the Future
✔ Always update with 50%+ battery
✔ Free at least 10–15GB storage
✔ Use stable Wi-Fi
✔ Avoid beta firmware unless necessary
✔ Delay updates on older devices
✔ Back up before every update
✔ Let professionals handle major firmware changes
Final Thoughts
Firmware updates are unavoidable—but bricking doesn’t have to be permanent. With the right steps and expert handling, most bricked devices can be safely recovered without data loss or expensive replacement.
If your phone, laptop, or smart device failed after an update, don’t panic—and don’t experiment blindly.
Smart Electronix specialises in safe firmware recovery, advanced diagnostics, and future-proof repair solutions for Australian consumers.
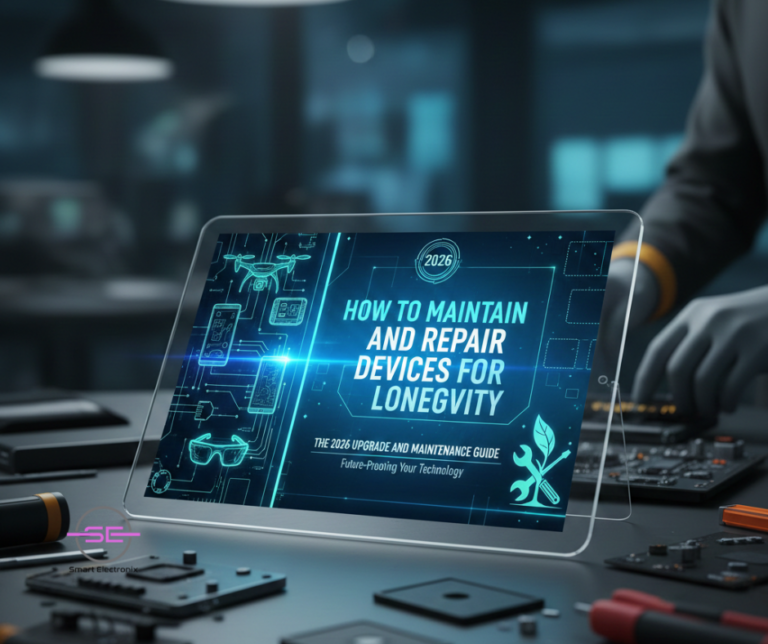
In 2026, smartphones, laptops, tablets, and smart devices are more powerful than ever — but also more expensive, more complex, and harder to replace. With rising device prices, ongoing chip shortages, and growing environmental concerns, device longevity has become a top priority for consumers and repair professionals alike.
At Smart Electronix, we see a clear trend: people want their devices to last longer, perform better, and stay repairable without frequent upgrades. The good news? With the right maintenance habits, smart upgrades, and timely repairs, modern devices can easily last 5–7 years or more.
This guide breaks down how to properly maintain, upgrade, and repair devices in 2026 to maximise lifespan, performance, and value.
Why Device Longevity Matters More in 2026
Several major shifts are shaping how we use and maintain technology today:
-
Device prices continue to rise due to supply-chain instability
-
Firmware updates are heavier and more demanding
-
Modern devices are thinner and more repair-sensitive
-
Environmental regulations encourage repair over replacement
-
Consumers are holding onto devices longer
Replacing a device every 1–2 years is no longer practical or sustainable. Instead, maintenance-first ownership is the new standard.
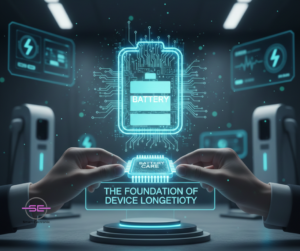
1. Battery Care: The Foundation of Device Longevity
Batteries remain the most common failure point in phones and laptops.
Best Battery Practices for 2026
-
Keep charge levels between 20% and 80%
-
Avoid overnight charging when possible
-
Use certified chargers and cables only
-
Prevent overheating during charging
-
Avoid fast charging unless necessary
Battery Replacement vs Delaying
Replacing a worn battery can:
-
Restore performance speed
-
Improve system stability
-
Prevent unexpected shutdowns
-
Extend device life by years
At Smart Electronix, battery replacement is often the single most cost-effective upgrade.
2. Storage & Performance Maintenance
As operating systems evolve, storage performance becomes critical.
How Storage Affects Longevity
-
SSD slowdowns cause system lag
-
Nearly full storage reduces efficiency
-
File system corruption increases crashes
Maintenance Tips
-
Keep 20–25% free storage space
-
Regularly clear cache and temporary files
-
Avoid low-quality external drives
-
Upgrade HDDs to SSDs where possible
A simple SSD upgrade can make a 5-year-old laptop feel new again.
3. Cooling, Thermal Health & Overheating Prevention
Thermal stress silently kills components over time.
Common Causes of Overheating
Best Practices
-
Clean vents every 6–12 months
-
Replace thermal paste every 2–3 years
-
Avoid using laptops on soft surfaces
-
Use cooling pads for heavy workloads
Overheating leads to:
-
CPU throttling
-
Battery degradation
-
GPU failure
-
Sudden shutdowns
Preventing heat damage dramatically improves lifespan.
4. Firmware & Software Updates — Handle With Care
Updates improve security but can also introduce problems.
Smart Update Strategy
-
Avoid updating immediately on release day
-
Back up data before major firmware updates
-
Ensure sufficient battery and storage
-
Watch for known update issues
Warning Signs After Updates
-
Boot loops
-
Rapid battery drain
-
Touch or camera failures
-
Connectivity issues
When updates go wrong, professional diagnostics can prevent permanent damage.
5. Screen, Hinge & Physical Wear Management
Modern devices are thinner, foldable, and more fragile.
Physical Longevity Tips
-
Use protective cases (not bulky, but shock-absorbent)
-
Replace cracked screens early to avoid further damage
-
Protect foldable hinges from dust and debris
-
Avoid pressure on device corners
Small cracks often lead to:
-
Moisture ingress
-
Touch failure
-
OLED burn-in
-
Board corrosion
Early repairs save money and prevent bigger failures.
6. Connectivity Components: Ports, Wi-Fi & Bluetooth
Charging ports, antennas, and wireless modules wear out gradually.
Maintenance Tips
-
Avoid charging cables under tension
-
Clean ports using proper tools (not metal pins)
-
Address Wi-Fi dropouts early
-
Update network drivers regularly
Many “slow Wi-Fi” issues are actually:
-
Antenna damage
-
Port corrosion
-
Firmware conflicts
Proper diagnostics matter.
7. Upgrade Smart — Not Often
Instead of replacing devices, upgrade strategically.
Best Upgrades for Longevity
Avoid Unnecessary Upgrades
Smart upgrades extend device life without compromising stability.
8. Repair Early, Not Late
Ignoring small issues leads to catastrophic failure.
Early Warning Signs
-
Random restarts
-
Unusual heating
-
Flickering display
-
Slower charging
-
Battery swelling
Repairing early:
-
Costs less
-
Preserves data
-
Prevents board damage
-
Improves resale value
Delaying repairs often multiplies costs.
9. Sustainability & E-Waste Reduction
Longevity supports sustainability.
By repairing instead of replacing, you:
-
Reduce electronic waste
-
Lower carbon footprint
-
Conserve rare materials
-
Support circular economy
In 2026, eco-conscious repair isn’t optional — it’s responsible ownership.
10. How Smart Electronix Supports Device Longevity
At Smart Electronix, our repair philosophy is repair-first, replace-last.
Our Longevity-Focused Services
We help Australians get maximum value and lifespan from their devices.

Final Thoughts
In 2026, the smartest upgrade isn’t always a new device — it’s better maintenance and smarter repair choices. With the right habits, professional diagnostics, and timely upgrades, modern devices can remain reliable, fast, and secure for years.
Device longevity isn’t just about saving money — it’s about sustainability, performance, and smarter tech ownership.
Smart Electronix is here to help you keep your devices running longer, stronger, and smarter.
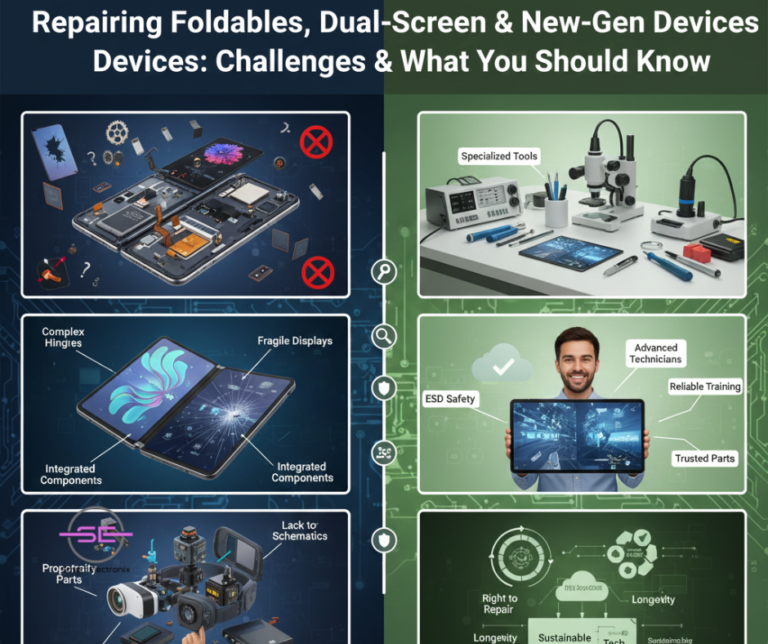
The device repair industry is evolving faster than ever. In 2026, smartphones and laptops are no longer just flat slabs of glass and metal. Foldable phones, dual-screen devices, rollable displays, and hybrid form factors are redefining how devices are designed — and how they must be repaired.
While these innovations deliver exciting user experiences, they also introduce entirely new repair challenges for technicians and consumers alike. Understanding these challenges helps users make better repair decisions and highlights why choosing an experienced repair provider like Smart Electronix is more important than ever.
The Rise of New-Gen Devices
Foldable and dual-screen devices are becoming mainstream thanks to brands like Samsung, Google, Motorola, OPPO, Microsoft, and Lenovo. These devices offer:
-
Flexible OLED displays
-
Advanced hinge mechanisms
-
Dual operating modes (phone + tablet)
-
Multi-screen productivity
-
Compact designs with complex internals
However, innovation comes at a cost — repair complexity has increased significantly.
1. Flexible Displays Are Extremely Fragile
Unlike traditional glass screens, foldable devices use ultra-thin glass (UTG) layered with flexible OLED panels and polymer coatings.
Why this is a repair challenge
-
UTG cracks differently than normal glass
-
Flexible OLEDs crease permanently if mishandled
-
Dust contamination can ruin the display
-
Even slight pressure during repair can cause dead pixels
Screen replacements require:
This makes foldable display repairs far more delicate and expensive than standard phone screens.

2. Hinge Mechanisms Are Mechanical Nightmares
The hinge is the heart of any foldable or dual-screen device. Modern hinges contain:
-
Micro gears
-
Springs
-
Rollers
-
Carbon fiber frames
-
Tension plates
Common hinge-related issues
Unlike laptop hinges, foldable phone hinges are not designed for easy disassembly. A small mistake can permanently damage the screen or internal cables.
3. Flex Cables Wear Out Faster
New-gen devices rely heavily on flexible ribbon cables that bend every time the device opens or closes.
Over time, this can cause:
Replacing flex cables often requires complete teardown of the device, making repairs time-consuming and high-risk.
4. Dual Screens Mean Double the Risk
Dual-screen devices feature:
This doubles:
-
Potential failure points
-
Diagnostic time
-
Replacement costs
A problem on one screen can affect system behavior across both displays, complicating troubleshooting.
5. Adhesives & Water Resistance Increase Complexity
To maintain slim designs and water resistance, manufacturers use high-strength adhesives and layered seals.
Repair risks include
After repairs, seals must be rebuilt and tested, or future liquid exposure could permanently damage the device.

6. Software Calibration Is Mandatory After Repairs
New-gen devices depend heavily on software calibration after hardware work.
Post-repair calibration may include
Without proper calibration, devices may:
Professional diagnostic software is essential — basic tools won’t work.
7. Parts Availability Is Limited
Spare parts for foldables and dual-screen devices are:
This can cause:
Experienced repair providers build trusted supplier networks to source safe, compatible parts.
8. Repairs Require Specialised Tools & Training
Repairing new-gen devices requires:
Technicians must be trained specifically for flexible OLED and hinge systems. Traditional phone repair skills alone are no longer enough.
9. Why Choosing the Right Repair Shop Matters
Not all repair shops are equipped to handle foldables or dual-screen devices safely.
What consumers should look for
-
Proven experience with foldable repairs
-
OEM-grade or certified parts
-
Transparent repair quotes
-
Post-repair testing & calibration
-
Warranty on workmanship
Poor repairs can permanently damage high-value devices — costing more in the long run.
How Smart Electronix Handles New-Gen Device Repairs
At Smart Electronix, we’ve adapted our repair processes to meet the demands of next-generation devices.
Our approach includes
-
Advanced diagnostics before disassembly
-
Clean, dust-controlled repair environments
-
Trained technicians for flexible displays
-
Genuine and high-quality replacement parts
-
Full post-repair calibration
-
Quality assurance testing
Whether it’s a foldable phone, dual-screen laptop, or emerging hybrid device, our goal is to restore performance, durability, and reliability.
What Consumers Should Know Before Repairing New-Gen Devices
-
Repairs are more complex than traditional phones
-
Cheap repairs often mean higher long-term risk
-
Delays may occur due to part availability
-
Proper calibration is essential
-
Experienced technicians matter more than ever
Understanding these realities helps set realistic expectations and prevents costly mistakes.
Final Thoughts
Foldables, dual-screen, and new-generation devices represent the future of consumer technology — but they demand a new standard of repair expertise. As designs become more innovative, repairs must become more precise, specialised, and professional.
For consumers, the key is choosing a repair partner who understands the technology inside and out.
Smart Electronix is proud to be part of this future — keeping advanced devices functional, sustainable, and repairable in a rapidly changing tech world.
