When devices slow down, crash, or behave unpredictably, most people assume the hardware is failing. In 2026, that assumption is often wrong. Increasingly, software aging—also known as digital wear and tear—is becoming the primary reason devices feel “old” long before their hardware actually is.
Unlike physical damage, software aging happens quietly. It accumulates over time, gradually degrading performance, reliability, and efficiency. Understanding this hidden form of wear is now essential for extending device lifespan and avoiding unnecessary replacements.
What Is Software Aging?
Software aging refers to the gradual decline in a system’s performance and stability due to:
-
Accumulated background processes
-
Memory fragmentation
-
Legacy code interacting with new updates
-
Outdated drivers and firmware layers
-
Cached data that never gets cleaned properly
Unlike hardware degradation, software aging doesn’t involve broken parts—it involves systems becoming inefficient over time.
Why Software Ages Faster in Modern Devices
Devices in 2026 are more complex than ever. Smartphones, laptops, and tablets now rely on:
-
AI-driven background services
-
Continuous cloud synchronization
-
Real-time security monitoring
-
Multi-layered firmware
-
Always-on connectivity
Each of these layers adds value—but also contributes to long-term system strain.
The more a device does automatically, the more opportunities there are for inefficiencies to build up.

Common Symptoms of Software Aging
Software aging doesn’t look dramatic—but it’s disruptive:
-
Slower boot times
-
Apps taking longer to open
-
Random system freezes
-
Inconsistent battery life
-
Connectivity dropouts
-
Features behaving unpredictably
These symptoms are often misdiagnosed as:
-
Failing batteries
-
Bad storage drives
-
Defective memory
-
Aging processors
In reality, the hardware may still be perfectly healthy.
Firmware Bloat: When Updates Become a Problem
Firmware updates are essential for security and compatibility—but over time, they can become burdensome.
Firmware bloat occurs when:
-
New features are added without removing old ones
-
Background services increase after each update
-
Older hardware struggles with newer firmware demands
This creates a gap between what the device can physically handle and what the software expects.
Why Factory Resets Don’t Always Work Anymore
In the past, a factory reset could restore performance. In 2026, resets are less effective because:
-
Firmware remains unchanged
-
Cloud backups restore inefficient configurations
-
Background services resume immediately
-
System-level optimizations are locked by manufacturers
A reset may temporarily help—but it rarely solves the root cause.
How Professional Repairs Address Software Aging
Modern repair services treat software aging as a technical issue—not a user inconvenience.
Professional intervention may include:
-
Firmware optimization and rollback
-
Removal of unnecessary system services
-
Power and memory behavior tuning
-
Connectivity stack recalibration
-
Thermal and performance profiling
These steps require specialized tools and experience—not just consumer-level settings.
The Hidden Cost of Ignoring Software Aging
When software aging goes untreated, it leads to:
-
Accelerated battery degradation
-
Increased heat output
-
Reduced storage lifespan
-
Higher risk of firmware corruption
-
Shortened overall device life
Ironically, ignoring software aging often causes real hardware damage over time.

Sustainability and Software Longevity
Replacing devices due to software aging contributes significantly to electronic waste.
Extending usable life through:
helps:
Software maintenance is now a sustainability strategy, not just a performance fix.
How Smart Electronix Tackles Software Aging
At Smart Electronix, software aging is treated as a repair discipline of its own.
Our approach includes:
-
System-level diagnostics
-
Firmware and OS behavior analysis
-
Performance and thermal balancing
-
Data-safe optimization procedures
Instead of defaulting to part replacement, we focus on restoring system efficiency.
The Future: Devices That Age Gracefully
Manufacturers are beginning to recognize software aging as a major issue. The future points toward:
-
Modular firmware updates
-
AI-driven system optimization
-
User-visible performance health metrics
-
Longer official software support
Until then, professional maintenance remains the best defense.
Final Thoughts
In 2026, devices don’t just wear out—they slowly wear down digitally. Software aging is the invisible force behind many modern tech frustrations, quietly undermining performance long before hardware fails.
Understanding this shift allows consumers to:
-
Make smarter repair decisions
-
Avoid unnecessary upgrades
-
Extend device lifespan
-
Reduce environmental impact
Because sometimes, fixing your device isn’t about replacing parts—it’s about restoring balance.

When people think about why their smartphones or laptops fail, they usually blame outdated hardware, bad batteries, or faulty updates. However, in 2026, one of the most overlooked causes of device failure isn’t inside the device at all—it’s the environment around it.
Heat, humidity, dust, air quality, and even daily usage locations are silently damaging modern electronics. As devices become thinner, more powerful, and more tightly packed, environmental stress has become a major repair trigger—often without users realizing it.
Why Modern Devices Are More Environment-Sensitive Than Ever
Today’s devices are designed for performance and portability, not resilience. Compared to older electronics, modern smartphones and laptops feature:
-
Ultra-thin internal layouts
-
High-density chips generating more heat
-
Compact cooling systems
-
Sealed designs with limited airflow
-
Sensitive sensors and soldered components
These advancements improve performance but reduce tolerance for environmental stress.
A device that works perfectly in one environment may degrade rapidly in another.

Heat: The Invisible Performance Killer
Heat is the number one environmental enemy of modern devices.
How heat causes damage:
-
Accelerates battery degradation
-
Weakens solder joints on motherboards
-
Triggers thermal throttling, slowing performance
-
Degrades display panels and adhesives
In 2026, devices often operate near their thermal limits due to:
Even mild, repeated overheating can cut a device’s lifespan in half.
Humidity and Moisture: Not Just Water Damage
Many users think moisture damage only happens when a device is dropped in water. In reality, humidity alone can be enough to cause long-term damage.
Common humidity-related issues:
-
Corrosion on charging ports
-
Oxidation on internal connectors
-
Random touch or button failures
-
Speaker distortion
This is especially common in:
Humidity damage builds slowly—and is often discovered too late.
Dust and Air Quality: The Forgotten Threat
Dust doesn’t just make devices dirty—it disrupts airflow and cooling.
Over time, dust accumulation can:
In urban environments, dust mixed with pollution becomes even more conductive and corrosive, increasing the risk of internal shorts and overheating.
Mobility Has a Cost: Repairs Caused by Daily Movement
Modern devices are constantly on the move:
This mobility introduces micro-damage, including:
-
Loosened internal connectors
-
Hairline cracks in solder joints
-
Gradual port misalignment
-
Camera and sensor calibration drift
These issues rarely appear suddenly—but they add up.
Why Environmental Damage Is Hard to Diagnose
Environmental stress doesn’t usually cause obvious failure. Instead, it results in:
-
Intermittent issues
-
Inconsistent charging
-
Random shutdowns
-
Unexplained slowdowns
Because the symptoms are subtle, users often blame:
-
Software bugs
-
Bad updates
-
Aging hardware
This leads to unnecessary replacements instead of targeted repairs.
How Professional Diagnostics Identify Environmental Damage
Modern repair services rely on more than visual inspection. Professional diagnostics include:
-
Thermal performance testing
-
Power fluctuation analysis
-
Corrosion and oxidation checks
-
Port and connector stress tests
-
Internal airflow evaluation
These methods help determine whether a device is suffering from environmental fatigue rather than component failure.
Preventive Maintenance Matters More Than Repairs
In 2026, the smartest repair is often the one that never happens.
Simple preventive steps include:
-
Avoiding prolonged use in hot environments
-
Keeping devices away from moisture-prone areas
-
Regular internal cleaning (professionally)
-
Using protective cases that allow airflow
-
Monitoring battery and thermal health
Small habits can add years to a device’s lifespan.
Environmental Stress and Sustainability
Environmental damage leads to:
By addressing environmental factors early, repair services help:
Repairing smarter isn’t just economical—it’s responsible.
How Smart Electronix Addresses Environmental Damage
At Smart Electronix, environmental stress is treated as a core diagnostic factor. Repairs focus on:
-
Identifying heat-related degradation
-
Addressing corrosion before it spreads
-
Restoring airflow and thermal efficiency
-
Preventing repeat damage through maintenance advice
This approach ensures repairs don’t just fix symptoms—but solve the underlying cause.
The Future of Repairs Is Context-Aware
As devices continue to evolve, repairs will increasingly consider:
-
Usage environments
-
Daily habits
-
Mobility patterns
-
Connectivity demands
The future of repairs isn’t only about replacing parts—it’s about understanding how devices live in the real world.
Final Thoughts
In 2026, device failure is rarely accidental. Environmental stress silently shapes how long technology lasts and how well it performs. Heat, humidity, dust, and movement all play a role in shortening device lifespans—often without users realizing it.
Understanding these hidden factors empowers consumers to:
Because sometimes, what breaks your device isn’t inside it—it’s all around it.
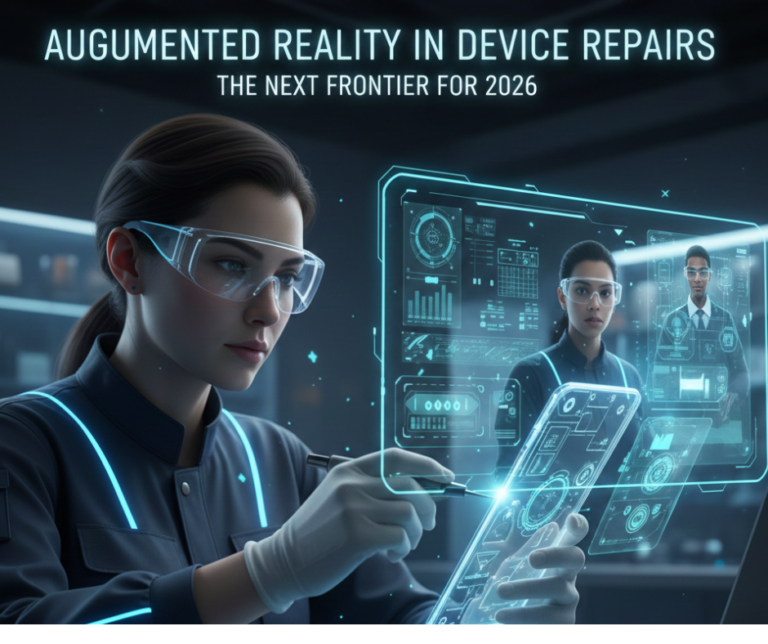
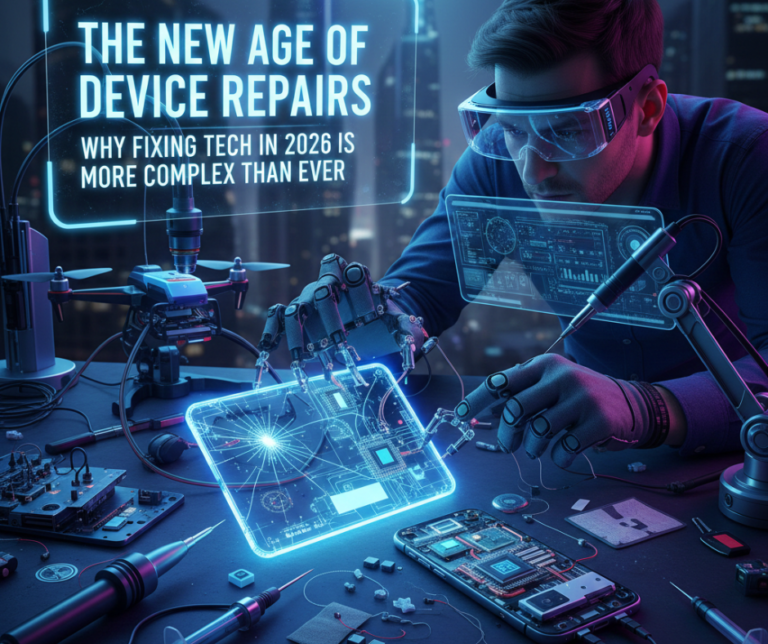
In 2026, repairing consumer electronics is no longer limited to physical tools and technical manuals. Augmented reality (AR) is revolutionizing the repair industry by providing technicians with real-time guidance, remote assistance, and interactive diagnostics. From smartphones and laptops to wearables and smart home devices, AR is helping professionals solve problems faster, more accurately, and with fewer errors.
This new era of AR-assisted repairs is changing expectations for both technicians and consumers. Let’s explore how AR is reshaping device repairs in Australia and why it’s a game-changer for 2026.
What Is AR-Assisted Device Repair?
Augmented reality overlays digital information onto the physical world. In repair scenarios, AR can provide:
-
Step-by-step visual instructions
-
Interactive 3D models of internal components
-
Remote expert guidance via live video feeds
-
Real-time diagnostic data overlaid on the device
By combining visual cues with digital insights, technicians can perform complex repairs with higher precision than ever before.
How AR Improves Repair Accuracy
Traditional repairs often rely on manuals, diagrams, or personal experience. AR takes this a step further by:
-
Highlighting exactly which components need attention
-
Showing optimal disassembly and reassembly sequences
-
Providing real-time warnings for sensitive parts
-
Integrating diagnostic results directly into the AR interface
This approach reduces human error, ensures consistent quality, and speeds up the repair process.
Remote Assistance: Bridging Distance With Technology
AR allows technicians to receive remote support from experts without needing to ship devices or travel. For instance:
-
A junior technician in Sydney can perform a repair under the guidance of a senior expert in Melbourne
-
AR annotations show exactly where to apply tools or replace components
-
Diagnostic data can be shared instantly to aid decision-making
This connectivity enhances the skillset of repair teams and increases service reach.
Benefits for Consumers
AR-assisted repairs are not just a win for technicians—they benefit consumers as well:
-
Faster Repairs: Visual guidance accelerates troubleshooting and part replacement
-
Higher Accuracy: Reduced errors mean devices are fixed right the first time
-
Lower Costs: Fewer mistakes translate into fewer repeat visits and lower repair expenses
-
Transparency: AR can be used to show consumers exactly what work is being done
This combination of efficiency, reliability, and transparency makes AR a compelling tool for modern device repair.
Challenges and Considerations
Despite its advantages, AR in repairs comes with certain considerations:
-
Technology Costs: AR hardware and software solutions require investment
-
Training: Technicians must learn how to effectively use AR tools
-
Compatibility: Not all repair scenarios or devices are fully AR-compatible
-
Connectivity: Remote AR guidance depends on high-speed internet for real-time interaction
Nevertheless, these challenges are outweighed by the long-term benefits of improved efficiency and precision.
The Role of Smart Electronix in AR Repairs
At Smart Electronix, AR is an integral part of our modern repair philosophy:
-
Remote AR Assistance: Experts guide technicians and even consumers through complicated repairs
-
Interactive Diagnostics: AR interfaces overlay real-time sensor and firmware data
-
Training and Education: Technicians use AR to learn new repair techniques faster
-
Consumer Transparency: Customers can see exactly what work is being done on their devices
By adopting AR-assisted repairs, Smart Electronix ensures faster, safer, and smarter device servicing for Australians.

The Future of Device Repairs With AR
The integration of AR into device repairs represents a shift from traditional, manual approaches to immersive, data-driven solutions. As devices become increasingly complex—foldable screens, modular components, AI-driven software—AR provides the tools necessary to keep up.
Technicians of the future will rely on AR for training, remote assistance, and enhanced diagnostics, making device repairs more reliable, precise, and accessible.
Conclusion
AR-assisted device repair is no longer a futuristic concept—it’s a practical, transformative tool for 2026. By combining visual guidance, remote expertise, and real-time diagnostics, AR empowers technicians and enhances consumer experiences.
For Australians, this means faster repairs, better accuracy, and more transparent service. At Smart Electronix, we’re embracing AR technology to deliver smarter repairs, protect data, and extend device lifespans.
The future of repairs isn’t just about fixing—it’s about seeing, understanding, and acting smarter.

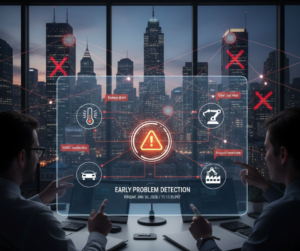
In 2026, the way we think about device repairs is shifting dramatically. Instead of waiting for a smartphone, laptop, or wearable to fail, predictive maintenance powered by AI and IoT is helping devices identify potential issues before they become critical. This approach is transforming repair practices, extending device lifespans, and saving consumers both time and money.
At the heart of this revolution is the ability of devices to monitor their own performance, analyze usage patterns, and alert users or repair professionals about potential problems. Let’s explore how predictive maintenance is changing the repair industry in Australia and what it means for tech users.
What Is Predictive Device Maintenance?
Predictive maintenance involves using real-time data and analytics to anticipate failures. Rather than repairing only after a device breaks, predictive systems:
-
Track hardware performance and wear
-
Monitor software stability and firmware integrity
-
Analyze environmental conditions like temperature and humidity
-
Detect anomalies in connectivity, storage, and battery usage
This proactive approach allows issues to be addressed before they escalate, reducing downtime and repair costs.
How AI Enhances Predictive Maintenance
Artificial intelligence plays a critical role by:
-
Detecting unusual behavior in apps, processors, or sensors
-
Learning typical user patterns to identify deviations
-
Predicting battery degradation, storage issues, and overheating risks
-
Suggesting preventive actions or maintenance schedules
For example, AI can alert a user when a battery is approaching its optimal cycle limit or when a laptop’s thermal management system is being stressed, allowing preventive intervention before failure occurs.
IoT Connectivity: Devices Communicating Problems Early
Modern devices are increasingly interconnected:
-
Smartphones sync with smartwatches and home systems
-
Laptops communicate with cloud services
-
IoT devices share real-time data with each other
IoT allows devices to report anomalies automatically, enabling technicians to act quickly. A failing sensor or peripheral component can trigger a remote alert, sometimes even before the user notices a problem.
Benefits of Predictive Maintenance for Consumers
Adopting predictive maintenance technologies brings multiple advantages:
-
Fewer Emergency Repairs: Early detection prevents sudden breakdowns
-
Lower Costs: Addressing small issues is cheaper than full replacements
-
Longer Device Lifespan: Optimized performance reduces wear on components
-
Data Protection: Preventing failures protects critical information
Predictive maintenance turns devices from reactive tools into smart, self-aware systems.
Impact on Repair Services
For technicians, predictive maintenance is changing the repair landscape:
-
Reduced Guesswork: AI logs and IoT data provide a clear picture of the issue
-
Faster Diagnostics: Problems are identified faster, enabling quicker repairs
-
Targeted Replacements: Only faulty components are repaired, minimizing waste
-
Remote Support: Some maintenance can be handled virtually, reducing the need for physical visits
This approach improves efficiency, accuracy, and customer satisfaction.
Examples of Predictive Maintenance in Action
-
Smartphones: AI alerts users to battery or charging issues before full depletion
-
Laptops: Thermal sensors detect potential overheating before hardware is damaged
-
Smartwatches: Sensor calibration alerts prevent inaccurate readings
-
IoT Devices: Smart home systems report performance degradation for preemptive fixes
Even minor preventive actions can save hundreds of dollars in repairs and replacements over a device’s lifespan.
Challenges and Considerations
While predictive maintenance is transformative, it comes with considerations:
-
Data Privacy: Devices collect performance data, which must be handled securely
-
AI Accuracy: Predictive algorithms need constant updates to remain reliable
-
Device Compatibility: Older models may not support advanced monitoring
-
Professional Oversight: Some predicted issues still require expert intervention
Consumers should combine AI alerts with professional diagnostics for the best results.
Smart Electronix: Leading Predictive Repairs
At Smart Electronix, predictive maintenance is at the forefront of our repair philosophy:
-
We use AI-assisted diagnostics to anticipate potential issues
-
We monitor firmware, sensors, and connectivity for hidden problems
-
Our technicians provide targeted repairs based on data-driven insights
-
We educate consumers on how to leverage predictive alerts for device longevity
This approach ensures that devices are not only repaired efficiently but maintained proactively.

The Future of Repairs Is Predictive
The repair industry in 2026 is evolving from reactive fixes to intelligent, data-driven maintenance. Predictive maintenance allows devices to act as partners in their own care, alerting users and technicians to problems before they escalate.
For consumers, this means fewer surprises, reduced repair costs, and longer-lasting technology. For repair services, it means greater precision, efficiency, and customer trust.
Conclusion
Predictive device maintenance is changing how we think about repairs. AI and IoT technologies are transforming devices from reactive machines into self-monitoring, proactive systems.
In this new era, successful repairs aren’t just about fixing broken parts—they’re about anticipating problems, protecting data, and extending device lifespans. With services like Smart Electronix, Australian consumers can enjoy smarter, safer, and more reliable technology in 2026 and beyond.
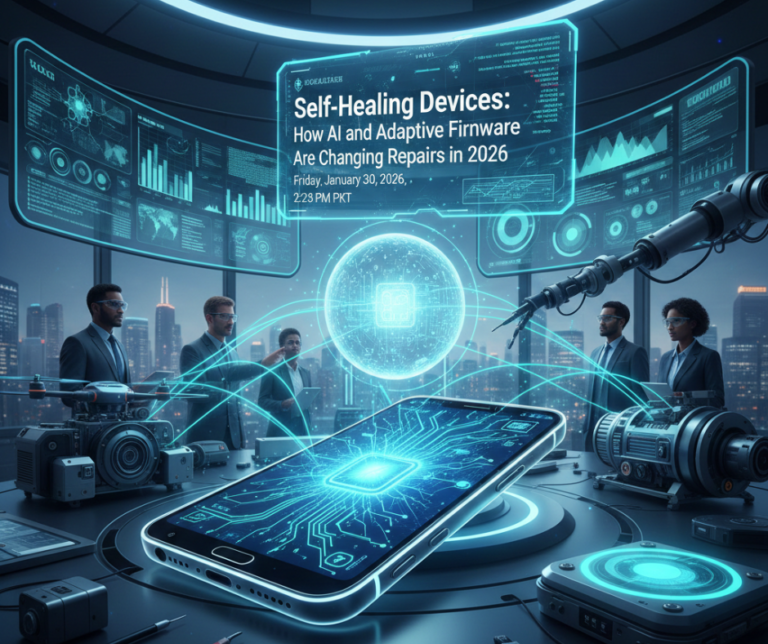
The world of consumer electronics is evolving faster than ever. In 2026, devices are no longer just tools—they’re intelligent systems capable of learning from use, predicting failures, and even repairing themselves. Self-healing devices are emerging as the next frontier, combining AI, adaptive firmware, and modular hardware to reduce downtime and extend lifespans.
This transformation is not just exciting for tech enthusiasts—it’s reshaping how repairs are approached, how technicians work, and what consumers can expect from modern devices.
What Are Self-Healing Devices?
Self-healing devices are electronics that can:
-
Detect faults automatically
-
Apply software patches to fix minor issues
-
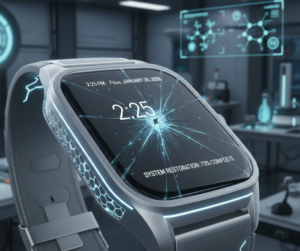
Recalibrate sensors and performance parameters
-
Bypass failing components temporarily until professional repair
This approach allows devices to continue functioning even when something starts to fail, reducing sudden breakdowns and avoiding costly repairs.
The Role of AI in Modern Repairs
AI is central to self-healing technology. Devices in 2026 can:
-
Monitor CPU, GPU, and memory usage in real-time
-
Predict battery degradation before it becomes critical
-
Detect sensor drift in cameras or motion modules
-
Adjust network connections and firmware parameters autonomously
For example, a smartphone noticing its battery draining faster than expected can automatically limit background processes, optimize charging cycles, and alert the user before damage occurs.
Adaptive Firmware: Repair Before Failure
Traditional firmware updates often require manual intervention, which can cause issues if applied incorrectly. Adaptive firmware changes that in 2026:
-
Continuously monitors system health
-
Updates small parameters on-the-fly
-
Reverts or isolates problematic modules
-
Communicates with connected devices to ensure compatibility
This reduces the need for emergency repairs, and in many cases, prevents failures entirely.
Implications for Repair Technicians
While self-healing devices reduce physical breakdowns, they don’t eliminate the need for skilled repairs. The role of technicians is evolving:
-
Diagnostics Become Smarter
Instead of looking for broken parts, technicians analyze system logs, AI reports, and firmware adjustments to identify the root cause.
-
Firmware & Software Expertise Is Critical
Understanding adaptive firmware is as important as knowing how to replace hardware.
-
Data Security Takes Center Stage
Self-healing systems may store sensitive diagnostic data. Repairs must protect privacy while ensuring system integrity.
Benefits for Consumers
Self-healing devices offer several advantages:
-
Reduced downtime: Devices can keep running even when minor issues arise
-
Lower repair costs: Early detection prevents major failures
-
Extended device lifespan: Adaptive maintenance reduces wear and tear
-
Predictive alerts: Users are informed about potential issues before they escalate
Challenges and Limitations
Despite the promise of self-healing devices, there are still limitations:
-
Not all hardware failures can be self-corrected
-
Firmware adjustments may require professional oversight
-
Self-healing systems rely on accurate AI predictions; misinterpretations can cause unnecessary limitations
-
Older devices may not support advanced self-healing features
How Consumers Can Prepare
To benefit from self-healing technology:
-
Keep devices updated with official firmware
-
Use certified accessories to avoid triggering false alerts
-
Regularly review system notifications and AI-recommended actions
-
Partner with trusted repair providers for hardware-level issues
Smart Electronix and the Future of Repairs
At Smart Electronix, we are embracing the new era of self-healing devices. Our approach focuses on:
-
Leveraging AI diagnostics to pinpoint hidden problems
-
Protecting user data during firmware-related repairs
-
Offering professional solutions when adaptive systems detect failures
-
Educating consumers on maximizing device longevity
By combining traditional expertise with insights from smart diagnostics, we ensure repairs are effective, secure, and forward-looking.

Conclusion
The repair landscape in 2026 is shifting from reactive to proactive. Self-healing devices equipped with AI and adaptive firmware are reducing the frequency and severity of failures—but skilled repair services remain essential for hardware and complex software issues.
For consumers, this means fewer surprises, longer-lasting devices, and smarter technology management. For technicians, it’s an exciting opportunity to embrace AI-assisted diagnostics and predictive maintenance, making repairs faster, safer, and more precise.
The future of device repair isn’t just about fixing problems—it’s about preventing them before they happen.
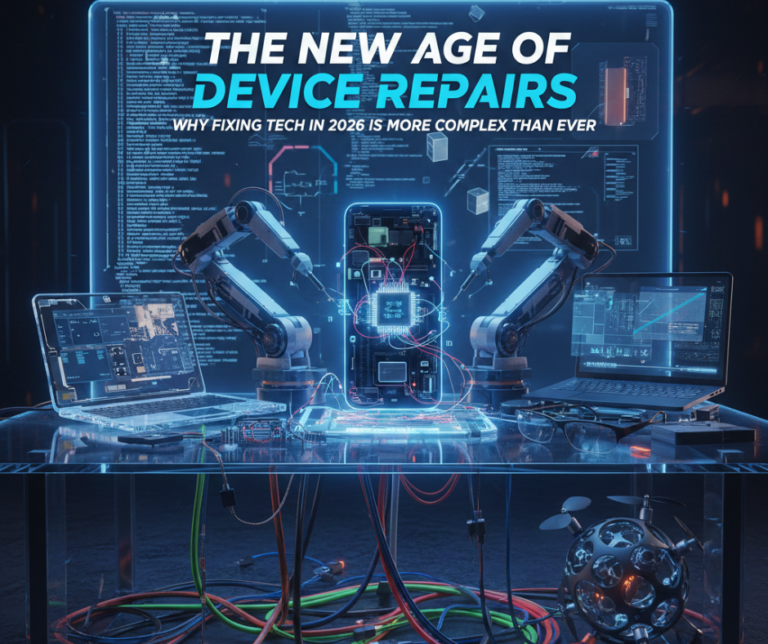
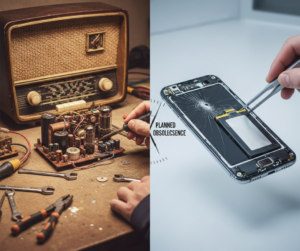
In 2026, repairing a smartphone or laptop is no longer a simple task of swapping broken parts. Modern devices are smarter, thinner, more connected, and more software-driven than ever before. While these advancements bring powerful features and seamless experiences, they also introduce new layers of complexity when something goes wrong.
Today’s device repairs sit at the intersection of hardware, software, connectivity, and data security. Understanding this shift is essential for consumers who want reliable, cost-effective, and long-lasting repairs.
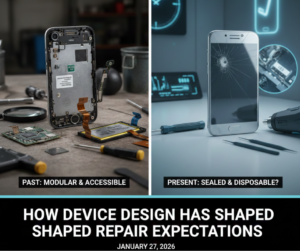
How Device Design Has Changed Repair Expectations
Modern devices are built for:
To achieve this, manufacturers rely on:
-
Integrated components
-
Soldered storage and memory
-
Advanced firmware controls
-
Multi-purpose ports and sensors
While these designs improve usability, they also make devices harder to diagnose and repair without proper expertise.
Why Modern Device Problems Are Harder to Identify
Many issues that appear to be hardware-related are actually caused by software or system conflicts.
Common Examples
-
A laptop overheating due to background AI processes, not a faulty fan
-
A phone losing signal because of firmware mismatch, not antenna damage
-
Battery drain caused by constant connectivity searching, not battery failure
Without proper diagnostics, replacing parts may fail to solve the issue.
Connectivity Has Become a Repair Factor
In 2026, devices constantly communicate with:
A disruption in this communication can trigger:
-
Performance drops
-
App crashes
-
Battery stress
-
Network instability
Effective troubleshooting now requires understanding how devices behave in connected environments, not just when powered on.
Firmware Updates: A Double-Edged Sword
Firmware updates improve security and performance—but they can also introduce:
-
Compatibility issues
-
Boot loops
-
Feature failures
-
Unexpected power drain
In some cases, devices become partially or fully unusable without any physical damage. Safe recovery requires:
This makes professional repair services more important than ever.
Why Diagnostic-First Repairs Are the New Standard
Replacing parts without diagnosis is risky in 2026.
Modern repair workflows begin with:
This approach:
✔ Prevents unnecessary repairs
✔ Reduces costs
✔ Protects user data
✔ Improves long-term reliability
DIY Maintenance vs Professional Repairs
Basic DIY care still plays an important role:
However, advanced repairs involving:
-
Batteries
-
Motherboards
-
Firmware
-
Foldable displays
-
Sensors and biometrics
should always be handled by trained technicians using professional tools.
The Role of Sustainability in Modern Repairs
With rising device prices and global e-waste concerns, repairability is now a sustainability issue.
Smart repairs help by:
-
Extending device lifespan
-
Reducing unnecessary replacements
-
Supporting reuse of functional components
-
Minimising electronic waste
Choosing repair over replacement—when done correctly—is both economical and environmentally responsible.

What Consumers Should Look for in a Repair Service
Before booking a repair in 2026, ask:
-
Is diagnostic testing performed first?
-
Are repairs explained clearly?
-
Is my data protected?
-
Are genuine or quality-tested parts used?
-
Is sustainability considered?
Transparency is a sign of professionalism.
How Smart Electronix Supports Modern Repair Needs
At Smart Electronix, repairs are approached with a diagnostic-first mindset. Every device is evaluated as a complete system—hardware, software, and connectivity—before any part is replaced.
This ensures:
-
Accurate problem identification
-
Honest repair recommendations
-
Reduced repeat issues
-
Better value for customers
The goal is not just to fix devices—but to restore performance, reliability, and confidence.
Looking Ahead: The Future of Repairs
As devices continue to evolve, repairs will become:
Consumers who understand this shift will make smarter decisions, save money, and keep their devices running longer.
Final Thoughts
Repairing devices in 2026 is no longer about quick fixes—it’s about precision, understanding, and responsibility. With the right approach, modern repairs can be reliable, sustainable, and cost-effective.
Choosing experienced repair professionals and maintaining devices properly ensures technology remains an asset—not a frustration.
Smart repairs start with smart decisions.
In 2026, repairing a smartphone or laptop is no longer a simple task of swapping broken parts. Modern devices are smarter, thinner, more connected, and more software-driven than ever before. While these advancements bring powerful features and seamless experiences, they also introduce new layers of complexity when something goes wrong.
Today’s device repairs sit at the intersection of hardware, software, connectivity, and data security. Understanding this shift is essential for consumers who want reliable, cost-effective, and long-lasting repairs.
How Device Design Has Changed Repair Expectations
Modern devices are built for:
To achieve this, manufacturers rely on:
-
Integrated components
-
Soldered storage and memory
-
Advanced firmware controls
-
Multi-purpose ports and sensors
While these designs improve usability, they also make devices harder to diagnose and repair without proper expertise.
Why Modern Device Problems Are Harder to Identify
Many issues that appear to be hardware-related are actually caused by software or system conflicts.
Common Examples
-
A laptop overheating due to background AI processes, not a faulty fan
-
A phone losing signal because of firmware mismatch, not antenna damage
-
Battery drain caused by constant connectivity searching, not battery failure
Without proper diagnostics, replacing parts may fail to solve the issue.
Connectivity Has Become a Repair Factor
In 2026, devices constantly communicate with:
A disruption in this communication can trigger:
-
Performance drops
-
App crashes
-
Battery stress
-
Network instability
Effective troubleshooting now requires understanding how devices behave in connected environments, not just when powered on.
Firmware Updates: A Double-Edged Sword
Firmware updates improve security and performance—but they can also introduce:
-
Compatibility issues
-
Boot loops
-
Feature failures
-
Unexpected power drain
In some cases, devices become partially or fully unusable without any physical damage. Safe recovery requires:
This makes professional repair services more important than ever.
Why Diagnostic-First Repairs Are the New Standard
Replacing parts without diagnosis is risky in 2026.
Modern repair workflows begin with:
This approach:
✔ Prevents unnecessary repairs
✔ Reduces costs
✔ Protects user data
✔ Improves long-term reliability
DIY Maintenance vs Professional Repairs
Basic DIY care still plays an important role:
However, advanced repairs involving:
-
Batteries
-
Motherboards
-
Firmware
-
Foldable displays
-
Sensors and biometrics
should always be handled by trained technicians using professional tools.

The Role of Sustainability in Modern Repairs
With rising device prices and global e-waste concerns, repairability is now a sustainability issue.
Smart repairs help by:
-
Extending device lifespan
-
Reducing unnecessary replacements
-
Supporting reuse of functional components
-
Minimising electronic waste
Choosing repair over replacement—when done correctly—is both economical and environmentally responsible.
What Consumers Should Look for in a Repair Service
Before booking a repair in 2026, ask:
-
Is diagnostic testing performed first?
-
Are repairs explained clearly?
-
Is my data protected?
-
Are genuine or quality-tested parts used?
-
Is sustainability considered?
Transparency is a sign of professionalism.
How Smart Electronix Supports Modern Repair Needs
At Smart Electronix, repairs are approached with a diagnostic-first mindset. Every device is evaluated as a complete system—hardware, software, and connectivity—before any part is replaced.
This ensures:
-
Accurate problem identification
-
Honest repair recommendations
-
Reduced repeat issues
-
Better value for customers
The goal is not just to fix devices—but to restore performance, reliability, and confidence.
Looking Ahead: The Future of Repairs
As devices continue to evolve, repairs will become:
Consumers who understand this shift will make smarter decisions, save money, and keep their devices running longer.
Final Thoughts
Repairing devices in 2026 is no longer about quick fixes—it’s about precision, understanding, and responsibility. With the right approach, modern repairs can be reliable, sustainable, and cost-effective.
Choosing experienced repair professionals and maintaining devices properly ensures technology remains an asset—not a frustration.
Smart repairs start with smart decisions.
Technology in 2026 is smarter, faster, and more interconnected than ever before. Smartphones think ahead using AI, laptops manage performance dynamically, and everyday devices communicate constantly through cloud services, edge computing, and high-speed networks. But with this intelligence comes a new reality: device failures are no longer simple or obvious.
Gone are the days when a cracked screen or dead battery told the whole story. Today’s repairs demand understanding systems, software behaviour, and digital dependencies—not just replacing parts. This shift is redefining how repairs are approached and why diagnostics matter more than tools.
The Evolution of Device Failures
Traditional device failures were mostly physical:
-
Broken displays
-
Loose charging ports
-
Worn-out batteries
In contrast, modern devices experience “smart failures”, where symptoms don’t clearly point to a single cause. A slow laptop may not have a failing SSD. A phone overheating may not have a bad battery. A smartwatch disconnecting may not be broken at all.
Instead, problems often stem from:
This complexity makes guesswork expensive and ineffective.
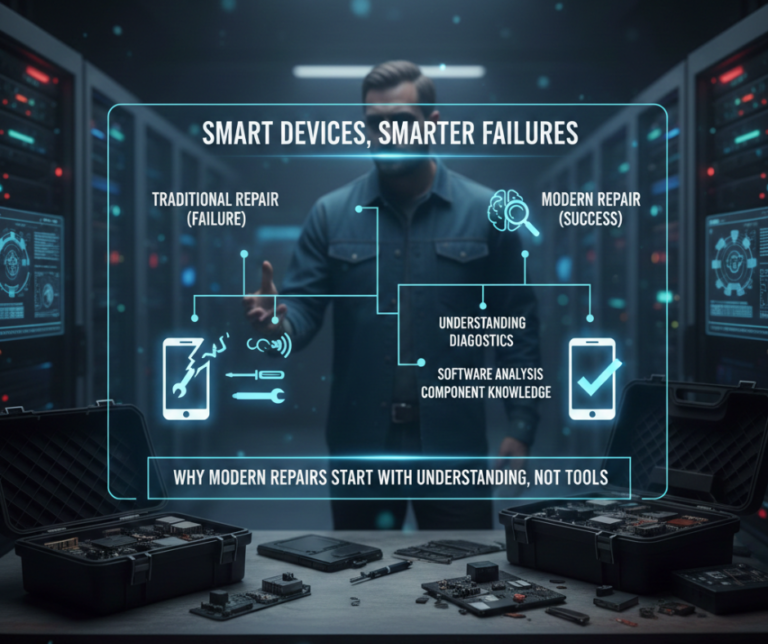
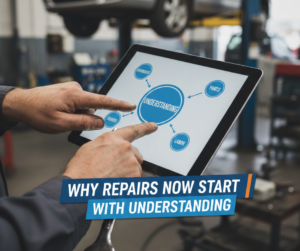
Why Repairs Now Start with Understanding
Modern repair success depends on context, not just components.
A professional technician today must understand:
-
How software manages hardware
-
How connectivity affects power usage
-
How updates alter device behaviour
-
How multiple devices interact within one ecosystem
Replacing parts without understanding the system often results in:
Understanding the why behind the problem is now the most valuable repair skill.
The Hidden Role of Software in “Hardware” Problems
Many hardware complaints are actually software-driven:
Battery Issues
What users see:
✔ Fast battery drain
✔ Random shutdowns
What’s often happening:
-
AI background tasks running constantly
-
Connectivity searching for weak signals
-
Firmware misreporting battery health
Replacing the battery may not fix the issue.
Performance Slowdowns
What users see:
✔ Lag
✔ Freezing
✔ Overheating
Possible causes:
The hardware may be perfectly fine.
Connectivity Has Become a Repair Variable
Devices in 2026 rarely operate alone. Smartphones connect to:
-
Smartwatches
-
Cars
-
Earbuds
-
Laptops
-
Home IoT systems
A fault in one connection can appear as a failure in another device. For example:
-
Bluetooth instability can drain batteries
-
Cloud sync loops can overload processors
-
Network conflicts can cause app crashes
Modern repairs must consider the full device ecosystem.

Why Guess-and-Replace Repairs No Longer Work
Replacing parts without diagnostics can:
-
Introduce new faults
-
Void warranties
-
Increase repair costs
-
Cause data corruption
This is especially risky with:
Precision matters more than speed.
The Rise of Diagnostic-First Repair Services
Professional repair services now prioritise:
Only after diagnostics confirm the cause does physical repair begin.
This approach:
✔ Saves money
✔ Reduces downtime
✔ Protects user data
✔ Prevents unnecessary part replacement
What This Means for Consumers
As a tech user in 2026, smart decisions matter more than ever.
Before booking a repair, ask:
-
Was the device properly diagnosed?
-
Were software causes ruled out?
-
Is part replacement truly necessary?
-
Will data be protected during repair?
A trustworthy repair service explains the problem—not just the price.
DIY Repairs vs Smart Maintenance
DIY maintenance still has value:
✔ Cleaning ports
✔ Monitoring battery health
✔ Managing storage
✔ Keeping software updated
But advanced repairs—especially involving firmware, connectivity, or sensors—require professional tools and experience.
Knowing when not to DIY is part of being a smart device owner.
How Smart Electronix Approaches Modern Repairs
At Smart Electronix, repairs begin with understanding:
-
How the device behaves
-
What changed before the issue started
-
How software, hardware, and connectivity interact
This diagnostic-first philosophy ensures:
Repairs are done only when necessary—and done right the first time.
The Future of Repairs Is Preventive, Not Reactive
The repair industry is moving toward:
Devices will continue to evolve—but the smartest repairs will always start with knowledge, not tools.
Final Thoughts
In 2026, devices don’t just fail—they misbehave, miscommunicate, and miscalculate. Fixing them requires understanding how modern technology works as a system.
Whether you’re dealing with a smartphone, laptop, wearable, or smart home device, the best repair decision starts with asking the right questions—not replacing parts blindly.
Smart devices need smart repairs. And smart repairs start with understanding.

In 2026, the repair landscape is changing faster than ever. Devices aren’t just phones, laptops, or tablets—they’re complex ecosystems powered by AI, 5G connectivity, foldable displays, edge computing, and IoT integration. With such advancements, the old “see a broken part, replace the part” approach is becoming outdated. Today, smart diagnostics are taking center stage, helping technicians identify the root causes of problems before any repair begins.
This shift isn’t just about convenience—it’s about saving time, reducing costs, extending device lifespans, and protecting data. Here’s how modern diagnostics are transforming the repair industry in 2026 and what consumers need to know.
Why Traditional Repairs Are Not Enough
In the past, most repairs were straightforward:
While hardware replacement solved many problems, modern devices bring new challenges:
-
AI-driven performance management can mask battery issues
-
Foldable and modular designs add delicate mechanical components
-
5G and Wi-Fi 6/7 connectivity create software-hardware dependencies
-
Firmware updates can cause devices to “brick” without obvious physical damage
This means guessing the problem can lead to unnecessary repairs, extra costs, and even worse damage.
The Role of Smart Diagnostics
Smart diagnostics involve analyzing devices as interconnected systems, combining software, firmware, and hardware checks. This approach enables technicians to pinpoint:
-
Battery degradation vs software misreporting
-
Thermal throttling vs dust-clogged vents
-
Network or firmware conflicts vs faulty antennas
-
Sensor or camera module issues vs software calibration errors
With accurate diagnostics, repairs become more precise and reliable, reducing repeat failures.
Key Features of Modern Diagnostics
1. AI-Assisted Analysis
AI tools now detect subtle patterns:
AI can also predict component failure before it happens, allowing proactive maintenance.
2. Connectivity Monitoring
Devices increasingly rely on 5G, edge computing, and cloud-linked AI. Diagnostics now monitor:
-
Signal strength and quality
-
Firmware interactions with networks
-
Data processing at the device vs edge nodes
This ensures technicians can identify software-hardware conflicts that would have been invisible before.
3. Firmware & Software Verification
Modern devices often fail due to corrupted firmware or update conflicts. Diagnostics now:
This reduces the risk of unnecessary hardware replacements.
4. Thermal & Power Profiling
Overheating isn’t always due to a bad fan. Diagnostics track:
This helps determine if performance issues are hardware, firmware, or usage-related.
Benefits for Consumers
Using smart diagnostics first offers clear advantages:
-
Cost Savings: Only replace parts that truly need it.
-
Data Protection: Early detection avoids catastrophic failures.
-
Extended Device Lifespan: Accurate maintenance keeps devices running longer.
-
Eco-Friendly Repairs: Less waste from unnecessary part replacements.
In 2026, informed diagnostics are not a luxury—they’re essential for modern device ownership.
What Consumers Can Do
Even if you’re not a technician, you can support smart diagnostics:
-
Keep devices updated with official firmware
-
Avoid uncertified chargers and accessories
-
Monitor battery health and performance
-
Note when and how problems appear (apps, locations, temperature)
-
Consult professional services before attempting risky repairs
Why Smart Electronix Leads in Modern Diagnostics
At Smart Electronix, we combine:
-
Advanced AI-assisted diagnostic tools
-
Network and firmware analysis
-
Hardware inspection and thermal profiling
-
Honest repair recommendations
Our goal is to diagnose first, repair smartly, and avoid unnecessary part replacements, keeping devices running longer and safely.

The Future of Device Repairs
The repair industry in 2026 is no longer just about hardware—it’s about systems thinking, data-driven analysis, and preventative maintenance. As devices become smarter, diagnostics become the most critical step in ensuring cost-effective, safe, and sustainable repairs.
Whether it’s a smartphone, laptop, foldable device, or wearable, the devices of tomorrow demand a smarter approach. Consumers who embrace smart diagnostics today are saving money, reducing e-waste, and enjoying longer-lasting tech.
Conclusion:
Smart diagnostics are transforming device repairs from reactive fixes to proactive, precise solutions. By understanding the full picture—hardware, software, and connectivity—users can enjoy better-performing devices, lower repair costs, and more sustainable technology use.
Smart Electronix is at the forefront of this shift, helping Australians make smarter, safer, and more informed repair decisions in 2026 and beyond.

The way devices connect, communicate, and process data has changed dramatically in recent years. By 2026, 5G networks, edge computing, and next-generation connectivity standards have become mainstream across smartphones, laptops, wearables, and IoT devices. While these technologies deliver faster speeds and smarter experiences, they also fundamentally change how devices fail, how issues are diagnosed, and how repairs are performed.
For consumers and repair professionals alike, troubleshooting is no longer just about replacing a broken part—it’s about understanding software, networks, firmware, and real-time data flow. This shift is redefining modern repair practices across Australia.
From Hardware Problems to Connectivity-Driven Issues
In the past, most device repairs were straightforward:
-
Broken screens
-
Dead batteries
-
Faulty charging ports
Today, many reported “hardware issues” are actually caused by:
As connectivity becomes more advanced, diagnosis becomes more complex.

How 5G Changes Device Troubleshooting
1. More Radios, More Failure Points
Modern devices support multiple frequency bands, including:
-
Sub-6 GHz
-
mmWave
-
Dynamic spectrum sharing
Each band relies on different antennas, amplifiers, and firmware controls. A device may:
-
Work on Wi-Fi but fail on mobile data
-
Connect to 4G but drop 5G
-
Overheat due to signal amplification
Diagnosing these issues requires signal testing, firmware validation, and antenna inspection, not just part replacement.
2. Heat & Power Issues Linked to Connectivity
5G radios consume more power, especially in weak signal areas. Common symptoms include:
What appears to be a “bad battery” is often a connectivity-related power management problem.
3. Software-Network Dependencies
5G performance depends heavily on:
A failed update or incorrect carrier configuration can break connectivity entirely, even when hardware is intact.
Edge Computing: A New Layer of Complexity
What Is Edge Computing?
Edge computing shifts data processing away from central cloud servers and closer to the device—sometimes onto the device itself or nearby network nodes.
This allows:
-
Faster response times
-
Real-time AI processing
-
Reduced latency
But it also means more things can go wrong locally.
How Edge Computing Affects Repairs
With edge processing:
If edge services fail, users may experience:
These problems often look like hardware faults—but they’re not.
Edge Failures Are Harder to Detect
Unlike cloud issues, edge failures:
-
Don’t always trigger error messages
-
Can affect only specific features
-
May vary by location or network
Repair technicians must now analyze logs, background services, and real-time data flows.
New Connectivity Standards & What They Break
Wi-Fi 6E & Wi-Fi 7
Newer Wi-Fi standards introduce:
Issues seen in 2026:
Many users assume faulty Wi-Fi chips, but the real issue is software and compatibility.

USB-C, Thunderbolt & Multi-Role Ports
Modern ports now handle:
-
Power delivery
-
Data transfer
-
Displays
-
Networking
A single port failure may affect:
-
Charging
-
External displays
-
Docking stations
Troubleshooting now requires protocol-level testing, not just visual inspection.
Why Traditional Repair Methods No Longer Work Alone
Replacing parts without understanding connectivity layers can:
-
Fail to fix the issue
-
Create new problems
-
Increase repair costs
Modern troubleshooting requires:
✔ Firmware diagnostics
✔ Network behaviour analysis
✔ Power and thermal monitoring
✔ Compatibility testing
This is why many “quick fixes” don’t work anymore.
How Repair Diagnostics Are Evolving in 2026
1. Software-First Diagnostics
Repair technicians now start with:
Hardware replacement comes after digital analysis.
2. AI-Assisted Troubleshooting
AI diagnostic tools can:
This speeds up diagnosis and reduces unnecessary part swaps.
3. Remote & Live Testing
Some connectivity issues only appear:
-
In specific locations
-
On certain networks
-
Under real-world usage
Remote diagnostics and live testing allow technicians to reproduce issues accurately.
What This Means for Consumers
If your device:
-
Drains battery unusually fast
-
Loses network randomly
-
Overheats during calls or streaming
-
Works fine on Wi-Fi but not mobile data
The issue may not be physical damage. It’s likely tied to connectivity, firmware, or network interaction.
Replacing a battery or screen won’t fix that.
Why Professional Diagnostics Matter More Than Ever
In the era of 5G and edge computing, professional repair services provide:
At Smart Electronix, diagnostics focus on the entire device ecosystem—hardware, software, and connectivity—before recommending any repair.
How Smart Electronix Adapts to New Connectivity Challenges
Smart Electronix keeps pace with modern repair demands by:
-
Using advanced diagnostic tools
-
Monitoring power, signal, and thermal behaviour
-
Identifying firmware-network conflicts
-
Repairing only what’s truly faulty
This approach ensures devices aren’t over-repaired or prematurely replaced.
Final Thoughts
5G, edge computing, and new connectivity standards are transforming how devices function—and how they fail. Troubleshooting in 2026 is no longer about spotting broken parts; it’s about understanding how software, networks, and hardware interact in real time.
As devices become smarter and more connected, repairs must become smarter too.
Accurate diagnosis is now the most valuable repair tool of all.
