
In 2026, smartphones, laptops, tablets, and smart devices are more powerful—but also more delicate—than ever before. With higher repair costs, ongoing supply-chain delays, and growing awareness around sustainability, many users are choosing basic DIY device maintenance to keep their tech running longer.
A well-built DIY device maintenance kit doesn’t turn you into a professional technician—but it does help you prevent damage, diagnose early issues, and perform safe, routine upkeep. At Smart Electronix, we encourage smart maintenance habits that reduce unnecessary repairs and extend device lifespan.
This guide walks you through what tools you need, what practices to follow, and what NOT to attempt at home in 2026.
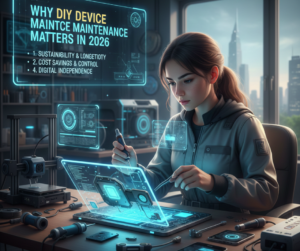
Why DIY Device Maintenance Matters in 2026
Modern devices rely on:
-
High-density batteries
-
Advanced cooling systems
-
Sensitive sensors and ports
-
AI-driven background software
Minor issues like dust buildup, battery strain, or blocked vents can snowball into expensive failures if ignored. DIY maintenance helps you:
-
Prevent overheating
-
Protect charging ports
-
Extend battery life
-
Identify problems early
-
Reduce e-waste
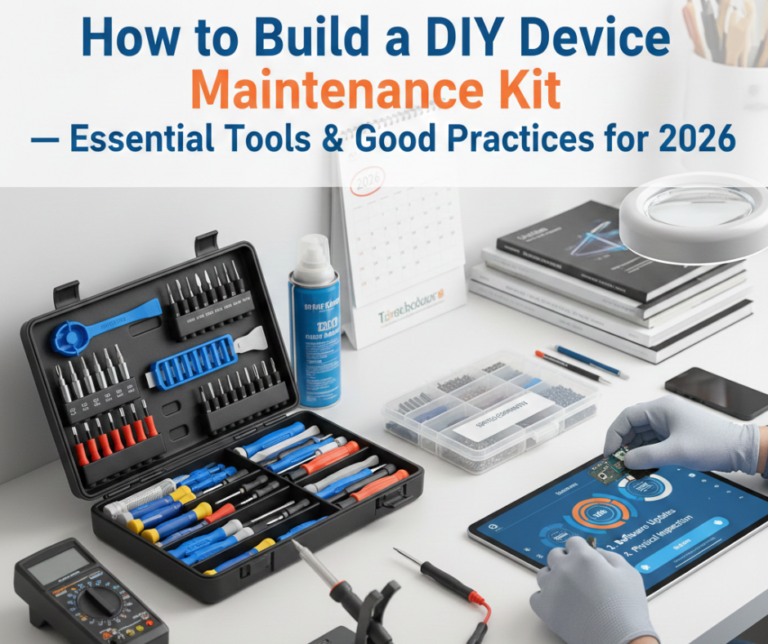
Core Tools for a DIY Device Maintenance Kit
1. Precision Screwdriver Set
Modern devices use proprietary screws such as:
-
Pentalobe
-
Torx (T3–T6)
-
Tri-point
What to look for:
✔ Magnetised tips
✔ Hardened steel
✔ Clearly labelled sizes
Avoid cheap kits that strip screws easily.
2. Anti-Static Protection
Static electricity can damage sensitive components.
Essentials:
-
Anti-static wrist strap
-
Anti-static mat (recommended for laptops)
Even brief static discharge can damage chips silently.
3. Cleaning Tools
Dust and debris cause overheating, port failures, and fan noise.
Include:
-
Microfiber cloths
-
Soft anti-static brush
-
Compressed air (short bursts only)
-
Isopropyl alcohol (90%+)
Never use household cleaners or wet wipes.
4. Plastic Pry Tools & Spudgers
Metal tools can scratch boards or short components.
Best options:
-
Nylon spudgers
-
Plastic opening picks
-
Suction cups for screen lifting (with caution)
5. Tweezers & Small Containers
Small parts are easy to lose.
✔ Fine-tip tweezers
✔ Magnetic screw mat or labelled containers
Organisation prevents reassembly mistakes.
6. Multimeter (Beginner Level)
A basic digital multimeter helps diagnose:
-
Charger issues
-
Battery voltage
-
Power continuity
You don’t need an advanced model—just one with clear readings.
7. Flashlight or Inspection Light
Helps inspect:
-
Charging ports
-
Corrosion
-
Cracks
-
Dust buildup
A headlamp is even better for hands-free work.
Optional Tools for Advanced Users
(Only if you’re confident)
-
Thermal paste (non-conductive)
-
USB power meter
-
External SSD enclosure
-
Bootable USB recovery drive
If unsure—leave these to professionals.
Good Maintenance Practices to Follow
1. Regular Cleaning Schedule
✔ Clean ports every 2–3 months
✔ Dust laptop vents quarterly
✔ Wipe screens with microfiber only
Preventive cleaning reduces heat-related failures.
2. Battery Care Best Practices
In 2026, lithium batteries still degrade with poor habits.
✔ Avoid full 0–100% cycles daily
✔ Keep charge between 20–80% when possible
✔ Avoid heat while charging
✔ Use certified chargers only
Never puncture or squeeze a battery.
3. Software Maintenance Matters
DIY maintenance isn’t just physical.
✔ Keep firmware updated
✔ Remove unused apps
✔ Monitor background usage
✔ Back up data regularly
Many “hardware” issues start with software conflicts.
4. Document Everything
Before opening any device:
-
Take photos
-
Label screws
-
Track cable positions
This avoids incorrect reassembly.
5. Know Your Limits
DIY maintenance ≠ DIY repair.
Do NOT attempt:
-
Micro-soldering
-
Motherboard repairs
-
Foldable screen replacement
-
Face ID or biometric repairs
These require specialised tools and calibration.
Common DIY Mistakes to Avoid
🚫 Using metal tools on batteries
🚫 Overusing compressed air
🚫 Mixing screw sizes
🚫 Skipping anti-static protection
🚫 Forcing connectors
Most DIY damage occurs from rushing.
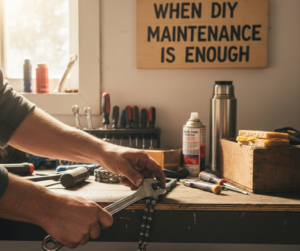
When DIY Maintenance Is Enough
DIY is ideal for:
✔ Cleaning
✔ Port inspection
✔ Battery health checks
✔ Performance optimisation
✔ Early diagnostics
If a device still misbehaves after basic maintenance, professional inspection is the safest next step.
When to Call a Professional Repair Service
Contact a repair expert if you notice:
-
Battery swelling
-
Liquid damage
-
Burning smell
-
Repeated boot loops
-
No power response
Delaying can multiply repair costs.
Smart Electronix’s Advice for DIY Users
At Smart Electronix, we support responsible DIY care—but also honest guidance.
Our approach:
✔ Educate users
✔ Prevent unnecessary repairs
✔ Reduce e-waste
✔ Step in only when needed
Smart maintenance today prevents major repairs tomorrow.
Final Thoughts
Building a DIY device maintenance kit in 2026 is about prevention, not experimentation. With the right tools and habits, you can protect your devices, extend their lifespan, and save money—without risking serious damage.
When DIY reaches its limits, professional repair ensures safety, data protection, and long-term reliability.
Maintain smart. Repair responsibly. Trust Smart Electronix when it matters most.